
Pruning
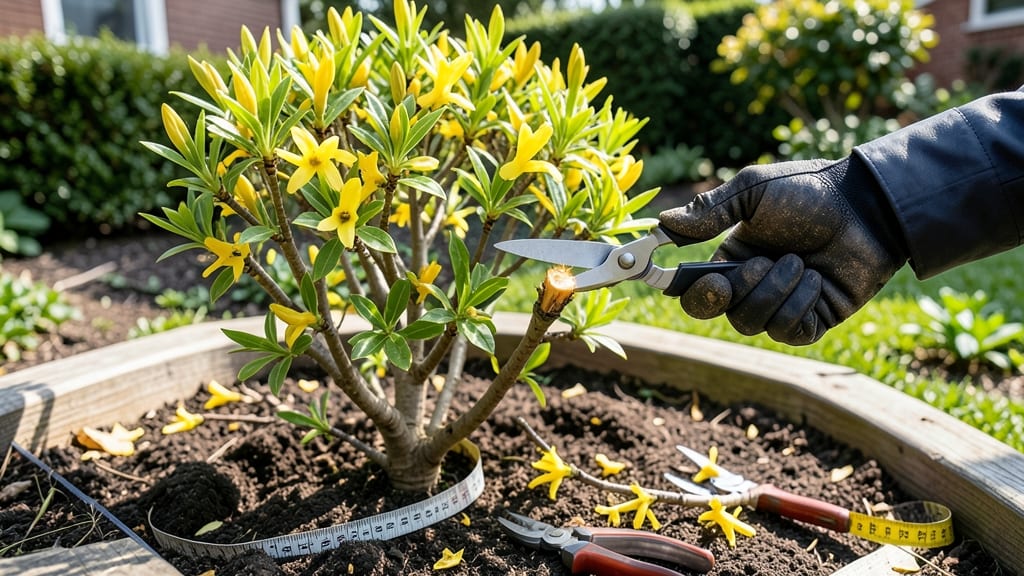
Pruning bushes into shapes transforms your yard from ordinary to extraordinary—boxwood spirals, privet cubes, or lacy lacecap hydrangeas all start with the right cuts. ✂️ I spent years struggling with uneven growth and messy shapes until I discovered the five simple steps that make topiary look effortless, even for beginners.
The secret isn’t fancy tools or expensive plants—it’s timing, technique, and patience. Start in late spring or early summer when new growth is tender but established. You’ll need sharp pruners, a small hand saw for thicker branches, and a wire frame for complex shapes.
Even a basic boxwood can become a geometric masterpiece with the right approach.
By summer’s end, your bushes will hold their shape with clean lines and vibrant green foliage, looking like they belong in a historic garden. The best part? This isn’t just about looks—proper pruning boosts airflow, reduces pests, and keeps plants healthier than they’d be left to grow wild.
Whether you’re shaping a small hedge or a grand topiary masterpiece, the key is consistency. A little maintenance every few weeks keeps your design crisp, and soon, neighbors will ask for your secrets. Let’s get started!
📚 In This Guide
- What you need
- Instructions
- Tips and common mistakes
- Wrapping up and next steps
What you need
- ● Pruning shears: Sharp, bypass-style shears (4-6 inches) for clean cuts on smaller branches.
- ● Hedge shears: Longer blades (8-12 inches) for larger bushes or topiary projects.
- ● Hand pruners: For precise trimming of thicker stems (avoid dull blades—sharpness is key!).
- ○ Loppers: For branches up to 2 inches thick (optional but helpful for established bushes).
- ● Gloves: Heavy-duty gardening gloves to protect hands from thorns and rough edges.
- ● Measuring tape or ruler: For marking even lines and maintaining symmetry.
- ● Spray bottle with water: To dampen leaves and reduce dust while cutting.
- ● Topiary wire or framework: (For advanced shapes) Copper or plastic wire to support intricate designs.
- ● Stakes or plant ties: To temporarily secure branches while shaping.
- ● String or twine: For outlining shapes before cutting.
- ● Disinfectant (rubbing alcohol or bleach solution): To clean tools between cuts and prevent disease spread.
- ● Pruning sealant: For larger cuts to promote faster healing (especially for woody plants).
- ● Notebook & pencil: To sketch your design before diving in!
- ● Choose a healthy, young bush (mature bushes may need more aggressive pruning).
- ● Pick a sunny day—avoid pruning in extreme heat or cold.
- ● Gather inspiration! Browse topiary shapes (animals, spirals, cubes) to pick your project.
- ● Check the growth rate of your plant—fast growers may need more frequent trims.
Step-by-step instructions for pruning bushes into shapes
Here's how I turn overgrown bushes into polished topiary—no green thumb required.
✂️ Step 1: Gather the Right Tools and Safety Gear
Start with sharp, clean bypass pruning shears for fine cuts and loppers for thicker branches. I always sanitize my tools with rubbing alcohol between cuts to prevent disease spread. Wear gloves—thorny bushes don't care about your manicure, and safety glasses protect against flying debris when you're aggressive with the loppers.
Choose a calm, dry day for your first pruning session. Wind makes it harder to see your cuts, and wet leaves can make branches slippery. I like to sketch my design first on paper—even a simple oval or spiral—so I know where to aim. This prevents me from making those awkward, lopsided cuts that look like a toddler drew them.
🌿 Step 2: Understand Your Bush's Growth Habits
Identify whether your bush is fast-growing (like privet) or slow-growing (like boxwood). Fast growers need more frequent light pruning, while slow growers can handle heavier shaping once or twice a year. Look for the new growth—this is where you'll focus your cuts. It's usually the softer, lighter green stems at the tips.
Remove any dead, diseased, or crossing branches first. These are your "must-cuts" before shaping. I always cut back to a bud or leaf node at a 45-degree angle to encourage new growth in the right direction. This step keeps your bush healthy and gives you a clean canvas for your design.
✂️ Step 3: Begin Shaping with Light, Strategic Cuts
Start with 10-20% of the foliage—never remove more than a third in one session. Use your sketch as a guide and make small, 1-inch cuts to test your shape. Step back frequently to check your progress. I find that cutting from the underside of branches helps maintain the natural curve of the bush.
Watch for the growth pattern—if you see branches growing outward too aggressively, cut them back by one-third to redirect energy inward. This is where patience pays off. Don't rush; a well-shaped bush takes time. I like to work in layers, starting with the top and moving downward, so I can see my progress as I go.
🌱 Step 4: Refine the Shape with Precision Cuts
Now it's time for the fun part—refining. Use your shears to trim along the natural lines of the bush, following the existing growth pattern. For formal shapes like cubes or spirals, I use a string or wire guide to keep my cuts even. Hold the shears at a 45-degree angle to avoid tearing the leaves.
Pay attention to the inside of the bush—this is where light struggles to reach. Thin out any dense areas by removing 1-2 inch sections of branches. You'll know you're doing it right when you can see light green new growth starting to fill in the gaps within a few weeks. This ensures your bush stays healthy and doesn't develop weak, leggy branches.
☀️ Step 5: Maintain and Encourage New Growth
After pruning, give your bush a light watering to reduce stress. Avoid heavy watering right after shaping, as it can cause the cuts to heal poorly. I like to apply a balanced fertilizer (like 10-10-10) to encourage robust regrowth. Watch for new shoots emerging within 2-4 weeks—this is your reward for a job well done.
Schedule a light maintenance trim every 4-6 weeks during the growing season to keep your shape intact. In late fall, give your bush a light cleanup to remove any dead or damaged growth before winter. This keeps it looking sharp and healthy year-round. Real talk: the first few times, your bushes might look a little uneven, but with each session, you'll get better—and so will your topiary.
Tips & tricks for perfect topiary shaping
These simple yet game-changing tips will help you transform any bush into professional-looking topiary with confidence.
Tool Selection Matters: Don't settle for dull shears—they tear leaves instead of making clean cuts. I invest in bypass pruning shears with sharp, stainless steel blades that stay sharp for years. For thicker branches, loppers with a 45-degree cutting angle prevent jagged edges that can damage your design. Pro tip: Test your tools on a small branch first to ensure they're cutting cleanly before you start your main project.
Design Sketching Secret: Your sketch doesn't need to be a work of art—just a rough guide to visualize your shape. I use a simple pencil outline on paper and hold it up to the bush while I work. This prevents those frustrating moments when you realize too late that your cuts are uneven. For complex shapes like cubes, I even use a string outline tied between stakes to create a visual reference while I trim.
Growth Pattern Awareness: Pay close attention to how your bush naturally grows. If you see branches growing outward aggressively, cut them back by one-third to redirect energy inward—this is where most people go wrong. I always work from the outside in, starting with the top and moving downward. This lets me see my progress and make adjustments as I go, rather than getting stuck with hidden problems inside the bush.
Post-Pruning Care: After shaping, your bush needs time to recover. Give it a light watering (just enough to dampen the soil) to reduce stress, then apply a balanced fertilizer like 10-10-10. Watch for new shoots emerging within 2-4 weeks—this is your confirmation that your pruning was successful. Avoid heavy watering right after shaping, as it can cause cuts to heal poorly and invite disease.
Pro Tips for Pruning Bushes Into Shapes
- These simple yet game-changing tips will help you transform any bush into professional-looking topiary with confidence.
- Tool Selection Matters: Don't settle for dull shears—they tear leaves instead of making clean cuts.
- Design Sketching Secret: Your sketch doesn't need to be a work of art—just a rough guide to visualize your shape.
Frequently asked questions
Got questions about shaping bushes like a pro? Here are answers to the most common queries—so you can prune with confidence!
When is the best time to prune bushes into shapes?
The ideal time depends on your bush type! For evergreens (like boxwood or yew), prune in early spring or late fall to avoid stress. Deciduous bushes (such as lilacs) should be shaped right after flowering or in late winter. Avoid pruning when extreme heat or frost is forecasted.
Can I use regular garden shears, or do I need special tools?
For small bushes, hand pruners or bypass shears work great! For larger projects, invest in long-handled loppers or hedge shears (like electric trimmers) for precision. Pro tip: Always keep blades sharp and clean to prevent tearing—dull tools cause jagged cuts that heal poorly.
What if my bush looks sad after pruning?
Don’t panic! Bushes often droop temporarily due to stress. To help recovery:
Regular light maintenance is key! Trim just the new growth every 4–6 weeks to encourage dense foliage. Use a string or wire guide to check symmetry, and shape lightly with hedge shears. Bonus: A light spray of water after trimming helps leaves stand up straighter! Yes! Avoid shaping flowering shrubs (like hydrangeas or roses) unless you prune right after blooming—cutting back too early removes next year’s flowers. Also, weeping varieties (like weeping cherries) are best left natural. Always research your specific bush before pruning!
Most bushes bounce back in 4–6 weeks.
How do I keep my shaped bush looking neat between prunings?
Are there bushes that shouldn’t be pruned into shapes?
Wrapping up and next steps
Mastering the art of pruning bushes into shapes is a rewarding way to elevate your garden’s aesthetic—and it’s easier than you think! 🌿 With the right tools, patience, and these five simple steps, you’ll transform overgrown shrubs into stunning topiary masterpieces.
Remember, practice makes perfect, so don’t hesitate to experiment and refine your technique.
Ready to take your gardening skills to the next level? Start with one small project today—whether it’s a simple hedge or a whimsical animal shape—and watch your confidence (and your garden!) bloom. Happy pruning! ✂️🌸