
Pruning
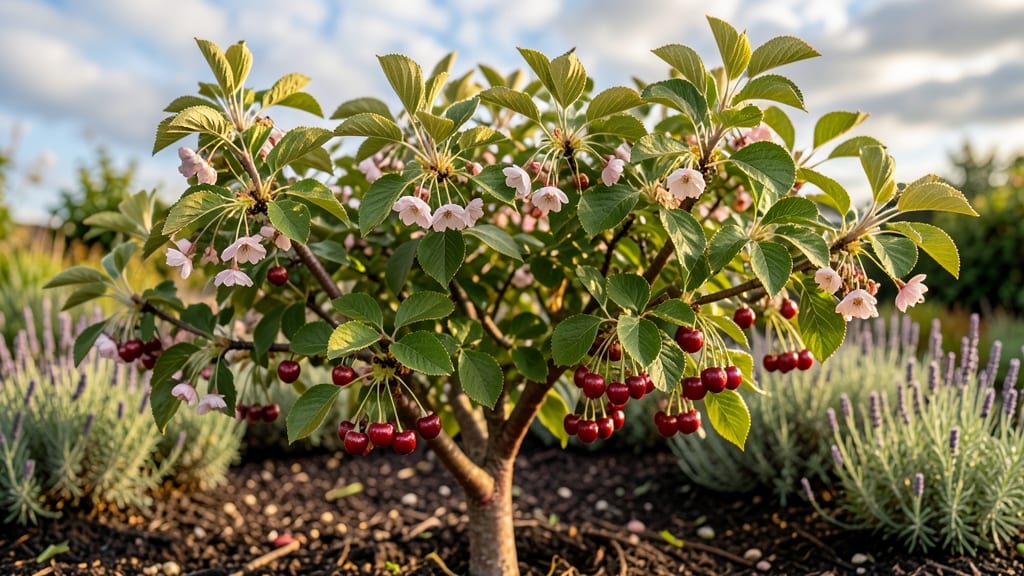
Late-winter pruning turns your tart cherry bush into a fruit factory. ✂️ I’ve watched my ‘Montmorency’ bush go from a tangled mess to a productive powerhouse—all by making three simple cuts in February. The key? Timing, technique, and knowing which branches to keep (and which to sacrifice).
This bush thrives in zones 4-7 with well-drained soil, but even if your yard isn’t perfect, you can still grow fruit. Start with a sunny spot, space plants 15-20 feet apart, and mulch heavily to retain moisture.
Water deeply once a week during dry spells, and fertilize in early spring with a balanced 10-10-10 mix. By summer, you’ll be harvesting tart, jewel-toned cherries perfect for pies or fresh snacking. The bush stays compact, produces for decades, and even handles light frost.
Just avoid pruning in fall—it invites disease. Works for ‘Montmorency,’ ‘Stella,’ or any tart variety. Let’s get those branches trimmed!
📚 In This Guide
- What you need
- Instructions
- Tips and common mistakes
- Wrapping up and next steps
What you need
- ● Pruning shears: Bypass pruners (for clean cuts on smaller branches, 3–5 inches long)
- ● Pruning saw: A folding pruning saw (for thicker branches, 10–12 inches long)
- ● Loppers: Bypass loppers (for medium branches, 12–18 inches long)
- ● Disinfectant: Rubbing alcohol (70% isopropyl) or bleach solution (1 part bleach to 9 parts water)
- ● Gloves: Heavy-duty gardening gloves (to protect against thorns and sap)
- ○ Pruning sealant: Optional but helpful (for sealing larger cuts, like Tanglefoot Tree Wound Pruning Sealer)
- ● Marking twine or tape: Colored twine or painter’s tape (to tag branches for removal)
- ● Bucket or bag: A sturdy 5-gallon bucket (for collecting pruned branches)
- ● Sharpie or label maker: (for marking tools to avoid cross-contamination)
- ● Weather check: Prune on a dry, calm day (avoid frost or rain within 24 hours)
- ● Safety gear: Safety glasses (to shield eyes from debris)
- ● Clean workspace: Lay down cardboard or a tarp (to collect fallen leaves/branches)
- ● Tool sharpening: File or sharpening stone (to ensure clean cuts—dull tools crush branches!)
- ● Research: Review your tart cherry bush’s variety (some may have specific pruning needs, like Montmorency vs. Balaton)
Instructions for pruning tart cherry bushes in late winter
Here’s how to shape your tart cherry bush for maximum fruit production—timing and technique matter most.
✂️ Step 1: Remove Dead, Diseased, or Damaged Branches First
Start by inspecting every branch for signs of winter damage, disease, or dead wood. Look for branches that are brittle, cracked, or completely without leaves. These are your first targets—they won’t produce fruit and could spread disease to healthy growth. Use sharp pruning shears to cut just outside the branch collar, the swollen area where the branch meets the trunk.
I always work from the inside out, removing branches that cross or rub against others. This prevents future wounds and improves airflow, which is critical for preventing fungal issues. If you’re unsure whether a branch is dead, scratch the bark with your fingernail—live wood will be green or moist underneath, while dead wood will be dry and brown.
✂️ Step 2: Thin Out Overcrowded Branches for Better Airflow
Tart cherries thrive when they have good airflow and sunlight penetration. Focus on removing branches that grow inward or overlap with others, as these create shaded areas where moisture lingers. Aim to thin the bush so light can reach the center—this encourages stronger fruit production on the outer branches.
I like to step back every few cuts to visualize the bush’s shape. Remove about 20-30% of the total branches in this step, but never take more than one-third of the plant’s growth in a single season. If you see water sprouts (thin, upright shoots growing straight up), cut them off at the base—they drain energy from fruit production.
✂️ Step 3: Prune to Encourage Fruit-Bearing Wood
Tart cherries produce fruit on 1- to 3-year-old wood, so your goal is to maintain a balance of older and younger branches. Start by shortening last year’s growth by about one-third to encourage bushier, fruit-bearing branches. Cut just above a bud that faces outward—this ensures new growth will fill in gaps and improve the bush’s structure.
For older branches that no longer produce well, remove them entirely at the branch collar. If a branch is larger than ½ inch in diameter, use a pruning saw to avoid tearing the bark. Always sterilize your tools with rubbing alcohol between cuts to prevent spreading disease. After pruning, the bush should look open and airy, with sunlight reaching the center.
✂️ Step 4: Shape the Bush for Optimal Fruit Production
Now’s the time to refine the bush’s shape. Tart cherries grow best in an open-center form, where the branches spread outward rather than upward. Step back and visualize the bush as a vase—wider at the top than the bottom. Remove any branches that grow downward or inward, as these create dense areas that block light and air.
I usually leave 3-5 main scaffold branches that are evenly spaced around the bush. These will form the backbone of your tart cherry’s structure. Avoid over-pruning—too much cutting at once stresses the plant and can reduce fruit set. If you’re unsure, err on the side of caution and leave a branch rather than removing it.
⏰ Step 5: Clean Up and Apply Post-Pruning Care
After pruning, rake up and dispose of all clippings—never leave them under the bush, as they can harbor pests and diseases. Sterilize your tools again with rubbing alcohol or a bleach solution to prevent cross-contamination. Now’s also the time to apply a balanced fertilizer (like 10-10-10) to replenish nutrients lost during pruning.
Water deeply to help the bush recover, especially if the winter was dry. Mulch around the base with 2-3 inches of organic mulch (like wood chips) to retain moisture and suppress weeds. Avoid piling mulch against the trunk, as this can trap moisture and cause rot. Your tart cherry bush is now ready for spring growth—just keep an eye out for new shoots and adjust as needed.
Tips & tricks for perfect tart cherry bush pruning
Late-winter pruning sets the stage for a fruitful summer—here’s how to avoid common mistakes and get it right the first time.
Tool Prep is Everything: Sterilizing your pruning shears between cuts is non-negotiable. I keep a small bottle of rubbing alcohol in my tool belt and wipe down blades after every 3-5 cuts, especially when moving between branches. This prevents spreading silver leaf disease, which can devastate your tart cherry in just one season. Also, make sure your shears are sharp—dull blades crush stems instead of making clean cuts, leaving wounds that invite infection.
Visualize the Vase Shape: Step back every 5-10 minutes to check your progress. The goal is an open-center form that looks like an inverted vase—wider at the top than the bottom. I imagine a clock face when spacing my 3-5 main scaffold branches, placing them roughly 90 degrees apart. This creates natural light pathways through the center, which is crucial for tart cherries that need full sun exposure for fruit development. Think of it as sculpting sunlight into your bush.
Bud Orientation Matters: When shortening branches in Step 3, always cut just above an outward-facing bud. These buds will grow into new branches that fill gaps and improve sunlight penetration. I use my thumb to feel the bud's orientation—it should point slightly outward, not inward. This simple technique prevents the bush from growing too dense in the center, where airflow is critical for preventing fungal diseases like powdery mildew.
Timing Your Pruning: Late winter is ideal because the bush is dormant, making it easier to see branch structure and assess damage. But if you miss the window, don't panic—you can still prune in early spring before buds swell. Just avoid pruning in fall, as new growth won't harden off before winter, making it vulnerable to cold damage. I've pruned as late as March in colder climates, and the bushes still produced beautifully the following summer.
Pro Tips for Tart Cherry Bush
- Late-winter pruning sets the stage for a fruitful summer—here’s how to avoid common mistakes and get it right the first time.
- Tool Prep is Everything: Sterilizing your pruning shears between cuts is non-negotiable.
- Visualize the Vase Shape: Step back every 5-10 minutes to check your progress.
Frequently asked questions
Got questions about pruning your tart cherry bush? You’re not alone! Here are some of the most common concerns—plus quick, practical answers to keep your tree thriving.
When is the exact best time to prune tart cherry bushes?
Late winter (just before buds swell) is ideal—typically February to early March in most U.S. zones. Avoid pruning in fall (risk of silver leaf fungus) or spring (when sap flows heavily). Pro tip: If you missed the window, prune in early winter (Dec–Jan) instead.
How much can I cut back my tart cherry bush without harming it?
Remove no more than 25% of the tree’s total growth in one year. Focus on dead, crossing, or inward-growing branches first. For older trees, thin selectively to improve airflow—just avoid heavy topping (it stresses the tree and reduces fruit quality).
Will pruning now affect my tart cherry harvest this summer?
Not if done correctly! Pruning in late winter stimulates new growth and boosts fruit production for next year’s harvest. This year’s crop may be slightly smaller, but the long-term benefits (healthier tree, better fruit quality) are worth it. Bonus: Open canopies = easier picking!
What if my tart cherry bush has no fruit after pruning?
Several factors could be at play: age (young trees need 3–5 years to bear fruit), pollination (tart cherries often need a second variety nearby), or environmental stress (drought, poor soil). Check for bloom clusters in spring—if they’re present but no fruit forms, pests (like cherry fruit flies) might be the culprit.
Can I use the same pruning tools on my tart cherry bush as I do for other fruit trees?
Yes, but sterilize tools between trees to prevent disease spread (use rubbing alcohol or a 10% bleach solution). Tart cherries are prone to bacterial canker and silver leaf fungus, so avoid sharing shears with infected trees. Tool recs: Sharp bypass pruners for branches <1” thick; a pruning saw for thicker limbs.
Quick Troubleshooting Table
| Problem | Likely Cause | Fix |
|---|---|---|
| Yellow leaves after pruning | Over-pruning or nutrient loss | Apply balanced fertilizer (10-10-10) and water deeply. |
| No new growth in spring | Winter dieback or root damage | Inspect for dead wood; mulch roots and prune lightly next year. |
| Black, oozy spots on branches | Bacterial canker | Remove infected branches <6” below the lesion; sterilize tools. |
Wrapping up and next steps
Pruning your tart cherry bush in late winter isn’t just about shaping—it’s about setting the stage for a fruit-filled summer! 🌱 By following the right techniques, you’ll boost airflow, encourage healthy growth, and maximize those delicious, tangy cherries. Remember, a little effort now means big rewards later.
Ready to transform your bush? Grab your pruners, roll up your sleeves, and get started—your future harvest is waiting! For extra confidence, watch a step-by-step video tutorial or consult your local nursery for tailored advice. Happy pruning! 🌟