
Blooming
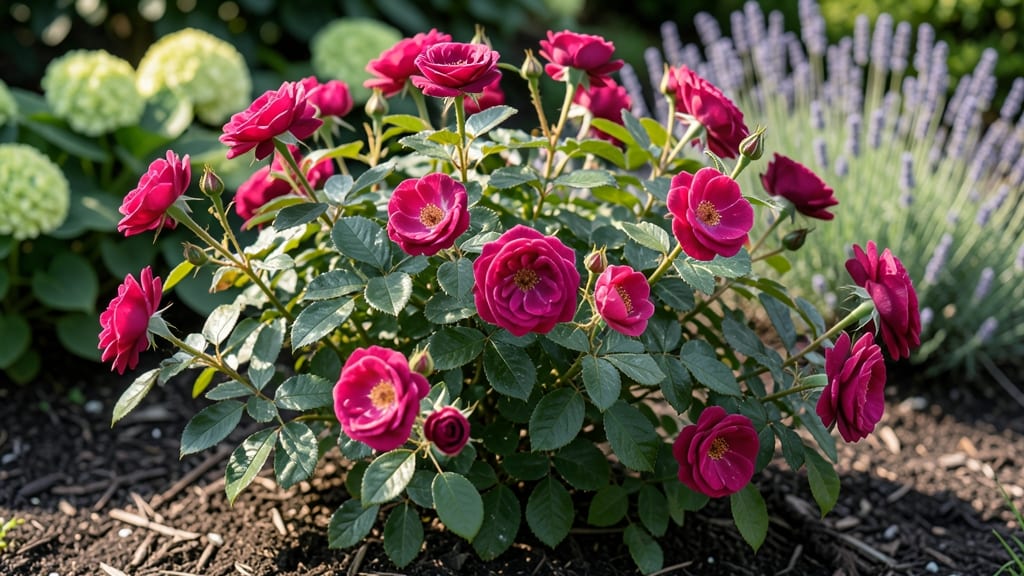
Strategic pruning cuts transform a struggling rose bush into a year-round blooming powerhouse. ✂️ I’ve turned my own tangled bushes into lush, fragrant shrubs by mastering just three key cuts—each timed to trigger new growth when roses naturally want to flower.
The secret isn’t aggressive trimming but understanding when to shape for air flow, when to encourage buds, and when to let the plant rest.
Most gardeners overlook the sunlight-soil-fertilizer triangle that makes roses bloom. My bushes now produce three flushes of flowers (spring, summer, and fall) because I adjusted their winter pruning, added compost-rich soil, and switched to a slow-release fertilizer in early spring.
The first year took patience—now I harvest blooms from June through October without extra effort.
You’ll see the difference in 6-8 weeks: fuller canes, more buds, and flowers that last longer. The pruning itself takes 20 minutes per bush, and the right tools (sharp bypass pruners, rubbing alcohol for cuts) prevent disease.
Even my black thumb can’t mess this up once you know the timing.
This works for hybrid teas, floribundas, and shrub roses alike—just adjust the pruning style. Whether you’re in a hot climate or a cold one, the same principles apply. Let’s get those canes blooming like crazy.
📚 In This Guide
- What you need
- Instructions
- Tips and common mistakes
- Wrapping up and next steps
What you need
- ● Bypass pruners (sharp, clean, and disinfected with rubbing alcohol) – 1 pair
- ● Loppers (for thicker branches, 20-24” reach) – 1 pair
- ● Hand saw (for stubborn stems, 8-10” blade) – 1
- ● Gloves (gardening-grade, cut-resistant) – 1 pair
- ● Disinfectant solution (1 part bleach to 9 parts water) – small spray bottle
- ○ Pruning sealant (optional but recommended for large cuts) – small container
- ● Garden twine or rubber bands (for tying stems during training) – small roll
- ● Notebook & pen (to sketch pruning plans) – 1
- ● Extension pole pruners (for high branches, 3-6 ft) – 1 pair
- ● Hose with nozzle (to clean tools mid-prune) – 1
- ● Rose fertilizer (balanced 10-10-10 or organic) – small bag
- ● Mulch (2-3” layer of shredded bark or compost) – 1-2 bags
- ● Plant support stakes (for climbing roses) – 2-4 stakes
How to prune a rose bush for continuous, lush blooms
Here's the method I rely on to keep my roses flowering nonstop—no dead wood, no wasted energy, just vibrant growth.
✂️ Step 1: Time Your First Cut for Late Winter Dormancy
Prune your rose bush in late winter when it's still dormant but the first buds have begun to swell. This is usually 4-6 weeks before your last frost date. You'll see tiny green swellings at the base of the canes—these are the buds preparing to bloom. Cutting now removes dead wood while encouraging new growth.
Use clean, sharp pruners to make 45-degree angled cuts just above an outward-facing bud. This angle prevents water from pooling on the cut and causing rot. I always sterilize my tools with rubbing alcohol between cuts to prevent spreading disease. Avoid cutting into old, woody growth—look for the fresh, green canes that emerged last season.
✂️ Step 2: Remove Dead, Diseased, or Weak Canes Completely
Start by identifying canes that are dead, diseased, or crossing—these are the first to go. Dead canes will be brown and brittle when you bend them, while diseased ones may have black spots or ooze. Cut these back to the ground completely. You'll also want to remove any canes that are rubbing against each other, as this creates wounds where pests can enter.
Next, thin out one-third of the oldest canes in the center of the bush. Older canes produce fewer blooms and compete with younger growth for nutrients. If your rose has more than 5 canes, remove the thinnest ones to improve airflow. This step is crucial—skipping it leads to crowded centers that trap moisture and invite fungal diseases like black spot.
✂️ Step 3: Shape for Airflow and Light Penetration
Step back and visualize the bush as an open vase. Your goal is to create a rounded shape with light and air reaching the center. Cut back the remaining canes to 18-24 inches tall, leaving 3-5 strong buds on each. Make your cuts just above an outward-facing bud to encourage branches to grow away from the center, not inward.
For hybrid teas and grandifloras, aim for 5-7 main stems with multiple side branches. For shrub roses, keep the height lower—3-4 feet—to encourage bushier growth. You'll see the difference immediately: pruned roses develop a full, rounded shape within weeks, while neglected ones grow leggy and sparse.
🌿 Step 4: Deadhead and Prune for Season-Long Blooms
After the first flush of blooms fades, deadhead spent flowers by cutting back to the first five-leaflet leaf below the bloom. This redirects the plant's energy into producing new side shoots instead of setting seed. I do this every 2-3 weeks throughout the growing season to keep my roses in constant bloom.
In early summer, give your roses a light trim to remove any weak, crossing, or overly long canes. This is also the time to shape the bush again, especially if it's grown uneven. Avoid heavy pruning now—you want to preserve the flowers already in bud. Watch for new growth emerging from the base; these are your future blooming canes, so handle them gently.
⏰ Step 5: Prepare for Winter with a Light Final Prune
In late fall, after the first hard frost but before the ground freezes, do a light pruning to remove any dead or diseased canes that may have appeared. Cut back any weak growth that didn't harden off properly. This final trim prevents pests and diseases from overwintering in the bush.
Mulch the base with 2-3 inches of organic mulch (like shredded bark) to insulate the roots. I also wrap the canes loosely with burlap to protect them from harsh winds. The goal here is to minimize stress on the plant so it wakes up strong in spring. Avoid heavy pruning now—you want the plant to enter dormancy with as much energy as possible.
Tips & tricks for perfect rose bush pruning
These pro techniques will help you transform your rose bush into a blooming powerhouse year after year.
Bud Identification: When making your 45-degree cuts in Step 1, look for outward-facing buds—they're the ones with a slight bump pointing away from the center of the bush. These buds will grow into branches that open up the center, allowing light and air to circulate. I've found that cutting just above these buds (about 1/8 inch above) creates the perfect angle for new growth while preventing water from pooling on the cut.
Disease Prevention: The sterilization step between cuts in Step 1 isn't just about cleanliness—it's about survival. I learned this the hard way when my entire bush developed black spot after using the same pruners on multiple infected plants. Keep rubbing alcohol handy and wipe your tools between each cut. For extra protection, consider using a fungicide spray on fresh cuts after pruning, especially in humid climates where fungal diseases thrive.
Seasonal Timing: The 4-6 week window before your last frost date is crucial for Step 1. If you prune too early, you risk encouraging new growth that won't harden off before winter. If you wait too long, you'll be cutting into last year's blooms. Check your local frost dates and mark your calendar—this timing makes all the difference between a bush that struggles and one that thrives. For those in mild climates, you might extend this to early spring when buds begin to swell.
Airflow Strategy: In Step 3, when shaping your bush, think of it like creating an open vase. The goal is to have light reach the center and air circulate freely. I've noticed that bushes with more than 5 canes often develop fungal issues because the center stays too damp. If you're working with a particularly dense rose variety, don't hesitate to remove additional canes to create that open structure—your future blooms will thank you for it.
Pro Tips for Blooming Rose Bush
- These pro techniques will help you transform your rose bush into a blooming powerhouse year after year.
- Bud Identification: When making your 45-degree cuts in Step 1, look for outward-facing buds—they're the ones with a slight bump pointing away from the center of the bush.
- Disease Prevention: The sterilization step between cuts in Step 1 isn't just about cleanliness—it's about survival.
Frequently asked questions
Got questions about keeping your blooming rose bush lush and vibrant? You’re not alone! Here are some of the most common queries—plus quick, expert-backed answers to help you grow like a pro.
When is the best time to prune a blooming rose bush?
The ideal time depends on your rose type! For once-blooming roses (like hybrid teas), prune in late winter or early spring (just before new growth starts). For repeat-blooming varieties, prune lightly after each flush of flowers or in early spring. Avoid heavy pruning in fall—it can stimulate tender growth that won’t survive winter. Learn the step-by-step timing here.
How do I prune a blooming rose bush without killing it?
Start by removing dead, diseased, or crossing branches first. Then, cut back 1/3 of the oldest canes to the ground and shape the bush by trimming back 1/4 to 1/3 of the remaining canes to an outward-facing bud. Always use clean, sharp pruners and make cuts at a 45-degree angle just above a bud. Pro tip: Sterilize your tools with rubbing alcohol to prevent spreading disease!
Can I prune a rose bush while it’s in bloom?
Yes, but with caution! Light pruning (removing spent blooms or deadheading) is safe year-round to encourage more flowers. However, avoid heavy pruning during peak bloom—it can stress the plant and reduce flowering. If you must prune heavily, do it right after a bloom cycle or in early spring. Deadheading 101: How to do it right.
What should I do if my rose bush isn’t blooming?
Several factors could be at play: over-pruning, poor sunlight (roses need 6+ hours of sun daily), nutrient deficiencies, or pests/disease. Start by checking your pruning habits—are you cutting too late in the season? Next, fertilize with a rose-specific feed in early spring and fall. If pests like aphids or black spot appear, treat with neem oil or fungicide. Troubleshooting guide for non-blooming roses.
Are there low-maintenance rose bushes that bloom year-round?
While true year-round blooming is rare, some varieties come close! Knock Out® roses and Earth-Kind roses (like ‘Belinda’s Dream’) are disease-resistant, repeat-blooming, and thrive with minimal pruning. For a perennial option, consider roses like ‘The Fairy’ or ‘Dr. Huey’, which bloom prolifically with basic care. Pair them with mulch and consistent watering for best results.
Still stumped? Drop your question in the comments—we’re happy to help your rose bush reach its full potential!
Wrapping up and next steps
Transforming your blooming rose bush into a year-round masterpiece is simpler than you think—just a little strategy and patience! By mastering the art of pruning cuts, you’ll unlock lush, vibrant blooms and a healthier plant, all while keeping pests and diseases at bay. 🌹
Now that you’re armed with the right tools and techniques, roll up your sleeves and get pruning! Start with small adjustments, observe your rose bush’s response, and fine-tune as you go. Every trim is a step toward a stunning, thriving garden. Happy gardening!