
Pruning
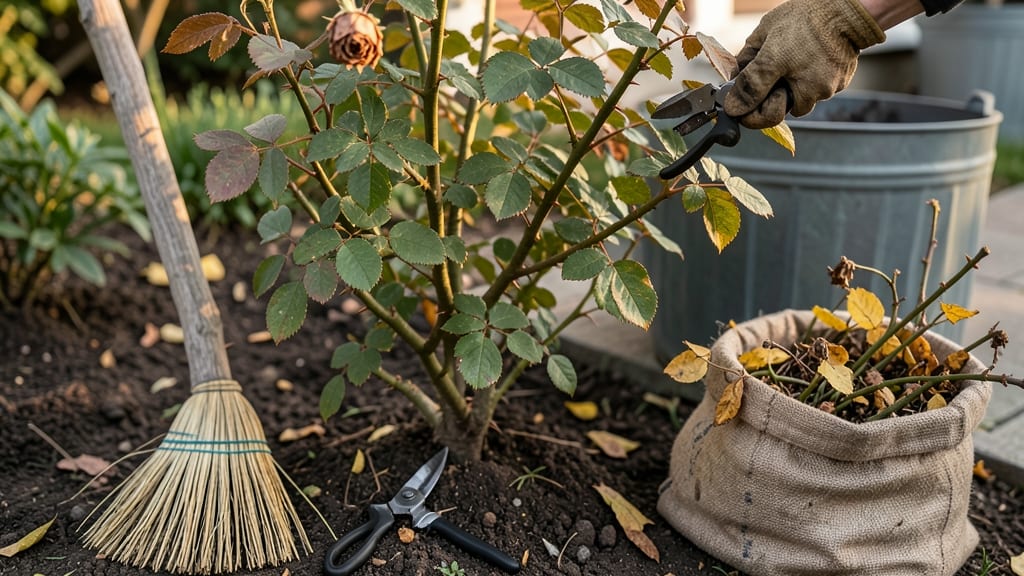
Cutting back rose bushes in the fall isn't just about tidying up—it's the secret to stronger, more prolific blooms next spring. 🌹 After years of trial and error, I finally cracked the code: pruning at the right time (not too early, not too late) makes all the difference. The key is removing dead wood, shaping for airflow, and prepping for winter—without overdoing it.
Timing matters most: aim for after your first hard frost but before winter storms hit. You'll need sharp bypass pruners, a saw for thick stems, and a disinfectant to clean tools between cuts.
The goal is to create an open, vase-like shape that lets sunlight and air reach the center—this prevents fungal diseases that love damp, crowded canes.
By the time spring arrives, you'll see new red shoots emerging within weeks of pruning, with blooms arriving 2-3 weeks earlier than unpruned bushes. The plants handle winter stress better, and you avoid the "winter dieback" that leaves bare stems where flowers should be.
It's not just about looks—it's about setting up your roses for a healthier, more productive next season.
Works for hybrid teas, floribundas, and shrub roses alike—just adjust the severity based on your climate. Warmer zones (like Zone 8+) can wait until late fall, while colder areas (Zone 5 and below) should prune earlier. Here's how to do it right without sacrificing next year's blooms.
📚 In This Guide
- What you need
- Instructions
- Tips and common mistakes
- Wrapping up and next steps
What you need
- ● Pruning shears: Bypass pruners (sharp, clean, and 4-6 inches long for precision cuts). Quantity: 1 pair (or 2 if you have multiple bushes).
- ● Loppers: Long-handled (24-36 inches) for thicker stems (½–1 inch diameter). Quantity: 1 pair.
- ○ Pruning saw: Curved blade for stubborn, woody stems. Quantity: 1 (optional but handy for mature roses).
- ● Disinfectant: Rubbing alcohol (70%+) or bleach solution (1 part bleach to 9 parts water) to sterilize tools between cuts. Quantity: Small spray bottle or cup.
- ● Garden gloves: Cut-resistant, waterproof (protects hands from thorns and debris). Quantity: 1 pair.
- ● Trash bags: Heavy-duty, 13-gallon size for collecting pruned branches. Quantity: 2–3 bags.
- ● Rake or broom: For clearing fallen leaves/debris around the base of bushes.
- ● Pruning sealant: Tree wound paint or pruning paste (controversial but useful for large cuts on hybrid teas/grandifloras). Quantity: Small jar.
- ● Hose or water sprayer: To rinse tools and clean up after pruning.
- ● Marking twine or flags: If you’re very organized and want to label cuts for winter reference.
- ● Compost bin: For repurposing small, healthy prunings (avoid diseased branches!).
- ● Weather: Wait for a dry, mild day (50–65°F / 10–18°C) to avoid stressing the plant or spreading disease.
- ● Timing: Prune after the first hard frost (when roses are dormant) but before the ground freezes solid.
- ● Health check: Inspect bushes for black spot, powdery mildew, or canker. Remove and dispose of infected branches immediately (do not compost!).
- ● Energy: Coffee ☕ and snacks—this might take a while for overgrown bushes!
Step-by-step guide for cutting back rose bushes in the fall
Here's the method I use to prepare roses for winter—it keeps them healthy and ready to burst into spring blooms.
✂️ Step 1: Time Your Trim Precisely
Wait until after your first hard frost but before the ground freezes solid—typically late November to early December in most climates. You'll know it's time when rose leaves have turned brown and fallen naturally. This timing prevents new growth that could be damaged by winter cold.
I avoid cutting too early, as roses need their foliage to feed the roots until frost. If you trim too soon, the plant wastes energy producing new shoots instead of storing nutrients underground. Mark your calendar now so you don't miss this crucial window.
✂️ Step 2: Gather Your Tools and Prepare the Workspace
You'll need clean, sharp pruning shears (dull blades tear stems and invite disease) and disinfectant (rubbing alcohol or bleach solution). Lay out a tarp or old sheet to collect debris—this makes cleanup easier and prevents spreading disease through your garden.
Wipe down your shears with disinfectant before and after each cut. I keep a small spray bottle of 70% isopropyl alcohol handy for quick cleanups between cuts. This prevents transferring fungal spores from one bush to another, which is especially important when working with multiple roses.
✂️ Step 3: Remove Dead and Diseased Wood First
Start by locating any blackened, mushy, or hollow stems—they're dead and need removal. Cut these out first, then discard them in the trash (not your compost). Healthy wood should have a firm texture and greenish center when you cut into it. Diseased wood often smells foul or has strange discoloration.
I like to work in sections, moving from the outside of the bush inward. This helps me spot hidden problems that might be lurking beneath healthier-looking canes. Remove any suckers (shoots growing from the base) while you're at it—they drain energy from your main plant.
✂️ Step 4: Shape the Bush for Next Year's Growth
Now it's time to shape the bush. For most roses, cut back to 18-24 inches tall, leaving 3-5 strong canes per bush. Make cuts at a 45-degree angle, about ¼ inch above an outward-facing bud. This encourages outward growth rather than inward.
I always step back occasionally to check my work—you want an open center that allows airflow. Crowded centers trap moisture and invite fungal diseases. Avoid leaving stubs; a clean cut just above the bud gives your rose the best chance for vigorous new growth in spring.
✂️ Step 5: Clean Up and Protect for Winter
Rake up all debris and dispose of it in the trash. Then apply 4-6 inches of mulch around the base (but not touching the stems) to insulate roots. I use shredded bark or straw—both work well and break down slowly to improve soil over time.
Finally, consider wrapping young or tender roses with burlap or rose cones for extra protection. This isn't usually needed for mature bushes in Zone 5 and warmer, but it's worth doing for newly planted roses or in particularly harsh winters. Water deeply before winter sets in to help roots establish.
Tips & tricks for perfect fall rose trimming
These little details make all the difference between a healthy spring bloom and a struggle next year.
Timing Secret: I can't stress enough how important that late-November window is. If you're unsure whether frost has hit, do a simple test: crush a few leaves between your fingers. If they stay crisp and brown, it's time. The goal is to give your roses enough time to harden off, but not so late that new growth gets nipped by winter. I've seen roses suffer from late trims where tender new shoots froze solid overnight.
Tool Technique: Your pruning shears are your most important tool—don't skimp on quality. I've ruined perfectly good roses with dull blades that crushed stems instead of making clean cuts. For Step 2, keep a small bowl of disinfectant right next to your workspace. Dip your shears between every 3-4 cuts, especially when moving between different bushes. This simple habit prevents spreading black spot disease, which can ruin your entire garden.
Visual Cue for Step 4: When shaping your bush, look for canes that are pencil-thick or larger—they're your strongest growth for next spring. Thin out any that cross or rub against each other, as these spots create wounds that invite disease. For that 45-degree angle cut, imagine slicing the top of a pie—this creates more surface area for water to run off, keeping the wound dry and healing faster.
Mulch Matters: That 4-6 inches of mulch isn't just decoration—it's insulation. I use straw because it breaks down slowly and adds organic matter to the soil. The key is to keep it 2-3 inches away from the stem to prevent rot. In particularly harsh winters, I add an extra 2 inches of mulch around newly planted roses—they're more vulnerable to cold damage.
Pro Tips for Cutting Back Rose Bushes In The Fall
- These little details make all the difference between a healthy spring bloom and a struggle next year.
- Timing Secret: I can't stress enough how important that late-November window is.
- Tool Technique: Your pruning shears are your most important tool—don't skimp on quality.
Frequently asked questions
Got questions about trimming your roses in the fall? Here are some of the most common concerns—and their answers—to help you prune like a pro!
When is the exact best time to cut back roses in the fall?
The ideal window is after your first hard frost (when leaves turn brown) but before winter dormancy sets in—typically late November to early December in most U.S. zones. This timing balances disease prevention and plant health. Check your local frost dates for precision!
What if I missed the fall deadline? Can I still prune?
Yes! Light pruning (removing dead/diseased wood) can happen anytime, but avoid heavy cuts in late winter or early spring. Wait until early spring (just before new growth) for a full reset. Cold weather can stress freshly pruned roses, so patience pays off!
Do I need to sterilize my pruners after cutting?
Absolutely!
Use a 1:9 bleach-water mix or 70% rubbing alcohol to wipe blades between cuts. This stops black spot and other fungal spores from hitching a ride to next year’s blooms. Pro tip: Keep a small spray bottle handy for quick disinfection.
Should I remove all the leaves before winter?
Nope! Leave healthy, brown leaves on climbing/hybrid teas—they act as insulation. Only remove diseased foliage or leaves from shrub roses. Mulch around the base instead for extra winter protection.
My roses look sad after pruning—did I overdo it?
If you see bare stems or no buds, you may have cut too aggressively. Aim to leave 3–4 strong canes per bush (about 12–18 inches tall). If in doubt, follow the "third-eye" rule: trim just above a outward-facing bud.
Can I use the same pruning technique for all rose types?
Not quite! Climbing roses need minimal cuts (just dead wood), while shrub roses benefit from heavier pruning. Check your variety—some, like Knock Out® roses, thrive with almost no fall pruning!
Wrapping up and next steps
Cutting back your rose bushes in the fall isn’t just maintenance—it’s an investment in next year’s vibrant blooms!
By removing dead or diseased growth, improving airflow, and shaping your plants, you’re setting the stage for healthier, more resilient roses. Don’t let overwhelm hold you back—start small, take your time, and enjoy the process!
Now that you’re armed with the right tools and techniques, grab those pruners and give your roses the care they deserve. 🌱 Next step? Mark your calendar for late fall (after the first frost) and get pruning—your spring garden will thank you!