
Propagation
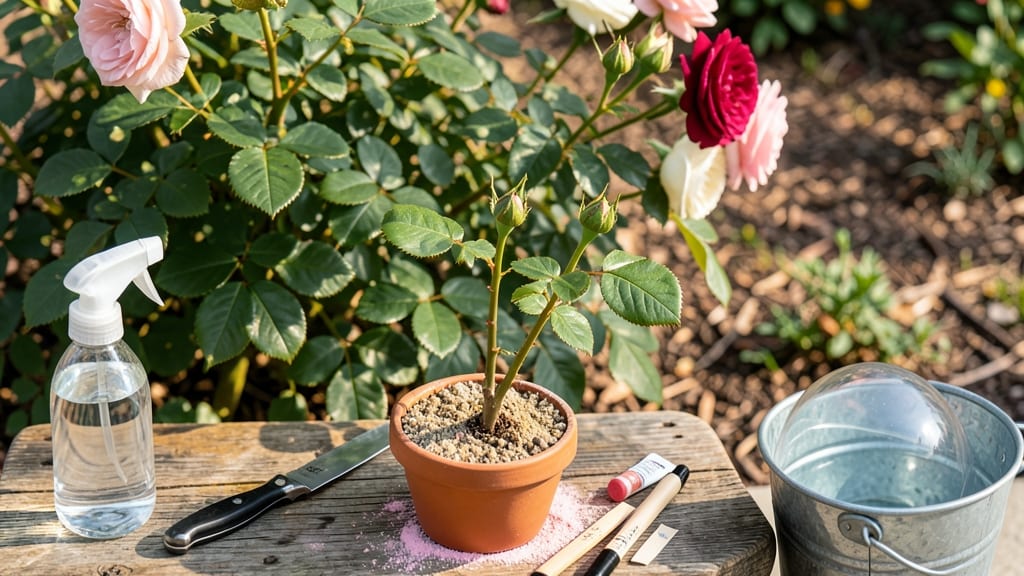
Propagating a rosebush through layering means multiplying your favorite roses without buying new plants—though I nearly gave up after my first attempt turned into a sad, rootless mess. 🌹 The beauty of this method is that it works even with old, established bushes, and you don’t need fancy tools or a green thumb to pull it off.
Timing is everything: aim for late spring or early summer when new growth is soft and flexible. You’ll need sharp pruners, rooting hormone (optional but helpful), and a little patience—no digging required. The process turns a single stem into a whole new plant, right where it grows.
Within 8-12 weeks, you’ll see tiny roots forming where you bent the stem into the soil. Once they’re 2-3 inches long, you can snip the new plant free and transplant it.
The best part? These layered roses often bloom the same year, proving that patience pays off in vibrant, fragrant rewards.
Perfect for gardeners who want to expand their rose collection without breaking the bank or risking shock from store-bought plants. Let’s get those stems rooting!
📚 In This Guide
- What you need
- Instructions
- Tips and common mistakes
- Wrapping up and next steps
What you need
- ● Healthy rosebush: Choose a mature, disease-free stem (at least 1/4-inch thick) with flexible, green growth.
- ● Sharp pruning shears: Clean, sterilized shears (or a knife) to make precise cuts.
- ○ Rooting hormone (optional but helpful): A powder or gel to boost root development.
- ● Plastic or metal clips: 2–3 per layer (e.g., rose propagation clips or bent wire).
- ● Moisture-retentive medium: Option 1: Sphagnum moss (pre-moistened)
- ● Option 2: Peat moss or coconut coir
- ● Plastic wrap or clear plastic bag: To create a humid microclimate (if not using moss).
- ● Watering can or spray bottle: For gentle hydration.
- ● Garden twine or zip ties: To secure layers temporarily.
- ● Hormone-free alternative: Cinnamon powder (natural antifungal).
- ● Labeling tags: To track layers by date.
- ● Garden gloves: For hygiene and grip.
- ● Fertilizer (low-nitrogen): For post-rooting care (e.g., 5-10-5 blend).
Step-by-Step instructions for propagating a rosebush using layering
Here's how I've successfully grown new rosebushes using simple layering—no digging required.
🌱 Step 1: Select Healthy Branches for Layering
Choose 4-6 healthy, flexible branches that are about ¼ to ½ inch thick and still attached to the mother plant. These should be 1-2 years old with some green bark and no signs of disease. The best candidates are those that hang close to the ground naturally—this makes the process easier.
I look for branches that are semi-rigid but bendable—they should snap with a slight bend, not break cleanly. Avoid branches that are too woody or too tender, as they won’t root well. If your rosebush has thorns, that’s a good sign—they indicate a strong, mature branch ready for propagation.
🌿 Step 2: Prepare the Branch for Layering
Select a section of the branch that’s about 6-12 inches long, preferably one that’s already touching the soil or can be gently bent downward. Using clean, sharp pruning shears, make a small, diagonal cut about ¼ inch deep into the bark, removing a small strip of the outer layer. This cut should be about 2-3 inches long—just enough to expose the inner cambium layer without damaging the branch.
Here's the thing—don’t overthink the cut. You’re not trying to create a deep wound, just a small nick that will encourage root growth. If you’re unsure, a shallow cut is better than one that’s too deep and risks damaging the branch. Once you’ve made the cut, gently bend the branch downward so it touches the soil.
💧 Step 3: Secure the Branch and Encourage Root Growth
Use a U-shaped wire or bent piece of metal (like a bent coat hanger) to hold the branch in place against the soil. The cut section should be buried just enough to cover it—about 1-2 inches of soil over the cut area. This creates a dark, moist environment that encourages roots to form.
Water the area lightly but thoroughly right after securing the branch. The soil should be moist but not soggy—think of it like a damp sponge. Overwatering here can lead to rot, so avoid soaking the soil. I like to check the moisture by sticking my finger in the soil; if it feels dry ½ inch down, it’s time to water again.
☀️ Step 4: Monitor and Wait for Roots to Form
Keep the layered branch consistently moist for the next 4-8 weeks. You’ll know it’s working when you see new growth at the tip of the branch—this means roots are forming below the soil. Don’t be tempted to dig it up early; roots can take time, and patience here is key.
During this time, I check the branch once a week to ensure the soil around it stays moist. If the weather is particularly dry or hot, you may need to water every 2-3 days. Watch for any signs of stress, like wilting or yellowing leaves, which can indicate the branch isn’t getting enough water or the cut wasn’t deep enough.
✂️ Step 5: Separate the New Rosebush
Once the layered branch has developed strong roots (usually after 6-12 weeks), it’s time to separate it from the mother plant. Gently dig around the base of the layered section to check for roots. If you see a network of white or tan roots, it’s ready to transplant.
Using your pruning shears, cut the branch cleanly just below the new roots. Be careful not to damage the roots as you lift the new plant from the soil. Plant it in its permanent location, water it deeply, and keep the soil moist for the first 2-3 weeks to help it establish. You’ll know it’s thriving when new leaves start to appear.
Tips & tricks for perfect rosebush layering
These simple tricks will help you avoid common pitfalls and maximize your success rate with rosebush propagation.
Branch Selection Matters: In Step 1, focus on branches that are about ¼ to ½ inch thick and show signs of flexibility—these are your best candidates. I've learned the hard way that thicker branches (over ½ inch) often fail to root properly, while thinner ones (under ¼ inch) are too delicate. Look for branches with a few leaves still attached; they'll continue photosynthesizing and support new root growth during the 4-8 week process.
Cutting Technique is Key: When making that ¼ inch deep, 2-3 inch long diagonal cut in Step 2, aim for the cambium layer—the green layer just beneath the bark. This is where root hormones are produced. If you're unsure about depth, make a shallow cut first and gently scrape to expose the cambium without damaging the branch. I've found that using a sharp knife or pruning shears makes this much easier than trying to force a dull tool.
Moisture Management is Critical: The instructions mention keeping soil moist but not soggy during the 4-8 week rooting period, but here's what nobody tells you—consistency is everything. I've had layers fail because the soil dried out between weekly checks, even when I thought I was watering enough. Use a spray bottle for light watering between deeper waterings, especially during hot weather. The soil should feel like a damp sponge when you squeeze it—if it crumbles, it's too dry.
Root Development Timeline: While the instructions mention 6-12 weeks for root development in Step 5, here's my pro tip: start checking for roots after about 8 weeks if you're impatient. Gently dig around the buried section with a small trowel—you should see white or tan roots if it's ready. If not, give it another 2 weeks. I've seen roots form as early as 7 weeks in ideal conditions, but don't rush the process or you might damage the delicate new roots.
Pro Tips for Propagate A Rosebush
- These simple tricks will help you avoid common pitfalls and maximize your success rate with rosebush propagation.
- Branch Selection Matters: In Step 1, focus on branches that are about ¼ to ½ inch thick and show signs of flexibility—these are your best candidates.
- Cutting Technique is Key: When making that ¼ inch deep, 2-3 inch long diagonal cut in Step 2, aim for the cambium layer—the green layer just beneath the bark.
Frequently asked questions
Got questions about propagating your rosebush? You’re not alone—even experienced gardeners hit snags! Below, we tackle the most common concerns to help you grow roots of confidence (and roses).
What’s the best time of year to layer a rosebush?
The ideal window is late spring to early summer (May–June) when temperatures are warm but not scorching, and the rose is actively growing. This gives new roots time to establish before winter. Avoid layering in extreme heat or cold—think Goldilocks conditions!
Do I need to use rooting hormone, or can I skip it?
Rooting hormone isn’t mandatory, but it dramatically boosts success rates (up to 80%!). If you skip it, ensure your cutting or layer is healthy, the soil is moist, and you’re patient. For cuttings, dip the stem in honey or cinnamon as a natural alternative—though results may vary.
How long until I see new roots forming?
With layering, roots typically appear in 4–8 weeks, depending on weather and rose variety. For cuttings, it can take 6–12 weeks. Stay patient! Check for resistance when gently tugging the stem—if it resists, roots are likely forming. Pro tip: Keep soil consistently moist but not soggy.
What if my layered stem rots or dies?
Don’t panic—this happens! Rot usually means overwatering or poor airflow. If the stem turns mushy or smells foul, trim it back and try again. For future layers, use well-draining soil, avoid burying too deeply, and choose healthy, flexible stems. Prevention is key!
Can I propagate roses from store-bought flowers?
Unfortunately, no—store-bought roses are often treated with growth inhibitors or sprayed with chemicals to prolong shelf life. For propagation, use stems from your own healthy rosebushes (or untreated, organic sources). If you’re desperate, try saving seeds from hip roses (wild varieties), but expect hybrid roses to revert to basics.
| Quick Troubleshooting Guide |
|---|
|
Issue: Layer won’t root Fix: Check moisture, sunlight, and stem health. Try again with a younger, more flexible stem. |
|
Issue: New growth is weak or yellow Fix: Could be overwatering or nutrient deficiency. Reduce water and fertilize lightly with diluted rose food. |
|
Issue: Pests on new layers Fix: Isolate affected plants. Use neem oil or insecticidal soap for mild infestations. |
Wrapping up and next steps
Propagating a rosebush through layering is a rewarding way to expand your garden without breaking the bank—or your back! 🌱 With patience, the right tools, and a little know-how, you’ll soon have thriving new plants rooted from your existing favorites.
Start small, stay consistent, and soon you’ll be sharing (or gifting!) your roses with pride.
Now that you’re armed with the secrets, why not try it today? Pick a healthy stem, follow the steps, and watch your green thumb grow! 🌸