
Transplanting
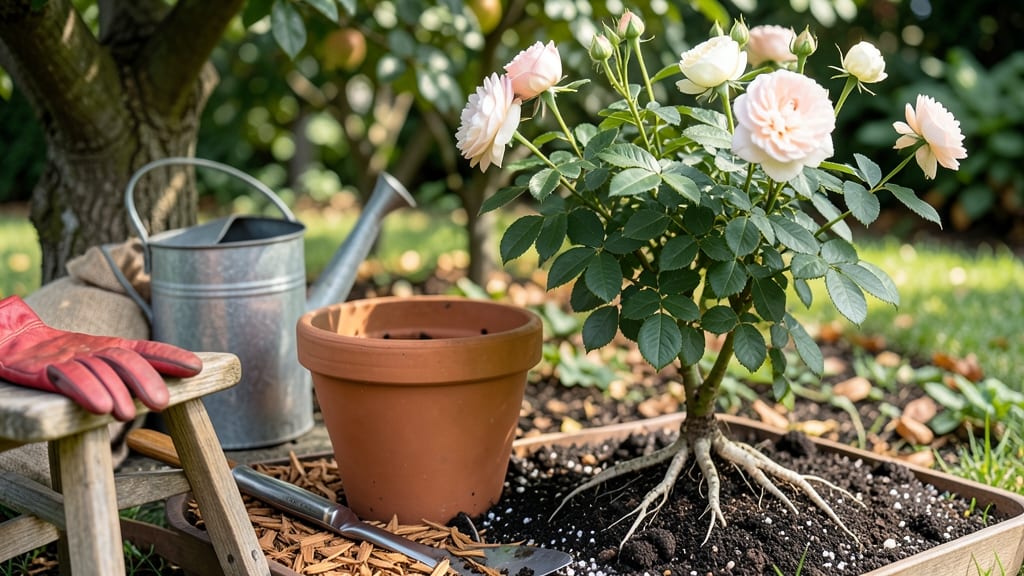
Repotting a rose bush in early spring unlocks its full potential—thicker canes, more blooms, and roots that finally get the space they crave. 🌹 I’ve seen roses go from struggling to thriving after just one repot, and the secret isn’t complicated: timing, the right pot, and gentle handling make all the difference.
Most gardeners wait too long, letting roots circle and choke the plant, but with this method, your rose will bounce back faster than you’d expect.
The key is working before new growth starts—late February to early March in most zones—when roots are dormant but ready to stretch into fresh soil.
You’ll need a container 2-4 inches larger than the current root ball (never go huge—it causes rot), well-draining soil mix (equal parts compost, perlite, and native soil), and a sturdy pot with drainage holes. Skip the fancy tools: a trowel, gloves, and a watering can are all you’ll need.
Even container roses benefit from this—just adjust the pot size to match their current growth.
After repotting, your rose will look like it’s taking a nap, but that’s normal. Keep it in dappled shade for a week while roots adjust, then gradually reintroduce sun. Water deeply but let the top inch dry between soakings—overwatering is the #1 killer after repotting.
Within 4-6 weeks, you’ll spot new shoots pushing through the soil, and by summer, your rose will be stronger than ever. The best part? You’ll avoid the shock that turns repotting into a risky gamble.
This method works for both in-ground roses (dig a trench to expand roots) and container-grown varieties. The only mistake to avoid? Repotting stressed plants—wait until they’ve recovered from winter dormancy.
With this approach, your roses won’t just survive the move—they’ll thrive like they’ve been planted fresh from the nursery. Ready to give it a try?
📚 In This Guide
- What you need
- Instructions
- Tips and common mistakes
- Wrapping up and next steps
What you need
- ● New pot: Choose a container 2–3 inches larger in diameter than the current one (e.g., if your bush is in a 12-inch pot, upgrade to 14–15 inches). Ensure it has drainage holes at the bottom.
- ● High-quality potting mix: Use a well-draining blend (e.g., 60% potting soil + 30% perlite/pumice + 10% compost). Avoid garden soil—it compacts and suffocates roots!
- ○ Rose fertilizer: A balanced, slow-release formula (e.g., 10-10-10 or organic options like fish emulsion). Optional but recommended: Add a handful of bone meal for phosphorus to boost blooms.
- ● Pruning shears: Sterilize with rubbing alcohol to prevent disease. Size: Sharp, bypass-pruners (3–4 inch blades).
- ● Garden gloves: Protect your hands from thorns and dirt. Tip: Choose heavy-duty leather for extra defense!
- ● Watering can or hose: With a gentle spray nozzle for thorough but controlled watering.
- ● Trowel or small shovel: For loosening roots if they’re tightly bound.
- ○ Mulch (optional): 2–3 inches of pine bark or shredded leaves to retain moisture and regulate soil temp.
- ○ Root stimulator (optional): A mycorrhizal fungi powder or seaweed extract to encourage root growth.
- ● Support stake (if needed): If your rose is tall or leggy, add a 5–6 ft bamboo stake for stability post-repotting.
- ● Timing: Repot in early spring (before new growth) or late fall to minimize stress. Avoid extreme heat or cold!
- ● Pre-watering: Water the rose 24 hours before repotting to reduce root shock.
- ● Location: Work in a shady, cool spot (e.g., under a tree) to protect the bush from sun stress.
Step-by-Step instructions for repotting a rose bush
Here’s how I refresh a rose bush’s home without stressing its roots—spring’s the perfect time.
🪴 Step 1: Choose the Right Pot and Soil Mix
Pick a container 2-4 inches wider than the current root ball, with drainage holes. I like terra cotta for roses—they breathe better and prevent root rot. Skip plastic unless it’s labeled "aeration-friendly."
Use a well-draining mix: blend 50% garden soil, 30% compost, and 20% perlite or sand. Roses hate soggy roots, so this combo keeps moisture balanced. If your soil drains poorly, add 10% coarse sand to improve aeration.
✂️ Step 2: Prune and Prepare the Rose Bush
Trim 1/3 of the oldest canes at the base with clean, sharp shears—this encourages fresh growth. Remove any dead, diseased, or crossing branches first. You’ll see new buds forming where you cut; that’s your sign the plant’s ready for a fresh start.
Water the rose deeply 24 hours before repotting. This keeps roots flexible and reduces breakage. If the soil feels dry, give it a thorough soak—roots should be moist but not waterlogged when you handle them.
🌱 Step 3: Lift and Inspect the Root Ball
Gently dig around the base, loosening soil with a spade until the root ball slides free. If roots are circled tightly (a sign of root-bound), use your fingers to tease them apart—this prevents future girdling. You’ll see white, fibrous roots; these are healthy and should spread into the new pot.
Check for pests or rot: Trim away any black, mushy roots with sterilized shears. Healthy roots smell earthy; rot smells foul. If you find grubs or weevils, rinse the roots under water before repotting.
💧 Step 4: Repot and Settle the Rose
Place 3-4 inches of soil mix in the bottom of the new pot, then position the rose so the top of the root ball sits 1 inch below the rim. Fill gaps with fresh mix, pressing lightly to remove air pockets. The soil should feel firm but not compacted—roots need room to breathe.
Water slowly until it drains from the bottom. Let excess water run out completely, then place the pot in a shaded, sheltered spot for 3-5 days. This gives roots time to adjust without stress from direct sun or wind.
☀️ Step 5: Acclimate and Care Post-Repotting
After 5 days, move the rose to its new location, gradually introducing it to morning sun first. Full sun can be reintroduced after 1-2 weeks, but watch for wilting or yellowing leaves—a sign it’s adjusting too fast.
Water deeply every 3-4 days (check soil—it should be dry 1-2 inches down). Feed with a balanced rose fertilizer after 4 weeks to support regrowth. You’ll see new shoots in 2-3 weeks—that’s your reward for gentle handling!
Tips & tricks for repotting a rose bush
These little adjustments make all the difference when you're giving your roses a fresh start.
Soil Mix Precision: When blending your 50% garden soil, 30% compost, and 20% perlite mix, sift the garden soil first to remove any large clumps. Compacted soil can create pockets in the pot that trap moisture and suffocate roots. I also like to add a handful of worm castings to the mix—they're packed with nutrients that help roses bounce back faster after repotting.
Pruning Insight: That 1/3 of oldest canes you're trimming in Step 2? Look for canes that are thinner and have fewer buds. These are the ones that have already given their all and need replacing. Cut just above a bud that faces outward—this encourages growth away from the center, giving your rose a fuller shape. Don't worry about making perfect cuts; roses are forgiving as long as you're using clean tools.
Root Handling Technique: When teasing apart those root-bound roots in Step 3, work gently but firmly—think of it like untangling headphones. If you encounter particularly tight circles, don't force them. Instead, make a small vertical cut through the center of the root ball with a sterilized knife. This creates a path for new roots to grow outward into the fresh soil. The goal is to encourage outward growth, not to create a root ball that's still compacted.
Acclimation Strategy: During that 3-5 day shaded recovery period in Step 4, I've found that misting the leaves lightly once a day helps maintain moisture without overwhelming the roots. Use a spray bottle with room-temperature water and avoid getting water on the buds. This mimics natural morning dew and helps the plant adjust more smoothly to its new environment. The key is gradual—just like you wouldn't go from a tanning bed to full sun!
Pro Tips for Repot A Rose Bush
- These little adjustments make all the difference when you're giving your roses a fresh start.
- Soil Mix Precision: When blending your 50% garden soil, 30% compost, and 20% perlite mix, sift the garden soil first to remove any large clumps.
- Pruning Insight: That 1/3 of oldest canes you're trimming in Step 2?
Frequently asked questions
Got questions about repotting your rose bush? You’re not alone—this process can feel tricky, but we’ve got answers! Here are some of the most common concerns and how to tackle them:
When is the best time to repot a rose bush?
The ideal window is early spring (before new growth starts) or late fall (after blooming). Avoid repotting during extreme heat or cold—roots need time to recover. If you’re in a mild climate, March or September are sweet spots!
How do I know if my rose bush needs repotting?
Watch for these red flags: roots circling the pot (like a pretzel!), soil drying out too fast, or roots growing through drainage holes. If your rose looks root-bound or blooms less vibrantly, it’s time to upgrade its home.
Can I repot a rose bush in winter?
Generally, no—winter repotting stresses dormant roots. However, if you’re in a warm climate (Zone 8+) and must act, choose a mild winter day and protect the bush with frost cloth afterward. Spring is always safer!
Should I water my rose bush before or after repotting?
Water it 1–2 days before to reduce shock, but avoid soggy soil. After repotting, don’t water immediately—wait 3–5 days to let roots settle. Then, water deeply to encourage root growth in the new pot.
What if my rose bush looks sad after repotting?
Don’t panic! Yellow leaves or wilting are normal for 2–4 weeks. Keep it in partial shade, water consistently (but not excessively), and avoid fertilizing for 4–6 weeks. If leaves stay crispy or black after 2 weeks, check for root rot or pests.
Can I use the same soil as before?
Not ideal! Roses thrive in well-draining, slightly acidic soil (pH 6.0–6.5). Mix 50% fresh potting soil with 30% compost and 20% perlite/sand for aeration. Avoid garden soil—it compacts and invites diseases.
How much bigger should the new pot be?
Upgrade by 2–4 inches in diameter (or 1 pot size up). A pot that’s too large holds excess moisture, while one too small causes root binding. For mature roses, aim for 15–20 gallons—they love room to stretch!
Wrapping up and next steps
Repotting your rose bush doesn’t have to be stressful—with the right timing, tools, and care, you can give your plant a fresh start while minimizing shock. Remember, spring is the perfect season for this task, and a little patience goes a long way in helping your roses thrive.
Now that you’re armed with these steps, grab your gloves and get ready to nurture those blooms!
🌱 Next step: Once your rose bush is happily settled in its new home, focus on consistent watering and gentle care to help it recover. Keep an eye on its progress—your hard work will soon pay off with lush, vibrant growth!