
Pruning
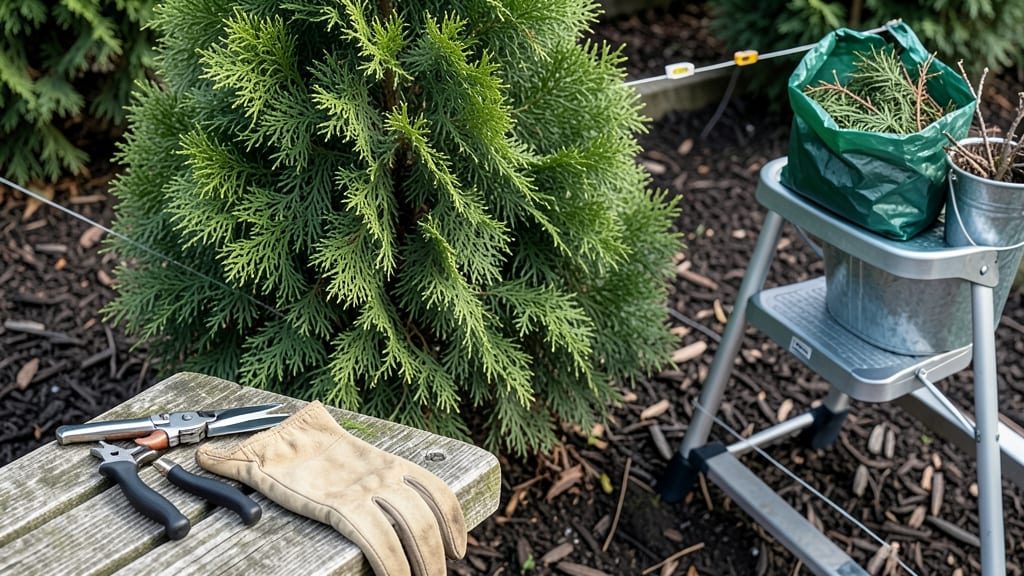
Trimming an arborvitae bush isn't just about shaping—it's about unlocking dense, healthy growth that keeps your hedge looking lush year after year. ✂️ I learned the hard way that aggressive cuts in summer can stress these evergreens, but the right timing and technique make all the difference.
The secret? Focus on thinning rather than shearing, and you'll avoid that "brown fringe" look that ruins the clean lines. You'll need sharp bypass pruners, a sturdy ladder, and a clear day to work—no midday heat.
The best time to trim is late winter or early spring, when new growth is just starting. This gives you a full growing season to fill in any gaps, and you'll avoid the shock that comes from cutting back in summer.
Start by removing any dead or crossing branches first; they're the easiest to spot against the fresh green. What you end up with is a bush that stays vibrant and full without that over-pruned look.
The key is to trim just above a leaf node—you'll see little buds where new growth emerges—and never cut into old wood. For a 3-foot-tall hedge, aim for no more than 1/3 of the growth in any single season, and always step back to check your shape.
This method works for both formal hedges and natural shapes, and it keeps your arborvitae looking fresh and thriving for decades. The payoff? A hedge that requires less frequent maintenance and stays disease-resistant because you're not stressing the plant. Let's get those shears ready!
📚 In This Guide
- What you need
- Instructions
- Tips and common mistakes
- Wrapping up and next steps
What you need
- ● Hand pruners or bypass pruners – Sharp, clean blades (avoid anvil pruners—they crush stems). Size: 5–7 inches for medium branches.
- ● Loppers – For thicker branches (½–1.5 inches). Quantity: 1 pair (extendable loppers save your back!).
- ● Hedge shears – Bypass-style (not anvil) for clean cuts. Size: 6–8 inches for dense foliage.
- ● Ladder or step stool – Sturdy, non-slip (extendable ladders work for taller bushes). Height: Reach your arborvitae’s top safely!
- ● Gloves – Garden-grade (cut-resistant if your bush has thorns). Bonus: Bring a spare pair—sap gets messy!
- ● Pruning saw – Only if branches exceed 2 inches in diameter. Type: Curved or bow saw for precision.
- ● Disinfectant (70% isopropyl alcohol or bleach solution) – Wipe tools between cuts to prevent disease spread.
- ● Trash bags or bucket – For clippings. Pro tip: Line the bucket with a bag for easy disposal!
- ● String or garden twine – Tie branches back to check for symmetry before trimming.
- ● Pruning sealant – For large cuts (½ inch or wider) to minimize sap loss (though arborvitae rarely needs it).
- ● Work apron with pockets – Keep tools and gloves handy (and avoid dropping them in the grass!).
- ● Safety glasses – Protect your eyes from flying debris (especially when using a saw).
- ● Spray bottle with water – Dampen shears occasionally to reduce friction and heat buildup.
Step-by-step instructions for trimming an arborvitae bush
Here's how to keep your arborvitae thick, lush, and healthy—no guesswork required.
✂️ Step 1: Gather the Right Tools and Timing
Start by grabbing bypass pruning shears (they make clean cuts without crushing stems) and a ladder if your bush is taller than 6 feet. I always check the weather first—trim on a dry, overcast morning to avoid stressing the plant. Early spring or late fall are ideal times, but you can do light shaping anytime.
Never trim in extreme heat or cold. Arborvitae are evergreens, so they stay vulnerable to sunburn and frost damage year-round. If you must shape in summer, do it in the early morning when the plant is hydrated. You'll know you're ready when your tools are sharp and the forecast promises calm weather for at least 24 hours.
✂️ Step 2: Assess the Bush's Natural Shape
Step back and examine your arborvitae from all sides. Look for thin, leggy branches or areas where the foliage is sparse—these are your first targets. Arborvitae grow best with a natural, tapered shape, so avoid cutting into a perfect geometric form. Your goal is to encourage dense, bushy growth from the bottom up.
Run your hands along the branches to feel for dead or dying sections—they'll be brittle and crumbly. Mark these with a piece of twine or tape before you start cutting. Healthy branches should have soft, flexible needles that feel springy. If you see brown, woody stems, those need removal first.
✂️ Step 3: Thin Out the Interior for Airflow
Begin by thinning the center of the bush, removing about 20-30% of the oldest, thickest branches. Cut these back to a healthy lateral branch or bud, making your cut just outside the bud at a 45-degree angle. This encourages new growth from the sides and prevents a "bald" center.
Work your way outward, shaping the outer edges last. Avoid cutting more than one-third of the bush's total foliage in a single session—this stresses the plant. You'll see the difference immediately: sunlight will reach the inner branches, and new growth will fill in those bare spots over the next growing season.
✂️ Step 4: Shape the Outer Edges for Definition
Now focus on the outer edges, where you'll create a smooth, rounded silhouette. Use your shears to trim no more than ¼ inch from the tips of branches—this prevents over-pruning and keeps the bush full. If a branch is growing outward too aggressively, cut it back to a side bud pointing in the direction you want new growth to go.
Step back frequently to check your progress. The goal is a gradual taper, with the widest part near the base and the narrowest at the top. Avoid cutting into the "sweet spot" where branches meet the trunk—this can create entry points for pests and diseases. If you accidentally cut too deep, seal the wound with pruning sealant to protect the plant.
💧 Step 5: Clean Up and Monitor for Recovery
After trimming, rake up all the clippings and dispose of them—never leave them at the base of the plant, as they can harbor pests and diseases. Water the bush deeply to help it recover from the stress of pruning. You'll notice new growth emerging from the sides within 4-6 weeks, especially if you trimmed in early spring.
Keep an eye on the bush over the next few weeks. If the needles turn brown or the growth slows, it might need more frequent watering or protection from harsh sun. A lightly fertilized arborvitae recovers faster, so consider adding a balanced, slow-release fertilizer in early spring if your plant looks tired.
Tips & tricks for perfect arborvitae trimming
A few simple strategies will help you avoid common pitfalls and get professional results every time.
Timing Secret: The 24-hour calm weather window after trimming is crucial for recovery. If you're trimming in summer, schedule your session for early morning—this gives the plant time to rehydrate before the midday sun hits. I've seen arborvitae show stress symptoms when trimmed in hot afternoons, even with proper watering afterward.
Tool Technique: Always make your cuts just outside the bud at a 45-degree angle—this is where new growth will emerge. I learned this the hard way after accidentally cutting too close to the bud, which left ugly scars. For stubborn branches, use your shears to make a small notch first, then complete the cut cleanly. This prevents tearing the bark.
Visual Cue: When shaping the outer edges, imagine your bush as an upside-down triangle. The widest part should be at the base, gradually narrowing toward the top. Step back every few cuts to check your progress—your eyes will spot imbalances your hands might miss. This gradual taper creates that natural, full look arborvitae are known for.
Recovery Hack: After trimming, give your bush a deep watering that penetrates at least 6 inches into the soil. I use a garden hose with a slow, steady stream rather than a quick spray. This mimics natural rainfall and helps the plant recover faster from the stress of pruning. You'll see new growth emerge from the sides within 4-6 weeks if you've done everything right.
Pro Tips for Trim An Arborvitae Bush
- A few simple strategies will help you avoid common pitfalls and get professional results every time.
- Timing Secret: The 24-hour calm weather window after trimming is crucial for recovery. If you're trimming in summer, ...
- Tool Technique: Always make your cuts just outside the bud at a 45-degree angle—this is where new growth will emerge....
Frequently asked questions
Got questions about trimming your arborvitae? You’re not alone!
Here are answers to the most common concerns—from timing to tools—to help you keep your bush looking its best with minimal stress.
When is the best time of year to trim an arborvitae?
The ideal window is late winter to early spring (February–March) before new growth starts. Avoid heavy pruning in late summer or fall, as this can stress the plant and leave it vulnerable to winter damage. Light shaping for cleanup is fine year-round, but never trim more than 25% of the foliage at once.
Do I need special tools to trim an arborvitae?
Basic hand pruners work for small bushes, but for taller or thicker branches, invest in bypass pruners or a pruning saw for clean cuts. A ladder is a must for safety if your bush is over 6 feet tall. Dull tools cause jagged cuts, so sharpen blades before starting—this prevents tearing and promotes faster healing.
What should I do if my arborvitae looks brown or dead after trimming?
Brown patches can happen if you cut into old wood (no green tissue inside) or over-pruned. Don’t panic! Arborvitaes are resilient. Water deeply after trimming, and avoid fertilizing until new growth appears in spring. If large sections are dead, check for pests (like spider mites) or disease (like canker)—these may need targeted treatment.
Can I shape my arborvitae into a specific form, like a spiral or hedge?
Arborvitaes respond well to structured shaping. For hedges, trim the top and sides evenly every 4–6 weeks during the growing season. For artistic designs (like spirals), use a string guide or staking method to mark your shape. Take it slow: Aim for gradual changes to avoid shock. Pro tip: Use sharp shears and step back often to check symmetry!
Will trimming attract pests or harm beneficial insects?
Trimming won’t directly attract pests, but over-pruning or improper cuts can stress the plant, making it more susceptible to issues like spider mites. To protect pollinators, avoid heavy trims during peak bloom times (spring). Focus on removing only dead or overgrown branches—healthy arborvitaes naturally support beneficial insects like bees and ladybugs.
Wrapping up and next steps
Trimming your arborvitae doesn’t have to be intimidating—with the right tools, timing, and technique, you’ll keep it lush and thriving all year long! 🌿 Whether you’re shaping it for privacy, aesthetics, or health, remember to trim gradually, use sharp tools, and focus on the tips to encourage dense growth.
Now that you’re armed with these secrets, grab your shears and give your arborvitae the care it deserves.
Ready to take it further? Next up:
- Learn how to diagnose common arborvitae pests or diseases and treat them early.
- Explore seasonal care tips to keep your shrubs vibrant in every climate.