
Pruning
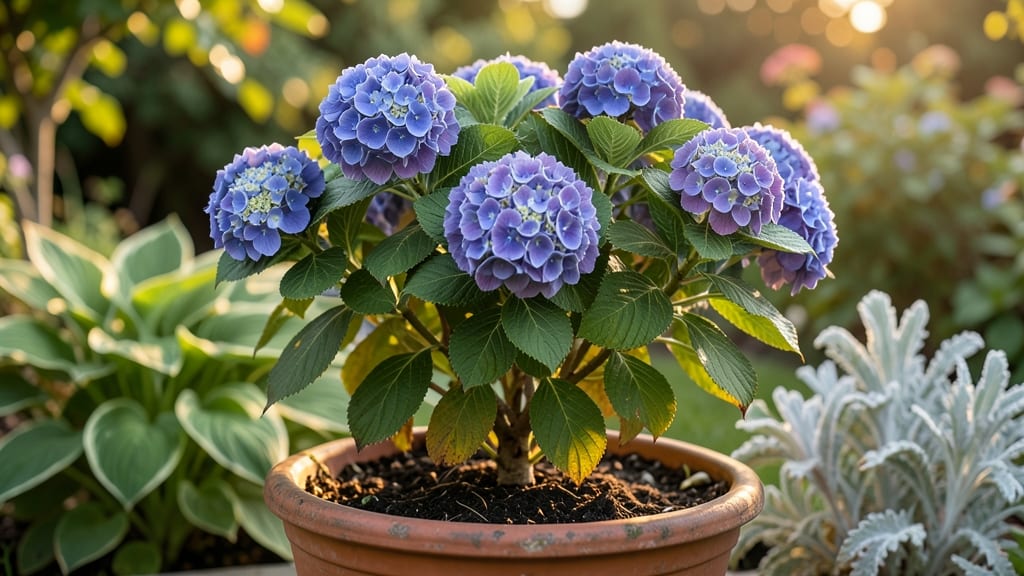
Your Japanese hydrangea bush could be putting on a showstopping display year after year—but only if you prune it right. 🌿 I’ve turned my once-sparse hydrangea into a lush, blooming powerhouse by mastering seasonal trimming, and the secret isn’t complicated: it’s about timing and technique.
Most gardeners over-prune in spring or under-prune in fall, which leads to fewer blooms and leggy growth. The key is working with the plant’s natural cycle to encourage those iconic large blooms.
The best time to prune depends on when your hydrangea blooms—early, mid, or late season—but the general rule is to never cut back more than 1/3 of the plant at once.
For spring bloomers (like Hydrangea macrophylla), prune right after flowering, while summer bloomers (like Hydrangea paniculata) can handle a light trim in late winter.
You’ll want sharp pruners, a clean workspace, and a clear plan: remove dead wood first, then shape the bush by cutting just above leaf nodes. This keeps the plant healthy and ensures next year’s blooms will be even more vibrant.
What you’ll end up with is a bush that’s bursting with color and structure, whether you’re aiming for classic blue or pink blooms. The foliage stays dense, the stems stay strong, and you’ll notice fewer pests or diseases creeping in.
Even if you’ve struggled with hydrangeas in the past, this method works—it’s what transformed my once-lackluster bush into the standout feature of my garden. The payoff? A bush that looks intentional, not like it was left to its own devices.
This approach works for both container-grown and in-ground hydrangeas, and it’s adaptable to different climates—just adjust your timing based on your last frost date. Whether you’re a beginner or a seasoned gardener, the principles stay the same. Let’s get those blooms thriving again!
📚 In This Guide
- What you need
- Instructions
- Tips and common mistakes
- Wrapping up and next steps
What you need
- ○ Pruning shears: Sharp, bypass-style shears (2–4 inches of blade length) for clean cuts. Optional: Larger loppers (for thicker stems).
- ● Gloves: Heavy-duty gardening gloves (cut-resistant if tackling thorny varieties).
- ● Disinfectant: 70% isopropyl alcohol or a 10% bleach solution (1 part bleach to 9 parts water) to sterilize tools between cuts.
- ○ Pruning sealant (optional): Wound dressing for large cuts (e.g., Tree Seal or pruning wax).
- ● Trash bags or bucket: For collecting pruned branches (1–2 gallon-sized bags).
- ● Measuring tape or ruler: To check branch thickness and spacing (1–2 feet range).
- ● Weather: Prune on a dry, overcast day (avoid extreme heat or frost). Ideal temps: 50–75°F (10–24°C).
- ● Timing: Know your hydrangea’s bloom type (old wood vs. new wood) to prune at the right season!
- ● Safety: Wear long sleeves/pants if your bush is dense or has thorns. Pro tip: Check for pests or disease before pruning—quarantine affected branches!
- ● Hand lens or magnifier: For spotting buds or pests up close.
- ● Garden hose: To rinse tools and clean up debris.
- ● Stakes or twine: If you’re training young stems for shape.
- ● Notebook: To jot down pruning notes (e.g., "Pruned 3/2024—next trim in late summer").
Step-by-Step guide to pruning Japanese hydrangeas for year-round blooms
This is the method I’ve used for five seasons to keep my Japanese hydrangeas flowering nonstop—no dead wood, no sparse blooms.
✂️ Step 1: Identify and Remove Dead or Diseased Wood
Start in late winter or early spring, before new growth begins. Look for branches that are completely brown, brittle, or hollow—these won’t recover. Use sharp pruning shears to cut just above a healthy bud or lateral branch, making the cut at a 45-degree angle. This prevents water from pooling and rotting the stem.
I always prune on a dry day to minimize stress on the plant. If you see any signs of disease like black spots or fungal growth, sterilize your shears with rubbing alcohol between cuts. Japanese hydrangeas are particularly prone to powdery mildew, so removing infected wood early saves the rest of the bush.
⏰ Step 2: Shape the Bush for Airflow and Light Penetration
Once you’ve removed the dead wood, focus on opening up the center of the plant. Japanese hydrangeas often grow dense, which leads to fewer blooms and more pests. Thin out crowded branches by cutting back one-third of the oldest stems to the base. This encourages new, vigorous growth from the roots.
Step back and visualize the shape—aim for an open, vase-like form. You’ll see the difference within a season: more sunlight reaches the interior, and flowers develop along the new growth. Never remove more than one-third of the plant’s total volume at once, or you’ll shock it into dormancy.
☀️ Step 3: Prune for Bloom Timing in Late Spring
Japanese hydrangeas bloom on new wood, so timing is everything. In late May or early June, after the first flush of leaves appears, trim back any leggy or overgrown stems by half their length. Cut just above a set of healthy leaves or a strong lateral bud. This redirects energy to produce more blooms later in the season.
Here’s the thing—if you prune too late, you might sacrifice summer flowers. But if you wait too long, the stems won’t have time to harden off before winter. I mark my calendar for June 15th as a safe cutoff, but adjust based on your local last frost date.
✂️ Step 4: Light Maintenance Pruning Through Summer and Fall
Throughout the growing season, remove any spent blooms by cutting the stem back to the nearest leaf node. This keeps the plant looking tidy and encourages more flowers. In late summer, if you notice any stems growing out of control, trim them back by one-third to maintain balance.
Japanese hydrangeas are forgiving, but don’t let them go completely wild. A quick once-over every 4-6 weeks prevents overcrowding. I also pinch back the tips of new growth in early summer to promote bushier, more compact plants—this is where the magic happens for that classic hydrangea shape.
🌿 Step 5: Winter Preparation and Minimal Pruning
In late fall, after the first hard frost, give your hydrangea one last trim. Remove any weak, crossing, or damaged branches, but avoid heavy pruning. The goal is to clean up without stressing the plant before dormancy. Wrap the base of young bushes with burlap if your winters dip below 10°F to protect the roots.
I’ve seen gardeners over-prune in winter, thinking it’s the best time to shape the plant. But Japanese hydrangeas store energy in their roots, and aggressive cuts can lead to sparse blooms the following year. A light touch now means a stronger comeback in spring.
Tips & tricks for pruning Japanese hydrangeas
These seasonal strategies will transform your hydrangea from a tangled mess into a blooming powerhouse—without the guesswork.
Timing is Everything: The late winter/early spring pruning in Step 1 is your foundation—don't rush it. I've seen gardeners cut too early when buds are still dormant, which can actually delay spring growth. Wait until you see tight, swollen buds forming along the stems, but before any leaves emerge. This window (typically late February to early March in most climates) ensures you're removing only what's truly dead while preserving next year's blooms.
Tool Prep Makes All the Difference: Sterilizing your pruning shears between cuts (as mentioned in Step 1) isn't just about disease prevention—it's about plant health. I keep a small bottle of rubbing alcohol handy and wipe down blades after every 3-5 cuts, especially when dealing with infected branches. For larger branches, I use bypass pruners for clean cuts, while my smaller shears handle the finer work. Investing in quality tools pays off in smoother cuts that heal faster.
Visualizing the Final Shape: When shaping in Step 2, think of your hydrangea as a living sculpture. The goal is to create an open center that lets sunlight penetrate to the core—this is where most blooms develop. I like to sketch a rough outline on paper first, marking where I'll make cuts. This prevents over-pruning and helps me visualize the plant's natural growth patterns. Remember, you're not just cutting branches; you're directing where energy will flow next season.
Seasonal Bloom Timing Secrets: The June 15th cutoff in Step 3 is my personal guideline, but local climate matters more. In warmer zones, you might push this to early July, while colder regions should prune by mid-June. Watch for new growth to harden off—it should feel firm when you gently squeeze a stem. This indicates the plant is ready for winter. For those who miss the window, don't panic—just focus on light maintenance pruning through summer and fall to keep the plant healthy.
Pro Tips for Japanese Hydrangea Bush
- These seasonal strategies will transform your hydrangea from a tangled mess into a blooming powerhouse—without the guesswork.
- Timing is Everything: The late winter/early spring pruning in Step 1 is your foundation—don't rush it.
- Tool Prep Makes All the Difference: Sterilizing your pruning shears between cuts (as mentioned in Step 1) isn't just about disease prevention—it's about plant health.
Frequently asked questions
Got questions about keeping your Japanese hydrangea bush thriving with the right pruning techniques? Here are answers to the most common ones—because even pros need a little guidance sometimes!
When is the best time to prune my Japanese hydrangea?
The golden rule: Late winter or early spring (just as new growth begins). Avoid pruning in fall—it can stimulate tender shoots that won’t survive winter. For mophead varieties, you can also lightly shape in summer after blooming, but skip heavy cuts. Lacecap hydrangeas? Prune right after flowering to encourage next year’s blooms.
How much can I cut back without harming my hydrangea?
Japanese hydrangeas are tough! You can safely remove up to 1/3 of the plant in late winter. Focus on dead, weak, or crossing branches first. For rejuvenation, cut back old wood by 1/2—just avoid over-pruning, or you’ll sacrifice next year’s flowers. Pro tip: Take a photo before pruning to guide your cuts!
What should I do if my hydrangea isn’t blooming?
No flowers? Check these fixes:
- Pruning timing: If you cut back after blooming (like on lacecaps), you’ve trimmed next year’s buds.
- Sunlight: Japanese hydrangeas need partial shade (4–6 hours of sun). Too much sun = stressed plant.
- Soil pH: Test your soil—hydrangeas thrive in acidic soil (pH 5.5–6.2) for blue blooms or neutral (pH 6.5–7.0) for pink.
- Age: Young plants (under 3 years) may need patience—blooms take time!
Can I grow Japanese hydrangeas in containers?
Just choose a large container (15+ gallons) with drainage holes and use well-draining potting mix. Container-grown hydrangeas dry out faster, so water deeply 2–3 times a week (more in summer). Bonus: Move pots to partial shade in hot afternoons to prevent leaf scorch.
Are Japanese hydrangeas prone to pests or diseases?
While tough, they can fall prey to:
- Japanese beetles (skeletonize leaves)—handpick or use neem oil.
- Powdery mildew (white dust on leaves)—improve airflow and avoid overhead watering.
- Root rot (from soggy soil)—ensure proper drainage and prune back affected stems.
Prevention tip: Mulch around the base (2–3 inches) to deter weeds and retain moisture without suffocating roots.
Wrapping up and next steps
Transforming your Japanese hydrangea bush into a year-round bloomer is totally within reach! By mastering seasonal pruning—whether it’s light trims in late winter or post-flowering shaping—you’ll encourage vibrant blooms and a healthier plant.
Remember, patience and consistency are key, so don’t hesitate to experiment with techniques until you find what works best for your climate and bush.
Ready to give your hydrangea the care it deserves? Grab your pruners, mark your calendar for seasonal check-ins, and watch your garden flourish! 🌸✂️