
Pruning
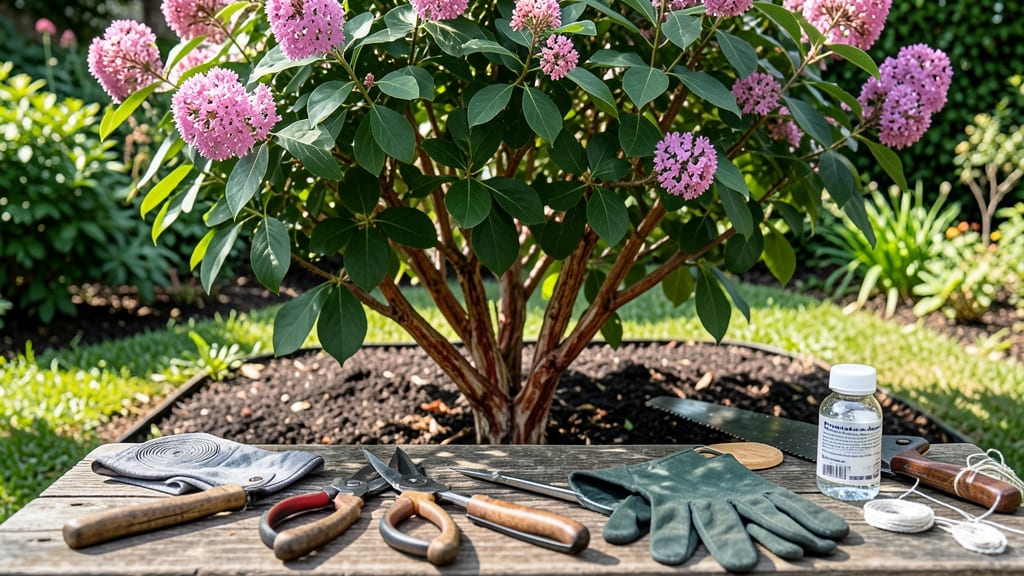
Pruning the crepe myrtle bush in late winter transforms it from a tangled mess into a showstopping summer bloomer—and I’ve finally cracked the code after years of over-trimming and sad, leggy branches. ✂️ The secret isn’t aggressive cuts; it’s strategic shaping that encourages dense growth and prevents those ugly "crepe murder" stubs.
Most people wait too late or hack too hard, but timing and technique make all the difference.
You’ll need just three tools: sharp pruners for small branches, loppers for thicker stems, and a ladder if your bush is taller than you are. The goal is to remove dead, crossing, or weak branches first—these are the ones stealing energy from your future blooms.
Then, cut back last year’s growth to just above a leaf node (that little bump where branches meet). This simple step ensures new growth starts strong and your bush stays bushy, not bare.
By summer, you’ll see thick, vibrant canes covered in clusters of flowers, and the foliage will be so lush your neighbors will ask for your secrets. The key is patience: avoid cutting into the trunk or removing more than one-third of the bush at once.
Over-pruning stresses the plant and delays blooms. Think of it like giving your crepe myrtle a haircut—less is more, and the results speak for themselves.
This method works for any mature crepe myrtle, whether it’s a small shrub or a towering tree. The only exception? If your bush is brand-new, wait a full year before pruning—let it establish its structure first.
Once you master this, your crepe myrtle will reward you with bold blooms from June to September and a shape that’s the envy of the neighborhood.
📚 In This Guide
- What you need
- Instructions
- Tips and common mistakes
- Wrapping up and next steps
What you need
- ● Pruning shears or loppers – Choose bypass pruners (for clean cuts) or loppers (for thicker branches, 1.5"–2.5" cutting capacity). Sterilize blades with rubbing alcohol before and after use to prevent disease spread.
- ● Hand pruners – For smaller branches (up to 0.5" thick). Opt for ergonomic grips to reduce hand fatigue.
- ● Safety gear: Work gloves (cut-resistant, like leather or synthetic mesh)
- ● Safety glasses (to shield eyes from debris)
- ● Disposable pruning bags or bucket – Collect trimmings for compost or disposal (1–2 large bags or a 5-gallon bucket).
- ● Ladder or step stool – If your bush exceeds 6–8 feet tall. Ensure it’s stable and non-slip.
- ● Rag or paper towels – For wiping sap or sticky residue off tools.
- ○ Marking twine or tape – Optional but helpful for identifying branches to remove before cutting.
- ● Hedge shears – For shaping overgrown or bushy crepe myrtles (if pruning for a formal look).
- ● Sealing wax or pruning paint – Apply to large cuts (>1" diameter) to prevent disease entry (e.g., Tanglefoot Tree Wound Pruning Sealer).
- ● Extension pole saw – For high branches without climbing (e.g., Fiskars 24" Extendable Pole Saw).
- ● Spray bottle with water – Keeps blades cool and sharp during long sessions.
- ● Garden kneeler or pad – For comfort if working near the base.
- ● Timing: Prune in late winter or early spring (before buds swell) to avoid stressing the plant. Ideal temps: 40–60°F.
- ● Weather: Choose a dry, overcast day to prevent sap bleeding and fungal growth.
- ● Plant health check: Look for dead, diseased, or crossing branches to prioritize removal.
Step-by-Step instructions for pruning crepe myrtle bush
Here's how I transform leggy, overgrown crepe myrtles into strong, blooming showstoppers every year.
✂️ Step 1: Remove Dead or Diseased Wood First
Start by scanning your bush for branches that are brown, brittle, or showing signs of disease like black spots or oozing sap. Grab your pruners and cut these out at the base where they meet the main trunk or larger branches. I always work from the bottom up—this keeps me from accidentally cutting healthy branches that might be hidden behind the dead ones.
Make clean cuts just outside the branch collar, the swollen area where the branch meets the trunk. Avoid leaving stubs, as they can rot and invite pests. If a branch is larger than ½ inch thick, use your loppers instead of pruners to avoid pinching or crushing the wood.
✂️ Step 2: Prune for Structure and Shape
Crepe myrtles bloom on new wood, so you can shape them aggressively without fear of losing flowers. I like to step back and visualize the bush as a vase—wider at the bottom, narrower at the top. Start by removing any crossing branches that rub against each other, as these will create wounds and weaken the plant.
Next, cut back any branches that grow inward toward the center of the bush. Aim to open up the canopy so air circulates freely. For a multi-stemmed crepe myrtle, prune the tallest stems first to create a balanced silhouette. Never remove more than ⅓ of the plant's total foliage in one season—this ensures it has enough energy to recover and bloom.
✂️ Step 3: Thin Out Overcrowded Branches
Look for clusters of branches growing too close together. Select the weakest or smallest branch in each group and cut it back to the main stem. I like to keep the strongest, healthiest branches to maintain the bush's vigor. If you're unsure which branch to remove, imagine the plant without it—does it look better? If yes, cut it.
Pay special attention to the lower third of the bush. Many gardeners make the mistake of leaving a bare trunk, but crepe myrtles look best when they have foliage all the way down. Thin out branches here to encourage new growth. Avoid cutting back into old wood—always prune just above a leaf node or bud to promote new shoots.
✂️ Step 4: Clean Up and Sterilize Tools
Once you've finished pruning, take a moment to clean up any fallen debris. This reduces the risk of disease spreading. I like to use a small rake or broom to gather up clippings and dispose of them in the trash or compost bin. If you notice any signs of disease on the branches you've removed, bag them separately to prevent contamination.
Before putting your tools away, wipe down the blades with rubbing alcohol or a 10% bleach solution to sterilize them. This step is crucial, especially if you've been pruning multiple plants. Store your tools in a dry place to prevent rust and keep them sharp for next time.
🌿 Step 5: Post-Pruning Care
After pruning, water your crepe myrtle deeply to help it recover. The roots will need moisture to support new growth. I usually apply 1-2 inches of mulch around the base of the plant, keeping it a few inches away from the trunk to prevent rot. This helps retain moisture and regulates soil temperature.
Monitor your bush over the next few weeks for any signs of stress, like wilting or yellowing leaves. If you see new growth emerging from the pruned areas, that's a good sign your plant is healing well. Avoid fertilizing immediately after pruning—wait until you see new shoots before applying any nutrients.
Tips & tricks for pruning crepe myrtle bush
Transforming your crepe myrtle into a blooming beauty takes a few key tricks—here's what I've learned after years of pruning these showstoppers.
Branch Collar Precision: When cutting branches in Step 1, focus on the branch collar—the swollen area where the branch meets the trunk. Cutting just outside this collar prevents damage to the healing tissue. I've seen too many gardeners leave stubs that rot or create entry points for pests. Use your pruners to make a clean cut at a slight angle, about ¼ inch outside the collar. This simple detail makes all the difference in how quickly your plant recovers.
The ⅓ Rule: In Step 2, remember the golden rule: never remove more than ⅓ of the plant's total foliage in one season. I learned this the hard way after over-pruning and watching my bush struggle to bloom. If you're unsure, take before photos and count branches—this visual reference helps maintain that critical balance. The goal is to shape without shocking the plant.
Tool Maintenance Matters: After finishing Step 4, take an extra 5 minutes to sharpen your pruners and loppers. Dull tools crush wood fibers, causing unnecessary stress to the plant. I keep a small sharpening stone in my toolbox and hone the blades before each pruning session. Clean, sharp tools also make the job easier and more precise—you'll notice the difference immediately when cutting.
Mulching Strategy: When applying that 1-2 inches of mulch in Step 5, keep it 2-3 inches away from the trunk. This prevents moisture buildup that can lead to rot. I use shredded hardwood mulch because it breaks down slowly and improves soil structure over time. The key is to create a donut shape around the base—this protects the roots while keeping the center dry.
Pro Tips for Prune Crepe Myrtle Bush
- Transforming your crepe myrtle into a blooming beauty takes a few key tricks—here's what I've learned after years of pruning these showstoppers.
- Branch Collar Precision: When cutting branches in Step 1, focus on the branch collar—the swollen area where the branch meets the trunk.
- The ⅓ Rule: In Step 2, remember the golden rule: never remove more than ⅓ of the plant's total foliage in one season.
Frequently asked questions
Got questions about pruning your crepe myrtle bush? You’re not alone! Here are answers to the most common concerns to help you trim with confidence and keep your shrub thriving.
When is the best time to prune a crepe myrtle?
The ideal time is late winter or early spring (just before new growth starts). Avoid pruning in fall or summer—this can stimulate weak growth or reduce next year’s blooms. If you missed the window, a light cleanup in early spring is better than nothing!
How much can I cut back my crepe myrtle?
You can safely prune up to ⅓ of the bush’s height in one season. For mature trees, remove dead, crossing, or weak branches first, then shape the canopy. Avoid over-pruning—crepe myrtles bloom on new wood, so drastic cuts may delay flowers.
Why do my crepe myrtle branches look “skeletal” after pruning?
This is normal! Crepe myrtles have exfoliating bark that peels naturally, and pruning exposes fresh stems. If branches look completely bare or mushy, they may be dead—remove them entirely. Healthy branches will sprout new leaves and buds in spring.
Can I prune a crepe myrtle in summer?
Summer pruning is not recommended unless removing dead/diseased wood. Heavy pruning then can reduce next year’s flowers and stress the plant. If you must trim, do it after blooming (late summer) and keep cuts minimal to avoid stunting growth.
What’s the difference between pruning and “topping” a crepe myrtle?
Pruning
= strategic cuts to shape, remove dead wood, and encourage blooms. Topping = hacking off the top flush with a horizontal cut—this is a no-go! Topping creates ugly, weak regrowth and invites pests. Always prune at a branch collar for clean, healthy growth.
Pro Tip:
Use sterilized tools (rubbing alcohol or bleach wipe) between cuts to prevent spreading disease. And if your crepe myrtle has “crepe myrtle bark scale,” prune in dormant season to reduce infestations.
Wrapping up and next steps
Pruning your crepe myrtle in late winter isn’t just about tidying up—it’s the secret to vibrant summer blooms and a healthier, more resilient plant! By following the right techniques, you’ll encourage strong growth, prevent pests, and keep your bush looking stunning year after year. 🌸
Ready to transform your landscape? Grab your pruners, mark your calendar for late winter, and get started—your crepe myrtle will thank you with a showstopping display come summer! For extra confidence, review our FAQs or consult a local gardening expert before diving in.