
Pruning
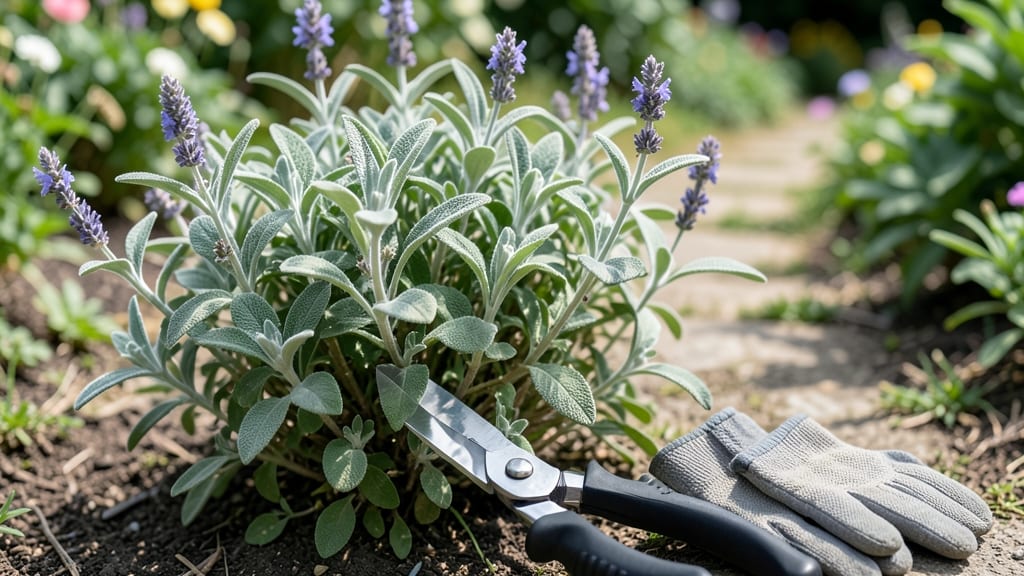
Pruning your sage bush isn't just about shaping—it's about keeping it vibrant and productive year after year. 🌿 I learned the hard way that skipping this step leads to leggy, sparse plants that struggle to rebound, even in ideal conditions.
The right cuts encourage dense growth, prevent disease, and keep those fragrant leaves coming. Timing matters more than most gardeners realize. Early spring is prime for shaping, while late winter is perfect for rejuvenating older bushes. You'll need sharp pruners, gloves, and a clear day—no rain or wind.
The goal? Remove dead wood first, then thin out crowded branches to let light and air circulate. What you'll end up with is a bush that stays compact, bushy, and bursting with new growth by midsummer.
The leaves stay tender, the aroma stays strong, and you avoid the woody, overgrown look that makes sage look neglected. Even a mature plant can bounce back with the right approach. This works for both garden beds and container-grown sage, though container plants need slightly more frequent trimming.
Let's get those shears out and transform your sage from straggly to stunning!
📚 In This Guide
- What you need
- Instructions
- Tips and common mistakes
- Wrapping up and next steps
What you need
- ● Pruning shears: Sharp, bypass-style shears (4–6 inches) for clean cuts—sterilize with rubbing alcohol before use!
- ● Hand pruners: For smaller branches (avoid dull blades—they crush stems!).
- ● Gloves: Heavy-duty gardening gloves (nitrile-coated for grip and protection).
- ● Disposable pruning bags: 2–3 medium-sized bags (10–15 gallons) to collect clippings.
- ● Hose or water source: To rinse tools and clean cuts (prevents disease spread).
- ○ Rake or leaf blower: Optional, for clearing fallen debris post-prune.
- ● Loppers: For thicker stems (if your sage bush is mature).
- ● Horticultural oil: 1 bottle (for sterilizing tools between cuts).
- ● Pruning saw: Only if dealing with very thick woody growth (rare for most sage bushes).
- ● Notebook & pen: To jot down pruning notes (e.g., "trimmed 3/2024—focused on lower branches").
- ● Compost bin: For repurposing sage clippings (dried leaves make great mulch!).
Instructions for pruning sage bushes: keep them lush and healthy
Here's the straightforward method I use to keep sage bushes thriving year-round with minimal effort.
✂️ Step 1: Prune in Early Spring for New Growth
Start your pruning in early spring—right after the last frost but before new shoots appear. This is the best time because the plant has stored energy from the previous growing season. Use clean, sharp pruning shears to make cuts just above a leaf node (the point where leaves attach to the stem). This encourages new growth from that spot.
Remove any dead, diseased, or crossing branches first—they'll only compete with healthy growth. I like to cut back about one-third of the plant's height at this stage. This might sound drastic, but sage is tough and responds well to bold pruning. You'll see fresh, vibrant green shoots emerging within 2-3 weeks if you've timed it right.
✂️ Step 2: Light Trim After Flowering to Encourage Foliage
After sage flowers in late spring or early summer, give it a second trim to redirect energy back into leaf production. Cut back the flowering stems by half to keep the bush full and bushy. The reason we do this is simple: sage plants put all their energy into seed production when they flower, leaving the leaves sparse and less flavorful.
Watch for woody stems—these are older branches that won't regrow well. If you see them, cut them back to the base. The goal here is to maintain a shape that lets sunlight reach all parts of the bush. You'll notice the leaves become thicker and more aromatic after this trim, which is your reward for keeping up with it.
✂️ Step 3: Shape and Thin in Late Summer for Winter Prep
In late summer, do a final shaping trim to prepare the sage for winter. Focus on thinning out the center of the bush to improve airflow, which prevents fungal diseases. Remove any branches that are growing inward or rubbing against others—these are weak points that can invite pests or rot.
Cut back any leggy growth that's stretching too far from the main plant. Sage can handle a 20-30% reduction in size at this stage without stress. The key is to leave a balanced shape—imagine a rounded dome. This ensures the plant has a strong structure to carry it through dormancy and burst out fresh in spring.
⏰ Step 4: Minimal Winter Pruning to Avoid Damage
Winter is the only time you should avoid heavy pruning. Instead, do light maintenance—just remove any dead or broken branches. Sage goes semi-dormant in cold weather, and pruning too much can stress the plant when it's already conserving energy. If you live in a mild climate, you might not need to do anything at all during winter.
Here's the thing—sage is hardy, but it's not invincible. If you see brown, crispy leaves from frost, wait until spring to prune them off. You'll know you've pruned at the right time when the bush looks tidy but still has plenty of green leaves to carry it through the cold months.
Tips & tricks for pruning sage bushes
Here's what I've learned after years of keeping my sage bushes thriving—these little details make all the difference.
Timing is Everything: The early spring pruning (Step 1) should happen right after the last frost but before you see any new growth. I check my local frost dates and mark my calendar—this window is typically just 2-3 weeks long. If you miss it, don't panic, but the plant won't respond as vigorously. I've seen sage bounce back even if pruned a week late, but the new growth comes slower.
Leaf Node Location Matters: When making cuts in Step 1, look for the small bump where leaves attach to the stem—that's your leaf node. Cut just above it at a 45-degree angle to prevent water from pooling on the cut. This small detail keeps your sage healthier by reducing rot risk. I use a magnifying glass if my eyes aren't what they used to be—it's worth the extra effort for perfect cuts.
Visual Growth Check: After the late summer shaping (Step 3), give your sage a good look from all sides. You want to see sunlight reaching the center—this is your airflow indicator. If you notice brown spots developing after pruning, you've gone too aggressive. Sage can handle up to 30% reduction, but I've learned that 20% is often the sweet spot for maintaining that lush appearance without stressing the plant.
Winter Maintenance Secret: During winter (Step 4), I keep a small pair of pruners handy for quick cleanups. The key is to only remove what's absolutely necessary—dead branches or those damaged by frost. I've made the mistake of pruning too much in winter, and the next spring's growth was noticeably weaker. Think of winter as a time for gentle upkeep rather than major reshaping.
Pro Tips for Prune Sage Bush
- Here's what I've learned after years of keeping my sage bushes thriving—these little details make all the difference.
- Timing is Everything: The early spring pruning (Step 1) should happen right after the last frost but before you see any new growth.
- Leaf Node Location Matters: When making cuts in Step 1, look for the small bump where leaves attach to the stem—that's your leaf node.
Frequently asked questions
Got questions about keeping your sage bush thriving with the right pruning? Here are some of the most common ones—and their straightforward answers!
When is the best time to prune a sage bush?
The ideal time to prune sage is late winter or early spring (just before new growth starts). This helps shape the bush and encourages healthy foliage. Avoid heavy pruning in fall, as it can stress the plant before winter. Light trimming to remove dead branches can happen anytime, though!
How much can I cut back my sage bush?
Never remove more than one-third of the plant’s total growth in a single pruning session. For established sage, aim to trim back to about half its height to maintain shape. Over-pruning can weaken the bush and reduce its ability to rebound. Think of it like giving your sage a haircut—not a buzz cut!
What if my sage bush looks leggy or sparse after pruning?
Leggy or sparse sage often means it needs more sunlight or better airflow. Prune to open up the center of the bush and avoid overcrowding. If growth is still slow, fertilize lightly with a balanced, low-nitrogen formula in spring. Patience is key—sage may take a season or two to fill back in!
Can I prune sage in summer?
Light pruning (like removing a few spent flowers or dead branches) is fine in summer, but avoid heavy trimming during hot, dry periods. Summer pruning can stress the plant, making it more susceptible to drought or pests. If you must prune, do it early in the morning or late afternoon to minimize shock.
What’s the difference between pruning sage for health vs. for harvest?
For health, focus on removing dead, diseased, or crossing branches and shaping the bush in early spring. For harvesting, trim just the woody stems (leaving at least 6–8 inches of growth) to encourage bushier, leafier regrowth. Always harvest after flowering for the strongest flavor!
Wrapping up and next steps
Pruning your sage bush isn’t just about keeping it tidy—it’s the secret to unlocking its full potential for year-round health and flavor. 🌿 With the right tools, timing, and technique, you’ll encourage lush growth, prevent disease, and harvest fresh leaves whenever you need them.
Whether you’re a seasoned gardener or just starting out, a little strategic trimming goes a long way!
Ready to take the next step? Grab your shears and give your sage bush the care it deserves! Start small—trim just a few stems this week—and watch your plant thrive. Happy pruning!