
Shrubs
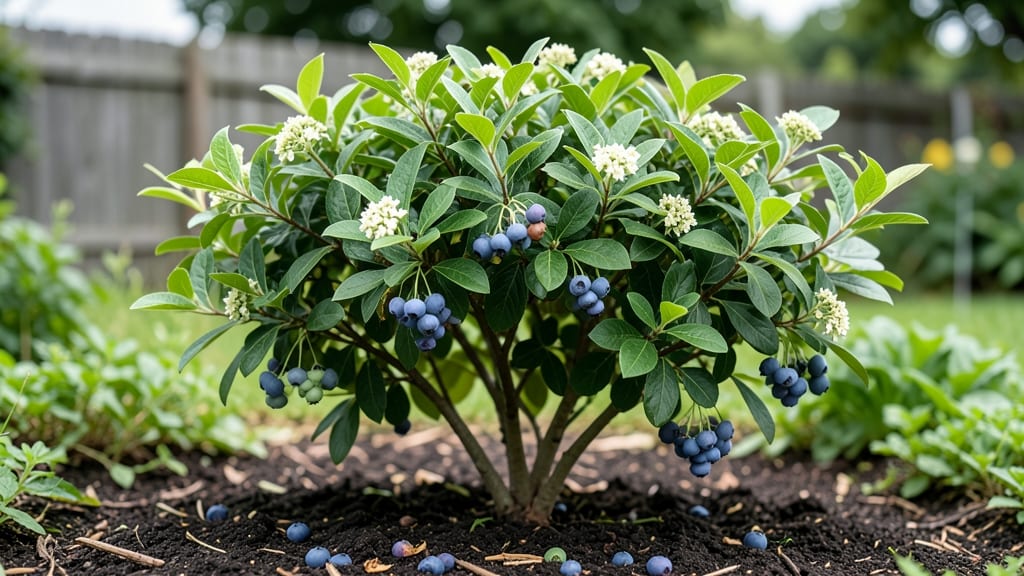
My small berry bushes produce more fruit per square foot than my entire in-ground garden ever did. 🌿 These compact varieties—like 'Top Hat' blueberries, 'Heritage' raspberries, and 'Jewel' currants—fit in tight spaces while delivering harvests from late spring through fall.
The key isn't just choosing the right plants, but matching them to your sunlight, soil, and watering habits.
You'll need well-draining soil with a pH between 4.5 and 6.5 (blueberries demand this), at least 6 hours of sun daily, and consistent moisture without soggy roots. Most varieties stay under 3 feet tall, making them perfect for containers, small yards, or even balcony gardens.
Pruning in late winter keeps them tidy and boosts next year's fruit.
By mid-summer, you'll be picking sweet berries that taste fresher than anything from the store. The bushes reward patience—first harvests come in year two, but they keep producing for 10+ years with proper care. No more struggling with sprawling canes or wasted space.
Works for urban gardens, rural homesteads, or anywhere you've got a sunny corner. Let's get those berries growing!
📚 In This Guide
- What you need
- Instructions
- Tips and common mistakes
- Wrapping up and next steps
What you need
- ● Berry Bushes: Choose compact varieties like blueberries (Top Hat, Sunshine Blue), raspberries (Heritage, Caroline), blackberries (Arapaho, Chester), or currants/gooseberries (Red Lake, Pixwell). Purchase 3–5 plants (for pollination and yield).
- ● Well-draining soil: Mix 1 part native soil with 1 part compost or use a premium potting mix (e.g., Miracle-Gro Potting Mix or FoxFarm Ocean Forest).
- ● Organic mulch: 2–3 inches of wood chips, straw, or pine needles to retain moisture and suppress weeds.
- ● Fertilizer: Slow-release organic fertilizer (e.g., Espoma Plant-Tone or fish emulsion) or acid-loving plant fertilizer (for blueberries).
- ● Watering can or drip irrigation: A 1–2 gallon capacity for hand-watering or a low-volume system for automation.
- ● Garden trowel or transplant spade (for digging holes 12–18 inches deep).
- ● Pruning shears (sharp, bypass-style for clean cuts).
- ● Gloves (gardening or nitrile for thorny varieties).
- ● Measuring tape or ruler (to space plants 2–4 feet apart, depending on variety).
- ○ Container or raised bed (optional): 5–15 gallon pots with drainage holes (for urban gardens).
- ● Sunlight: 6–10 hours of full sun daily (morning sun is ideal to prevent scorching).
- ● pH preference: Berry Type Ideal pH Range Blueberries 4.5–5.5 (acidic) Raspberries/Blackberries 5.5–6.5 (slightly acidic) Currants/Gooseberries 6.0–7.0 (neutral)
- ● Water access: Consistent moisture (especially in first year and during fruit production).
- ○ Protection (optional): Frost cloth for early springs or bird netting to deter pests.
Step-by-Step guide to planting and maintaining compact berry bushes
Here’s how I grow four hardy, space-saving berry bushes that produce reliably year after year.
🪴 Step 1: Select and Prepare the Planting Site
Choose a location with at least 6 hours of sunlight daily—most compact berry varieties thrive in full sun but tolerate partial shade if summers are scorching. I prefer a spot with well-draining soil (berries hate soggy roots) and shelter from strong winds that can damage delicate canes. Test your soil’s pH—berries prefer slightly acidic soil (5.5-6.5)—and amend with compost or peat moss if needed.
Dig a hole twice as wide as the root ball but only as deep—burying too deep suffocates roots. Loosen the sides of the hole with a fork to encourage root spread. If planting multiple bushes, space them 3-4 feet apart (check variety tags for exact spacing). This ensures airflow and prevents fungal diseases like powdery mildew.
🌱 Step 2: Plant and Water for Immediate Root Establishment
Gently remove the bush from its container and tease apart any circling roots—this prevents girdling as the plant matures. Place it in the hole so the root flare (where roots meet stem) sits just above soil level. Backfill with native soil mixed with compost (I use about 1 gallon per bush), firming lightly as you go to eliminate air pockets.
Water deeply until moisture seeps 6 inches down—this encourages roots to grow downward rather than stay shallow. Mulch around the base with 2-3 inches of organic mulch (like wood chips or straw) to retain moisture and suppress weeds. Keep the mulch 2 inches away from the stem to prevent rot. Water every 2-3 days until new growth appears, then taper to once a week once established.
☀️ Step 3: Prune and Fertilize for Year-Round Productivity
Prune immediately after planting to remove any damaged or crossing branches. For summer-bearing varieties (like raspberries), cut back old canes to the ground in late winter—new growth will produce fruit that season. Ever-bearing varieties (like blackberries) need light pruning to shape the bush and remove dead wood, but avoid heavy cuts that reduce fruiting.
Fertilize twice a year: in early spring (when buds swell) and after harvest. Use a balanced, slow-release fertilizer (10-10-10)—I sprinkle ½ cup per bush around the drip line, then water deeply. Avoid high-nitrogen fertilizers late in the season, as they encourage leafy growth at the expense of fruit. Watch for yellowing leaves (a sign of over-fertilization) and adjust accordingly.
✂️ Step 4: Monitor for Pests and Diseases
Inspect bushes weekly for aphids, spider mites, or Japanese beetles—these pests sap energy from plants. I spray neem oil (mixed per label) at the first sign of infestation, repeating every 7-10 days until pests disappear. For fungal issues (like rust or botrytis), remove infected canes immediately and space plants further apart to improve airflow.
Birds love berries as much as you do—cover bushes with fine netting once fruit ripens. I use lightweight bird netting that doesn’t block sunlight but keeps birds out. Harvest regularly (every 2-3 days in peak season) to encourage more production. If a bush stops fruiting, check for overcrowding or nutrient deficiencies—thinning or fertilizing often revives productivity.
🍓 Step 5: Overwinter and Plan for Next Year’s Harvest
In late fall, cut back dead or weak canes and apply 4-6 inches of mulch around the base to insulate roots. Evergreen varieties (like blueberries) need extra protection in cold climates—wrap young bushes in burlap or use straw mulch to shield them from freezing winds. Water sparingly in winter unless soil is bone-dry—root rot is more dangerous than drought in cold months.
Prune dormant bushes in late winter (just before buds swell) to shape the plant and remove old canes. I mark pruning cuts with white paint (to signal new growth) and fertilize lightly in early spring to kickstart the season. By June, you’ll see new canes forming—these will bear fruit the following year. Repeat the cycle, and your compact berry patch will keep producing for decades with minimal effort.
Tips & tricks for perfectly thriving compact berry bushes
These insights will help you avoid common pitfalls and maximize your berry harvest with minimal fuss.
Soil Preparation Secret: Before planting, mix 1 gallon of compost directly into the native soil when backfilling the hole—this ensures immediate nutrient availability for root establishment. I also add a handful of wood ash (from untreated wood) to boost soil pH slightly if your test shows it's too acidic. The key is creating a loose, aerated mix that encourages root spread rather than compacting around the roots.
Watering Wisdom: The 6-inch deep watering in Step 2 is non-negotiable—use a moisture meter to verify you're reaching that depth. For the first 2-3 weeks, I water in the early morning to prevent fungal issues from evening moisture. After establishment, let the top 2 inches of soil dry between waterings to prevent root rot while maintaining consistent moisture.
Pruning Precision: When pruning summer-bearing varieties in late winter, cut back old canes to the ground only if they're completely brown and dead—healthy-looking canes may still produce fruit. For ever-bearing varieties, I make my cuts at a 45-degree angle just above a bud, always leaving at least 3-4 buds per cane to ensure new growth. This targeted approach prevents over-pruning that reduces fruiting.
Winter Protection: The 4-6 inches of mulch in late fall is your best defense against winter damage. For young bushes in particularly harsh climates, I add an extra 2 inches of straw mulch after the first snowfall to create an insulating layer. This prevents temperature fluctuations that can stress the roots during freeze-thaw cycles.
Pro Tips for Small Berry Bushes
- These insights will help you avoid common pitfalls and maximize your berry harvest with minimal fuss.
- Soil Preparation Secret: Before planting, mix 1 gallon of compost directly into the native soil when backfilling the hole—this ensures immediate nutrient availability for root establishment.
- Watering Wisdom: The 6-inch deep watering in Step 2 is non-negotiable—use a moisture meter to verify you're reaching that depth.
Frequently asked questions
Got questions about growing small berry bushes? You’re not alone! Here are answers to the most common queries to help you cultivate a thriving, low-maintenance berry patch.
What are the easiest small berry bushes for beginners?
Start with blueberries (like ‘Top Hat’ or ‘Pink Lemonade’) or raspberries (e.g., ‘Carolina Gold’). These varieties are hardy, disease-resistant, and produce well in containers or small spaces. Blackberries like ‘Arapaho’ are also beginner-friendly—just prune aggressively to keep them compact!
How long does it take for small berry bushes to bear fruit?
Most dwarf varieties take 1–2 years to produce fruit after planting, but some (like everbearing strawberries) may yield small harvests in the first year. Patience pays off—consistent care (water, mulch, and fertilizer) speeds up fruiting. Pro tip: Use a slow-release fertilizer at planting for a head start!
Can I grow small berry bushes in containers or pots?
Many compact varieties thrive in pots, including dwarf blueberries, juniper berries, and strawberries. Use containers at least 12–18 inches deep with drainage holes and well-draining soil. Rotate pots yearly for even sunlight exposure. Bonus: Move them indoors in winter if frost-sensitive!
What pests or diseases should I watch for in small berry bushes?
Common threats include aphids, spider mites, and fruit rot. Prevent issues with:
Yes! Once rooted, they need minimal upkeep:
Most berries need 6+ hours of sunlight daily, but some tolerate partial shade:
If leaves yellow or fruit molds, act fast—remove affected parts and adjust watering (berries hate soggy roots).
Are small berry bushes low-maintenance once established?
Pro tip: Mulch with pine needles (for blueberries) or straw to retain moisture and suppress weeds.
Can I grow small berry bushes in partial shade?
Test your spot—if leaves look pale, move the bush to sunnier ground!
Wrapping up and next steps
Small berry bushes are a game-changer for gardeners with limited space or big dreams! 🌱 Whether you’re growing blueberries, raspberries, or blackberries, these compact varieties deliver abundant harvests with minimal effort.
With the right care—sunlight, soil, and a little patience—you’ll enjoy fresh, flavorful berries for months, even in small yards or containers.
Ready to grow your own berry bounty? Start by picking a variety that suits your climate and space, then plant with confidence! 🌟 Next up: Grab your gloves, head to the nursery, and let the planting begin—your taste buds (and Instagram feed) will thank you!