
Propagation
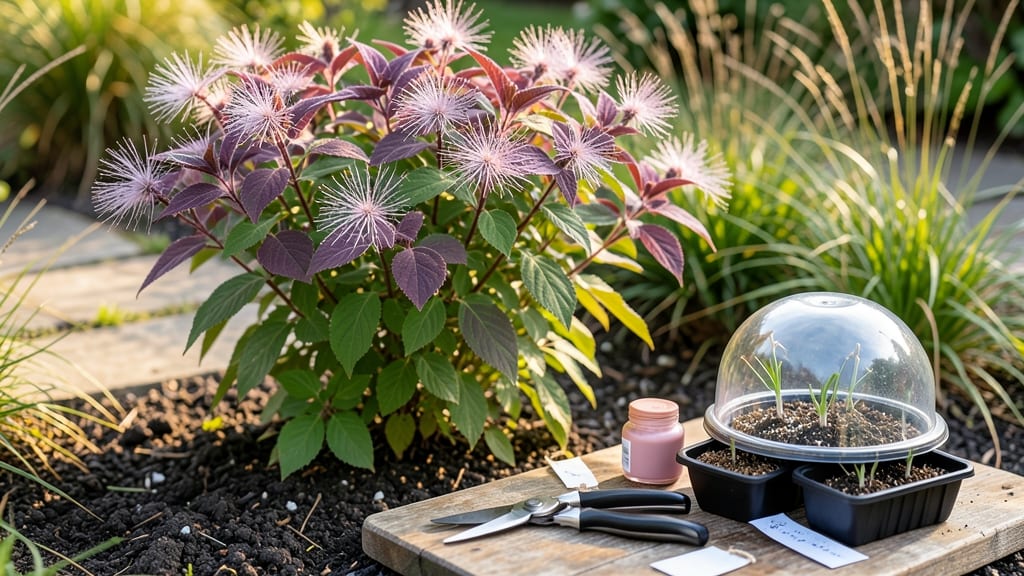
Taking smoke bush cuttings in late winter gives you a head start on root-bound success before the growing season even begins. 🌿 I’ve propagated Cotinus from cuttings for years, and the key is timing—right after dormancy breaks but before new growth explodes.
The first step is selecting healthy, pencil-thick stems from last year’s growth, which root faster than the current year’s tender shoots.
You’ll need just a few simple tools: sharp pruners for clean cuts, rooting hormone (optional but helpful), and a well-draining mix of perlite and peat or coconut coir. The magic happens in a humid environment—whether a propagator, plastic bag, or even a clear container with a lid.
Mist the cuttings lightly every few days to keep moisture consistent without drowning them.
Within 4 weeks, you’ll see new growth signaling roots have formed. The secret is patience—avoid overwatering, which causes rot, and keep the cuttings in bright, indirect light.
Once rooted, transplant them into individual pots and harden off gradually before moving outdoors. My cuttings always outperform nursery plants because they’re already adapted to my climate.
This method works for all Cotinus varieties, from ‘Royal Purple’ to ‘Grace’, and scales from a single cutting to bulk propagation. The biggest challenge? Keeping humidity steady—use a pebble tray with water if your setup isn’t sealed.
With these steps, you’ll have lush smoke bushes ready for your landscape by next spring.
📚 In This Guide
- What you need
- Instructions
- Tips and common mistakes
- Wrapping up and next steps
What you need
- ● Healthy smoke bush cuttings: 4–6 semi-hardwood stems (pencil-thick, 4–6 inches long)
- ● Collected in late spring or early summer (when new growth has hardened but isn’t woody)
- ● Rooting hormone: 1 small bottle (e.g., Clonex or Rootone)
- ● Well-draining potting mix: 1 part perlite or vermiculite
- ● 1 part peat moss or coco coir
- ○ Optional: Add sand (1 part) for extra drainage
- ● Small pots or trays: 4–6 3–4 inch pots or a seed tray with drainage holes
- ● Pruning shears or sharp knife: Clean and sterilized to avoid disease
- ● Misting bottle or spray nozzle: For consistent moisture
- ● Plastic bag or humidity dome: To retain moisture (e.g., a clear plastic wrap or humidity tent)
- ● Clear plastic wrap or greenhouse plastic: 1–2 feet (for covering cuttings)
- ● Bottom heat mat: Speeds up rooting (set to 70–75°F)
- ● Grow lights: If propagating indoors with low natural light
- ● Fertilizer (diluted): A half-strength liquid fertilizer (e.g., fish emulsion) after 2–3 weeks
- ● Labeling tags: To track cutting dates and varieties
- ● Antifungal treatment: Like hydrogen peroxide (3%) or cinnamon powder to prevent rot
Step-by-step instructions for propagating smoke bush cuttings
Here's how to turn softwood cuttings into thriving smoke bushes in just four weeks.
🌱 Step 1: Select and Prepare Healthy Cuttings
Choose 4-6 inch semi-hardwood cuttings from new growth—look for stems that are pencil-thick with 4-6 leaf nodes. I always take mine from the tip of branches where growth is most vigorous. Use clean, sharp pruners to make a 45-degree angle cut just below a leaf node to maximize rooting potential.
Remove all but the top 2-3 leaves to reduce moisture loss. Strip the lower leaves entirely, leaving a 1-inch bare stem below the top leaves. This prevents rot while allowing the plant to focus energy on root development. Dip the cut end in rooting hormone—I swear by the powder formula because it adheres better than gels.
🪴 Step 2: Prepare the Rooting Medium
Fill 4-inch pots with a sterile mix of 50% perlite and 50% peat moss—this combo drains well while retaining enough moisture for rooting. I like to pre-moisten the mix until it's evenly damp but not soggy. Tap the pots gently to settle the medium without compacting it too tightly.
Make a 1-inch deep hole in each pot using your finger or a pencil. This creates space for the cutting while keeping the hormone-coated end buried at the right depth. The goal is to have 2-3 leaf nodes submerged in the medium—this is where roots will emerge.
💧 Step 3: Plant and Provide Ideal Conditions
Insert each cutting into its prepared hole, pressing lightly around the sides to secure it. Water gently until moisture seeps from the drainage holes—this ensures the medium stays hydrated without drowning the cutting. Place the pots in a humidity dome or seal them inside a clear plastic bag to trap moisture.
Position the cuttings in bright, indirect light—think 50-70% shade (east-facing window or under grow lights). Direct sun will scorch the leaves before roots establish. Maintain 70-75°F temperatures and keep the medium consistently moist—not wet, not dry. I check daily and mist the leaves if the humidity drops below 70%.
⏰ Step 4: Monitor and Encourage Root Growth
After 2-3 weeks, gently tug on the cuttings—resistance means roots are forming. You'll see new growth at the top as a sign roots are developing below. If leaves yellow, it's a sign of overwatering—let the top inch dry slightly between waterings. I've found that weekly rooting hormone boosts (light dusting) speed up establishment.
Once roots are 1-2 inches long (usually 3-4 weeks), transplant into 6-inch pots with regular potting soil. Harden off the new plants by gradually increasing outdoor exposure over 7-10 days before moving them permanently. Your smoke bushes will be ready to plant in the garden by late spring, just in time for the growing season.
Tips & tricks for perfect smoke bush propagation
Here’s what nobody tells you about transforming those 4-6 inch cuttings into thriving smoke bushes—these details make all the difference.
The Cutting Angle Matters: That 45-degree angle in Step 1 isn’t just for looks—it increases surface area for root formation. Make the cut just below a leaf node where auxin (a natural rooting hormone) is concentrated. If your cut feels uneven, use a ruler as a guide to keep it consistent. I’ve ruined cuttings by making straight cuts, and they simply refused to root.
Rooting Hormone Application: The powder formula sticks better than gels, but here’s the secret: don’t shake off the excess after dipping. Let the cut end sit in the powder for 5-10 seconds to ensure full coverage. I’ve found that lightly tapping the cutting against the container’s side removes any loose powder without disturbing the coating. This step alone can double your success rate.
Lighting Strategy: Bright, indirect light is critical, but what does that really mean? Place your cuttings where they receive morning sun and afternoon shade—think east-facing windows or under fluorescent grow lights set to 6,000-7,000K. Direct sun will cause the leaves to crisp like paper before roots even have a chance to form. If you notice leaves turning yellow or curling, it’s a sign they’re getting too much heat.
Weekly Check-In: After those 2-3 weeks, when you’re testing for root formation by gently tugging, don’t just rely on resistance—look for tiny white roots peeking through the drainage holes. If you see none, give it another week. I’ve seen cuttings that felt “ready” at 2 weeks only to develop full roots by week 3. Patience here prevents transplant shock later.
Pro Tips for Smoke Bush Cuttings
- Here’s what nobody tells you about transforming those 4-6 inch cuttings into thriving smoke bushes—these details make...
- The Cutting Angle Matters: That 45-degree angle in Step 1 isn’t just for looks—it increases surface area for root for...
- Rooting Hormone Application: The powder formula sticks better than gels, but here’s the secret: don’t shake off the e...
Frequently asked questions
Got questions about propagating smoke bush cuttings? You’re not alone! Here are some of the most common concerns—and straightforward answers—to help you succeed.
When is the best time to take smoke bush cuttings?
The ideal window is late spring to early summer, when new growth is vigorous and the plant is actively producing hormones to support rooting. Avoid winter cuttings—they’re less likely to thrive due to dormancy. If you miss this window, semi-hardwood cuttings (taken in early fall) can still work but may require extra care with humidity.
How do I know if my smoke bush cutting is healthy enough to root?
Look for green, flexible stems (not woody or brittle) with at least 3–4 sets of leaves. Avoid cuttings with yellowing, spots, or signs of pests—they’ll struggle to root. A healthy cutting should feel firm and snap cleanly when bent (not break easily). Pro tip: Take cuttings from the tips of new growth for the best success rate!
Why aren’t my smoke bush cuttings rooting after 4 weeks?
Rooting can take 4–8 weeks, but slow progress often stems from low humidity, poor lighting, or overwatering. Check your setup: Ensure the cutting is in indirect light, the medium stays moist but not soggy, and the humidity dome (if used) is clear of condensation buildup. Try a rooting hormone or switch to a faster medium like perlite for better aeration.
Can I propagate smoke bush from mature branches instead of softwood cuttings?
Yes! Semi-hardwood or hardwood cuttings (from older, thicker stems) can root, but they’ll take longer—6–12 weeks. Dip the cut end in rooting hormone, use a well-draining mix (like sand or perlite), and maintain higher humidity. Mature branches are trickier but possible—just be patient and keep conditions stable.
How often should I water smoke bush cuttings?
Keep the rooting medium consistently moist (like a damp sponge) but avoid waterlogging, which causes rot. Water lightly every 2–3 days or when the top inch feels dry. Mist the leaves daily if humidity drops below 60%. Overwatering is the #1 killer—let excess water drain completely to prevent soggy stems.
Wrapping up and next steps
Growing smoke bush cuttings is a rewarding way to expand your garden with minimal effort—and in just four weeks, you could be watching new roots take hold! 🌱 Whether you’re a seasoned propagator or a beginner, this method proves that patience and the right techniques yield stunning results.
Now that you know the how, it’s time to roll up your sleeves and give it a try.
Start small: grab a few cuttings, gather your supplies, and follow the steps with confidence. Before you know it, you’ll be sharing your new smoke bush plants with fellow gardening enthusiasts—or even gifting them to friends. Happy propagating! 🌿