
Pruning
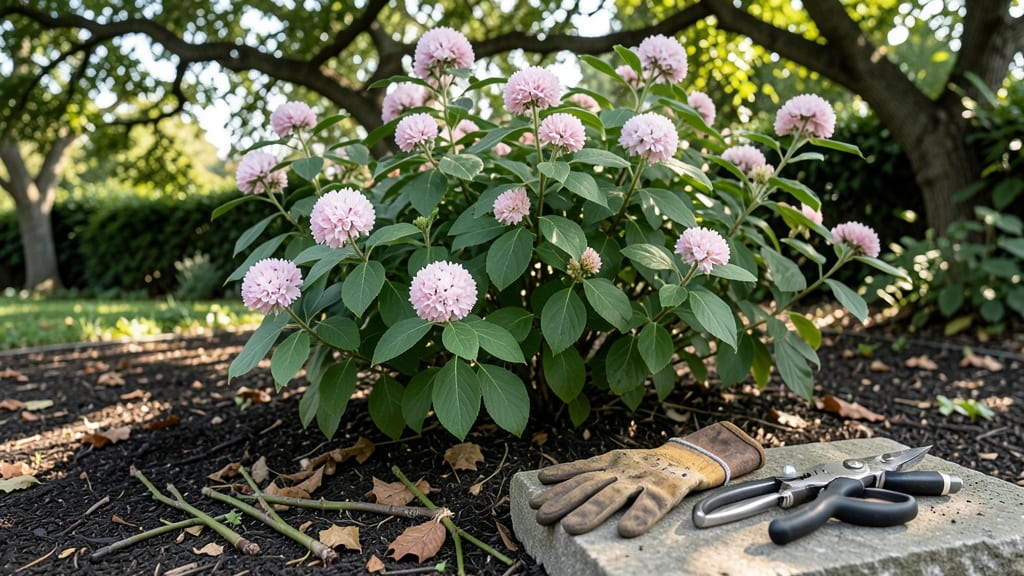
Four simple cuts can trim viburnum bushes from overgrown to showstopping—no green thumb required. ✂️ I’ve shaped mine every year since moving in, and the difference in blooms and structure is shocking. The key? Timing and technique, not brute force.
Start with clean, sharp pruners and a clear goal: open up the center, shape the silhouette, and encourage next year’s flowers. Most people over-prune in spring—this bush handles light touches year-round. Even a 10-minute trim in winter keeps it tidy without sacrificing blooms.
By summer, you’ll see fuller foliage, more branches with flowers, and a bush that fits your landscape like it was designed for it. The secret is thinning, not topping—avoid the urge to hack back.
Works for all viburnum types, from snowball bushes to leatherleaf varieties. Let’s get those branches in line!
📚 In This Guide
- What you need
- Instructions
- Tips and common mistakes
- Wrapping up and next steps
What you need
- ● Pruning shears – Sharp, bypass-style shears (4-6" blades) for clean cuts on small stems.
- ● Loppers – Bypass or anvil type (8-10" blades) for thicker branches (up to 1.5" diameter).
- ○ Pruning saw – Curved-tooth saw for branches over 2" in diameter (optional but handy).
- ● Garden gloves – Heavy-duty, cut-resistant to protect your hands from thorns and rough stems.
- ● Disinfectant (70% isopropyl alcohol or bleach solution) – To sterilize tools between cuts and prevent disease.
- ● Rag or paper towels – For wiping tools clean.
- ○ Garden twine or plant ties – 1/8" wide (optional, for securing heavy branches temporarily).
- ● Hose or bucket of water – To rinse tools and clean up sap.
- ● Hand pruners with a built-in bottle opener – Because every gardener deserves a reward after work! 🍻
- ● Knee pads or cushion – For comfort if your viburnum is tall or the ground is tough.
- ● Ladder or step stool – If your bushes are over 6 feet tall.
- ● Plant food or compost – To nourish the bush post-pruning (apply in early spring).
- ● Marking spray (white or pink) – To highlight cuts for better visibility (great for beginners!).
Instructions for year-round viburnum shaping
Here's the straightforward method I've used for years to keep viburnums lush and tidy.
✂️ Step 1: Late Winter Cleanup Cut (February-March)
Start by removing any dead, diseased, or crossing branches first—these compete for energy and invite pests. I grab my bypass pruners and make clean cuts just outside the branch collar (the swollen area where the branch meets the trunk). This prevents unsightly stubs and promotes faster healing.
Next, thin out about 20-30% of the oldest stems at ground level. These are usually the largest, woody branches. Viburnums naturally produce new growth from the base, so removing these stimulates fresh, vigorous shoots. Watch for the first buds swelling—this is your signal to finish before sap starts flowing heavily.
✂️ Step 2: Spring Flower Prep Cut (April-May)
Viburnums bloom on last year's wood, so never cut back flower clusters until after they finish blooming. I wait until 3-4 weeks after flowering to remove spent blooms and any weak growth that emerged in spring. Use hand pruners for branches under ½ inch thick, and a loppers for thicker stems.
Shape the bush by opening up the center to improve airflow and sunlight penetration. Aim for an open vase shape—this prevents dense, shaded interiors where diseases fester. Step back frequently to visualize the overall form; you'll notice how much more balanced it looks when you can see it from a distance.
✂️ Step 3: Mid-Summer Growth Control (June-July)
After the initial flush of growth, viburnums often produce long, leggy shoots that spoil the shape. I trim these back by ⅓ of their length using sharp pruners to encourage bushier growth. The key is to cut just above a leaf node where new growth can emerge.
Remove any suckers growing from the base—these drain energy from the main plant. I also pinch back the tips of vigorous new shoots to promote branching. You'll see within 2-3 weeks that the bush fills out more densely and looks fuller from all angles.
✂️ Step 4: Light Fall Maintenance (October-November)
In late fall, focus on removing any dead or diseased branches that appeared during the growing season. I also thin out any branches that are growing inward to maintain that open vase shape. Never remove more than 10% of the plant's volume in a single season—this prevents stress.
Rake up and dispose of all pruned material to reduce disease risk over winter. The goal here is minimal intervention—just enough to keep the bush looking tidy without stimulating new growth that wouldn't harden off before frost.
Tips & tricks for perfect year-round viburnum shaping
Here's what nobody tells you—these details make all the difference between a bush that thrives and one that struggles.
Tool Prep: Always sanitize your pruning tools with rubbing alcohol or a 10% bleach solution before you start. I learned this the hard way after my viburnum developed powdery mildew from contaminated shears. Sharp tools also make cleaner cuts that heal faster—dull blades crush stems and create entry points for disease. Honestly, spending 5 minutes sharpening your bypass pruners before Step 1 saves hours of cleanup later.
Seasonal Timing Secret: The 3-4 week window after flowering in Step 2 is your golden opportunity to shape without sacrificing next year's blooms. I mark my calendar with the first frost date and count backward to schedule this cut. Too early and you'll remove flower buds; too late and you risk encouraging late-season growth that won't harden off properly before winter. Pro tip: Snap off any flower clusters that appear after your main pruning—they won't develop fully anyway.
Visualization Technique: When shaping in Step 2, step back every 5 minutes to check your progress. I use the "cup of tea" test—if you can't see the center of the bush from 10 feet away, you're not opening it up enough. The goal is sunlight penetration to the very middle, where branches often get shaded and develop fungal issues. Think of it like creating a dome that lets light cascade through the layers.
Recovery Strategy: If you accidentally prune too aggressively in one season (more than 10% volume), don't panic. Viburnums are remarkably resilient. In Step 4, focus on removing only dead wood and inward-growing branches. The plant will compensate by producing more vigorous new growth from the base—just be patient and avoid heavy pruning the following winter. I've seen bushes bounce back beautifully after a single season of over-pruning.
Pro Tips for Trim Viburnum Bushes
- Here's what nobody tells you—these details make all the difference between a bush that thrives and one that struggles.
- Tool Prep: Always sanitize your pruning tools with rubbing alcohol or a 10% bleach solution before you start. I learn...
- Seasonal Timing Secret: The 3-4 week window after flowering in Step 2 is your golden opportunity to shape without sac...
Frequently asked questions
Got questions about trimming your viburnum bushes? You’re not alone! Here are some of the most common concerns—and their answers—to help you keep your shrubs thriving with confidence.
When is the best time to trim viburnum bushes?
For most viburnum varieties, late winter or early spring (just before new growth starts) is ideal. This timing promotes healthy blooms and prevents disease. Exception: If you prune spring-blooming viburnums (like Viburnum carlesii) after they flower, you’ll sacrifice next year’s blooms. Always check your specific type!
How much can I cut back a viburnum bush?
Never remove more than one-third of the plant’s total volume in a single pruning session. For overgrown viburnums, spread cuts over 2–3 years to avoid stress. Focus on thinning out dense branches first—this improves airflow and reduces pests. Pro tip: Older stems can be cut back to the ground if rejuvenation is needed!
Why are my viburnum leaves turning brown after pruning?
Brown leaves post-pruning are usually a sign of stress or disease. If cuts are too severe or made during active growth, the plant may react poorly. Ensure you’re using clean, sharp tools and avoid pruning when wet (to prevent fungal infections). If browning persists, check for pests like spider mites or viburnum leaf beetles.
Can I prune viburnum bushes in summer?
Yes, but lightly! Summer pruning is best for shaping or removing dead/diseased branches. Avoid heavy cuts—this can stimulate tender new growth that’s vulnerable to frost. If you must prune for aesthetics, do so after flowering (for summer-blooming types) and keep it minimal to avoid sacrificing next year’s blooms.
What’s the difference between trimming and rejuvenating a viburnum?
| Trimming | Rejuvenating |
|---|---|
| Light maintenance cuts to shape, thin, or remove dead branches. | Drastic pruning to revive an overgrown or neglected bush. |
| Done annually (or biennially) for healthy growth. | Requires cutting back older stems to the ground in stages. |
| Best for routine upkeep. | Best for revitalizing mature viburnums (3+ years). |
Rejuvenation is tough on the plant—water deeply and fertilize afterward!
Wrapping up and next steps
Trimming your viburnum bushes doesn’t have to be intimidating—just follow the four simple cuts we’ve shared, and you’ll enjoy a neat, healthy, and blooming landscape year-round! 🌿 With the right tools, timing, and technique, you’ll keep your viburnums thriving while adding curb appeal to your yard.
Ready to take the next step? Grab your pruners and schedule your first trim—whether it’s a light cleanup in early spring or a shaping session in late winter. Your viburnums (and your future self) will thank you!