
Planting
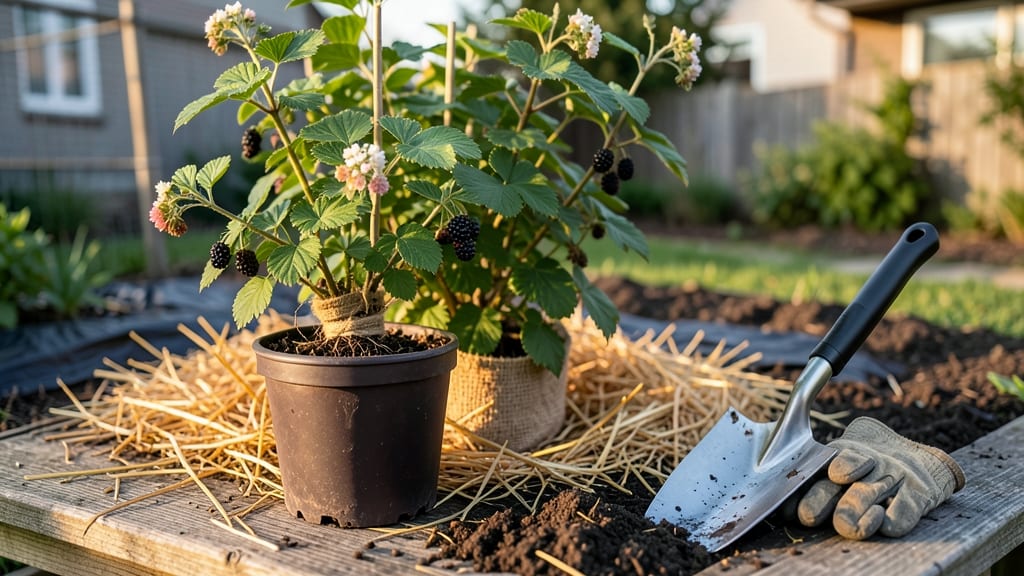
Planting blackberry bushes in the right spot turns a thorny challenge into a juicy, bountiful harvest every summer. 🌿 The best place for them is where they get 6-10 hours of sunlight daily, with well-draining soil that won’t leave their roots soggy.
I learned this the hard way—my first bush struggled in partial shade, producing only a fraction of the berries it could have. Blackberries thrive in USDA zones 5-9, but they hate wind and frost pockets.
A sheltered spot near a fence or trellis gives them support and protection while keeping their canes from flopping over. Rich, slightly acidic soil (pH 5.5-6.5) packed with compost is their secret weapon for sweet, plump berries.
Once planted, they’ll reward you with thick canes and heavy yields in just two seasons. The key is spacing them 4-6 feet apart so they don’t crowd each other, and pruning old canes after harvest to keep them productive.
My bushes now produce gallons of berries—enough for jams, snacks, and sharing with neighbors. For cooler climates, choose thornless varieties like ‘Chehalem’ or ‘Natchez’ for easier picking, while heat-loving gardeners can opt for ‘Apache’ or ‘Arapaho’. Just avoid low-lying areas where frost lingers—blackberries despise cold feet!
📚 In This Guide
- What you need
- Instructions
- Tips and common mistakes
- Wrapping up and next steps
What you need
- ● Blackberry plants: 2–4 healthy, disease-free bushes (thornless or traditional varieties, depending on preference). Choose bare-root plants in early spring or container-grown plants year-round.
- ● Shovel or trowel: A sturdy 6-inch garden trowel for precision or a heavy-duty shovel for larger holes (12–18 inches deep).
- ● Garden gloves: Thick, cut-resistant gloves (blackberries have thorns!). Opt for breathable fabric like cotton or leather.
- ● Well-draining soil: A mix of native soil + 3–4 inches of compost or 50% topsoil + 50% peat moss for sandy or clay-heavy areas.
- ● Organic mulch: 4–6 inches of straw, wood chips, or pine needles to retain moisture and suppress weeds.
- ● Watering can or hose: With a gentle spray nozzle to avoid disturbing roots during watering.
- ● Fertilizer: Balanced 10-10-10 or organic options like composted manure (apply sparingly—blackberries prefer lean soil).
- ● Support system: T-trellis or wire fence (4–6 feet tall) for upright varieties.
- ● Floating row covers (if planting in early spring to protect from frost).
- ● Soil pH test kit: Blackberries thrive in slightly acidic soil (pH 5.5–6.5). Adjust with sulfur or lime if needed.
- ● Pruning shears: Sharp, bypass-pruners (sterilized with rubbing alcohol) for shaping and harvesting.
- ● Drip irrigation kit: For consistent moisture, especially in hot climates.
- ● Bird netting: To protect ripe berries from hungry birds and wildlife.
- ● Epsom salt: A tablespoon per plant in early spring for magnesium boost (great for leafy growth!).
Step-by-step guide to choosing the perfect blackberry planting spot
Here's how to find that sun-drenched, well-drained location where blackberries will thrive for years.
🌞 Step 1: Select a Sunny Location with Minimum 6-8 Hours of Direct Sun
Blackberries are sun-enthusiasts, so prioritize a spot receiving at least 6-8 hours of full sun daily. The more sunlight, the sweeter and more productive your berries will be. I always check the sun patterns throughout the day—morning sun helps dry dew quickly, while afternoon sun prevents fungal issues. Watch for areas where branches cast shadows; these spots will limit growth.
If your yard has limited full sun, choose the south or southwest-facing side of structures or fences, as these areas typically receive the most consistent sunlight. Avoid north-facing walls or heavily shaded corners—blackberries will produce fewer berries and weaker canes in low-light conditions. You'll know you've found the right spot when neighboring plants thrive vigorously, indicating optimal growing conditions.
🪴 Step 2: Ensure Well-Draining Soil with pH Between 5.5 and 6.5
Blackberries despise soggy roots, so test your soil's drainage by digging a 12-inch deep hole in the proposed planting area. Fill it with water and observe how quickly it drains. If water remains after 24 hours, amend the soil with 2-3 inches of compost or well-rotted manure mixed into the top 12 inches. Sandy soils may need a 50/50 mix of garden soil and compost to retain moisture without becoming waterlogged.
Use a soil pH test kit to verify the acidity level—blackberries prefer slightly acidic soil (5.5-6.5). If your soil tests higher, incorporate elemental sulfur or peat moss following package instructions. I like to add a 5-pound bag of balanced 10-10-10 fertilizer at planting time to give the roots a nutrient boost. The ideal soil should feel like a well-wrung sponge—firm enough to support roots but loose enough to allow water and air movement.
🌿 Step 3: Choose a Protected Location with Windbreaks and Support Structures
Blackberry canes grow 6-10 feet tall and produce thorny, arching branches, so position your planting near a fence, trellis, or sturdy wire system to contain their growth. I recommend installing a T-post trellis or knotted wire system at planting time—this prevents future damage and makes harvesting easier. Avoid open areas where wind can snap canes, especially in late summer when berries are heavy.
Plant near natural windbreaks like hedges, shrubs, or even a wooden lattice to shield the bush from harsh winds. If your yard lacks natural barriers, consider planting wind-resistant companions like sunflowers or tall grasses on the windward side. The goal is to create a microclimate where canes grow upright and berries develop without stress. You'll see the difference in cane strength and berry quality within the first growing season.
⏰ Step 4: Time Planting for Early Spring or Fall When Soil is Workable
Plant blackberry bushes in early spring (2-4 weeks before last frost) or fall (6-8 weeks before first frost) when soil temperatures hover around 60-65°F. This gives roots time to establish before extreme heat or cold sets in. Avoid planting in mid-summer heat, as transplant shock will stress the bush during its critical establishment period. I always check the soil temperature with a thermometer—if it's above 75°F, wait until fall.
Dig a hole twice as wide as the root ball but no deeper to prevent waterlogging. Loosen the roots gently if they're circling the root ball—this encourages outward growth. Backfill with the amended soil you prepared earlier, pressing lightly to remove air pockets. Water deeply to settle the soil, then add 2-3 inches of mulch (like wood chips or straw) around the base, keeping it 3-4 inches away from the stem to prevent rot. You'll know the planting is successful when new growth appears within 4-6 weeks.
Tips & tricks for perfect blackberry planting
Between us, these small details make the difference between a thriving blackberry patch and one that struggles year after year.
Sunlight Strategy: While 6-8 hours of sun is ideal, I've found that morning sun (6-9 AM) paired with afternoon shade (after 3 PM) works surprisingly well in hot climates. The key is avoiding the intense midday sun when temperatures exceed 90°F—this can scorch leaves and reduce fruit quality. If your yard only gets 4-5 hours of sun, consider planting near a reflective surface like a light-colored fence or patio that bounces extra light onto the plants.
Soil Test Timing: Don't just test soil pH once—check it again after amending with sulfur or peat moss. The pH can shift unexpectedly, especially in clay soils. I like to test again 2-3 weeks before planting to confirm the 5.5-6.5 range. For sandy soils, you might need to re-test after the initial amendment because the pH can rise again as the soil stabilizes. The 24-hour drainage test is critical, but I've seen many gardeners skip it—don't make that mistake!
Wind Protection Secret: The 6-10 foot height range means blackberries are surprisingly vulnerable to wind damage. I've seen canes snap under 30 mph winds, especially when berries are heavy. For maximum protection, install your trellis or wire system before planting—after the fact is a nightmare. If you're planting in an exposed area, consider adding a temporary windbreak like a bamboo fence during the first growing season until the canes establish stronger root systems.
Pro Tips for Best Place To Plant A Blackberry Bush
- Between us, these small details make the difference between a thriving blackberry patch and one that struggles year after year.
- Sunlight Strategy: While 6-8 hours of sun is ideal, I've found that morning sun (6-9 AM) paired with afternoon shade (after 3 PM) works surprisingly well in hot climates.
- Soil Test Timing: Don't just test soil pH once—check it again after amending with sulfur or peat moss.
Frequently asked questions
Got questions about planting blackberry bushes? You’re not alone! Here are some of the most common queries—plus straightforward answers to help you grow a thriving patch.
What’s the best time of year to plant blackberry bushes?
Plant blackberries in early spring (just as new growth starts) or late fall (4-6 weeks before the first frost). Avoid planting in summer heat or freezing winter months—roots need time to establish without stress. If you’re in a mild climate, fall planting can give bushes a head start for next year’s harvest!
How much space should I leave between blackberry bushes?
Space blackberries 4 to 6 feet apart in rows that are 8 to 10 feet apart. This prevents overcrowding, improves airflow (reducing disease), and makes harvesting easier. If you’re growing thornless varieties, you can plant them slightly closer (3-4 feet) for a denser patch.
Can I plant blackberries in a container or small garden?
Yes! Dwarf or semi-erect varieties (like ‘Arapaho’ or ‘Natchez’) thrive in large containers (at least 18-24 inches deep and wide) with well-draining soil. Use a trellis to support canes, and place pots in full sun. Just ensure the container doesn’t dry out—blackberries need consistent moisture.
Do blackberry bushes need a trellis or support?
Trellises (or T-posts with wire) save space, improve airflow, and make harvesting easier. Train canes to grow upward along the trellis, pruning old canes in late winter. Without support, bushes sprawl, making fruit hard to reach and increasing disease risk. A simple 5-foot tall trellis works for most varieties.
Why aren’t my blackberry bushes producing fruit?
Common culprits include:
- Insufficient sunlight (they need 6+ hours of direct sun
- Poor pollination—plant multiple varieties nearby (or hand-pollinate with a brush).
- Young age—bushes often take 2-3 years to bear fruit.
- Over-pruning—leave 1-2 year-old canes to fruit (remove only dead/weak ones).
Wrapping up and next steps
Choosing the perfect spot for your blackberry bush is the first step toward a bountiful, thriving harvest! 🌱 With the right balance of sunlight, soil, and space, your plant will reward you with juicy berries year after year.
Now that you’re armed with the best practices, it’s time to roll up your sleeves, grab your tools, and get planting—your future blackberry patch is waiting!
Ready to take the next step? Check out our step-by-step planting guide to ensure your blackberry bush gets off to the best start possible. Happy gardening! 🌞