
Pruning
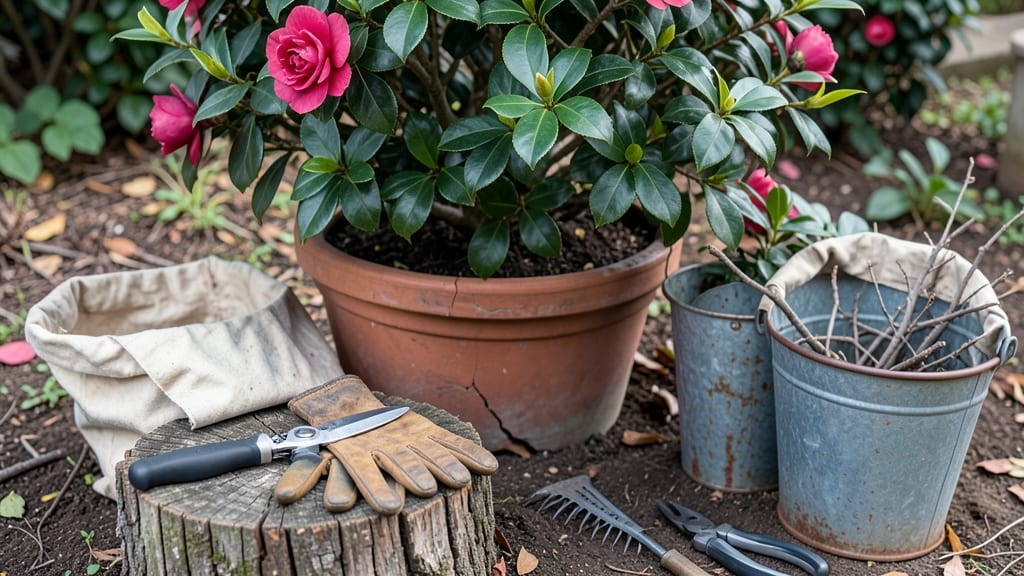
Cutting back camellia bushes in late winter transforms your bare branches into spring-blooming powerhouses. ✨ The secret lies in timing—after blooms fade but before new growth starts—and knowing whether to shape, thin, or rejuvenate. I’ve turned my once-neglected bushes into the showstopper of my garden by mastering this simple technique.
You’ll need sharp pruning shears, gloves, and a clear day to see what you’re doing. The goal is to open up the center for airflow and sunlight while maintaining that natural, graceful shape.
Most people over-prune, so aim to remove only 10-20% of the bush’s total growth—just enough to encourage fresh, vibrant blooms.
By late spring, you’ll see new shoots pushing through, followed by clusters of buds ready to burst into color. The key is patience: camellias reward careful pruning with years of lush, healthy blooms. Avoid cutting into old wood, and never prune in extreme cold or heat.
This method works for both Sasanqua and Japonica varieties, whether you’re dealing with a mature bush or a young plant. The payoff? A garden centerpiece that blooms reliably year after year with minimal effort. Let’s get those shears ready!
📚 In This Guide
- What you need
- Instructions
- Tips and common mistakes
- Wrapping up and next steps
What you need
- ● Pruning shears (bypass pruners): Sharp, high-quality shears with a 4- to 6-inch blade for clean cuts on smaller stems.
- ● Loppers: For thicker branches (up to 1.5 inches in diameter), opt for bypass-style loppers with long handles for leverage.
- ● Pruning saw: A curved-tooth pruning saw for cutting through stubborn, woody stems over 1.5 inches thick.
- ● Gloves: Heavy-duty, gardening gloves (water-resistant, with grip) to protect against thorns and sap.
- ● Disinfectant (rubbing alcohol or 10% bleach solution): Clean tools between cuts to prevent disease spread.
- ○ Sharpie or permanent marker: For marking branches to remove (optional but helpful for planning).
- ● Bucket or trash bag: A 5-gallon bucket or sturdy bag to collect pruned branches and debris.
- ○ Hose with nozzle (optional but handy): For rinsing tools and refreshing yourself mid-prune!
- ● Hand pruners (for fine-tuning): Smaller shears (3-inch blade) for delicate trimming.
- ● Safety glasses: Protect your eyes from flying debris or sap splatters.
- ● Knee pads: For comfort if you’re working with large or sprawling bushes.
- ● Pruning sealant: A wound dressing (like tree paint) to coat large cuts, though many experts debate its necessity.
- ● Extension pole pruners: If your camellia is tall, these help reach high branches safely.
Step-by-step guide to pruning camellias for vibrant spring growth
Revitalize your camellias with this precise late-winter pruning method—focused on shape, airflow, and next season’s blooms.
✂️ Step 1: Time Your Pruning for Optimal Healing
Prune camellias immediately after their spring blooming season ends, ideally between late March and early April in most climates. This timing ensures you remove spent flowers while avoiding late-season buds that form on new growth. I always check for fresh blooms first—if you see any still open, wait another week. Cold snaps below 30°F can stress newly pruned plants, so avoid cutting back if frost is forecasted.
Use sharp, clean pruners to make cuts at a 45-degree angle, about ¼ inch above a leaf node. This angle prevents water from pooling on the cut, reducing rot risk. I disinfect my tools with rubbing alcohol between cuts—camellias are prone to bacterial infections if tools carry pathogens from other plants.
🌿 Step 2: Remove Dead, Diseased, or Crossed Branches
Start by eliminating any branches that are dead, broken, or diseased. These are easy to spot—they’ll be brown, brittle, or oozing sap. Cut these back to healthy wood, making your cuts just outside the branch collar where it meets the main stem. Next, target branches that cross or rub against each other. Friction weakens the plant and creates entry points for pests. Look for branches growing inward toward the center of the bush—these block airflow and sunlight, inviting fungal issues.
I also remove any branches that grow straight upward from the main stem. These "watersprouts" compete with flowering branches for energy and rarely produce blooms. Thin these out first—they’re the easiest to identify and remove without disrupting the plant’s natural shape.
☀️ Step 3: Shape for Airflow and Light Penetration
Step back and assess the bush’s overall form. Camellias bloom best when they receive dappled sunlight and good air circulation. Aim to create an open, vase-like shape that allows light to reach the inner branches. Start by shortening overlong branches by one-third—never cut more than this in a single season. Long branches can be thinned entirely if they’re weak or leggy, but always leave at least one strong lateral branch to maintain the plant’s structure.
Pay special attention to the lower third of the bush. Many gardeners neglect this area, but removing dense growth here prevents a "bushy bottom" that stays shaded and prone to mildew. I like to leave a few branches at the base to encourage new growth, but I never let them become crowded.
⏰ Step 4: Fertilize and Hydrate for Spring Recovery
After pruning, apply a balanced, slow-release fertilizer (10-10-10 ratio) around the base of the plant, keeping it 6 inches away from the trunk. Water deeply to help the roots absorb nutrients, then mulch with 2-3 inches of organic mulch to retain moisture and regulate soil temperature. Avoid fresh mulch directly against the trunk—keep it 3 inches away to prevent rot.
Monitor the plant closely over the next 4-6 weeks. You’ll see new growth emerge from the leaf nodes where you made cuts—this is your signal that the plant is recovering well. If you notice yellowing leaves or wilting, reduce watering slightly. Camellias are drought-tolerant once established, but they hate soggy roots.
Tips & tricks for perfect camellia pruning
These precision-focused tips will help you transform your camellias into vibrant blooming machines—without the common pitfalls that leave plants stressed or over-pruned.
Timing is Everything: The late March to early April window is critical because camellias form next season's buds after their spring bloom. If you prune too early, you risk cutting off those future flowers. I've learned this the hard way—after pruning too soon one year, I ended up with half the expected blooms. Always check for fresh open flowers first; if you see any, wait another week. And that 30°F frost warning isn't just cautionary—cold snaps after pruning can shock the plant, causing leaf drop or even dieback.
Tool Technique: Your pruners are more important than you think. Always use sharp, clean tools—dull blades crush stems instead of making clean cuts, which invites disease. That 45-degree angle isn't just aesthetic; it prevents water from pooling on the cut surface, which dramatically reduces rot risk. I keep rubbing alcohol handy to disinfect between cuts—camellias are particularly susceptible to bacterial infections like canker. Pro tip: Wipe your tools with a paper towel after each disinfection to remove any alcohol residue that could irritate the plant.
Structural Balance: When shaping your camellia, think of it like sculpting a living work of art. That one-third reduction rule for overlong branches isn't arbitrary—it maintains the plant's natural energy balance. Cutting more than this stresses the plant and can trigger excessive watersprout growth. For the lower third of the bush, I like to use the "finger test": If you can't see sunlight through the center when standing 3 feet away, you need to thin more. This prevents that dreaded "bushy bottom" that stays perpetually shaded and prone to mildew.
Recovery Monitoring: After pruning, those 4-6 weeks of monitoring are your best friend. New growth emerging from leaf nodes is your green light that everything's working. But watch for yellowing leaves—they're often a sign of overwatering or nutrient stress. I've found that camellias actually prefer the "almost dry" method: Let the top inch of soil dry out between waterings. This prevents the soggy roots that can lead to root rot, especially in our humid climates.
Pro Tips for Cutting Back Camellia Bushes
- These precision-focused tips will help you transform your camellias into vibrant blooming machines—without the common pitfalls that leave plants stressed or over-pruned.
- Timing is Everything: The late March to early April window is critical because camellias form next season's buds after their spring bloom.
- Tool Technique: Your pruners are more important than you think.
Frequently asked questions
Got questions about pruning your camellias? You’re not alone! Here are answers to the most common concerns—so you can confidently shape your bushes and set the stage for stunning blooms.
When is the exact best time to cut back camellias?
The ideal window is late winter (just after flowering) or early spring, before new growth starts. For spring-blooming varieties, prune right after blooms fade (usually February–March in most climates). Fall-bloomers can wait until late winter to avoid damaging buds.
How much can I trim? Will I hurt the bush?
Camellias are forgiving! You can safely remove up to one-third of the plant’s growth without stressing it. Focus on dead, crossing, or overcrowded branches—never cut into old wood (the bare stems). Thin out the center to improve airflow and light penetration. Never shear into a ball shape—camellias bloom best on open, tiered branches!
What if my camellia doesn’t bloom after pruning?
No blooms? You might’ve pruned too late (after buds formed) or cut back old wood (which won’t regrow). For spring bloomers, wait until next year to prune. For fall bloomers, prune only lightly in late winter. Feed with acidic fertilizer (like 8-3-9) in early spring to encourage flowering.
Can I propagate cuttings from my pruned branches?
Take 4–6 inch cuttings from healthy, non-flowering growth in late spring/early summer. Dip in rooting hormone, plant in moist perlite/sand mix, and keep humid (use a plastic bag). Roots typically form in 2–3 months. Pro tip: Semi-hardwood cuttings (from new growth) root best!
Do I need to sterilize tools to prevent disease?
Yes!
Disinfect pruners with rubbing alcohol or a 10% bleach solution between cuts to avoid spreading bacterial blight or fungal infections. Wipe tools dry to prevent rust. Bonus: Sharpen blades annually for clean cuts that heal faster.
Wrapping up and next steps
Cutting back your camellia bushes in late winter isn’t just about tidying up—it’s your secret to vibrant, healthy blooms all spring and summer! 🌸 With the right tools, timing, and technique, you’ll encourage stronger growth and stunning flowers.
Remember, patience and precision are key, but the results will make it worth every snip.
Ready to transform your garden? Grab your pruners and start pruning! If you’re new to camellias, take notes, practice, and soon you’ll be a pro. Happy gardening—your blooming masterpiece awaits! 🌿