
Fertilization
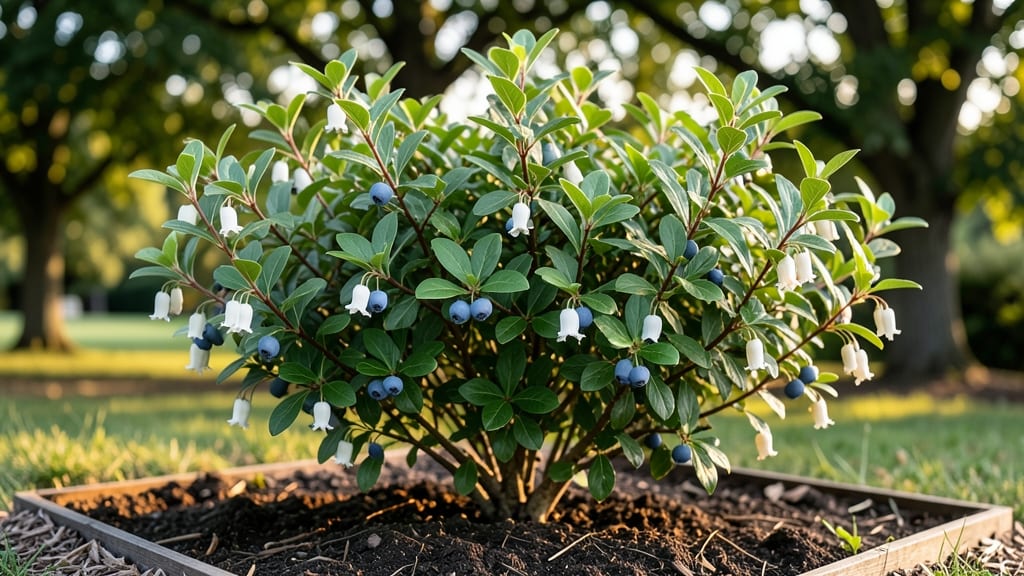
Northern Highbush blueberries thrive where winters bite and summers stretch long—the perfect choice for gardeners in zones 3 through 7. 🌿 I’ve grown them for years in my own yard, and once established, they produce pounds of sweet berries with minimal fuss. The key?
Acidic soil, patient planting, and a little seasonal TLC. These bushes love full sun and well-draining soil with a pH between 4.5 and 5.5—think of it as giving them the perfect "moist sponge" environment.
Most gardeners struggle with soil acidity, but a simple test kit and a few amendments (like peat moss or sulfur) solve the problem. Plant in early spring or fall, spacing bushes 4 to 6 feet apart for airflow and future growth.
By mid-summer, you’ll be harvesting juicy, deep-blue berries that taste like summer in every bite. Prune in late winter to shape the bush and remove dead wood, and fertilize with an acid-loving plant formula twice a year. Pests are rare, but watch for birds—those berries disappear fast!
Whether you’re a beginner or a seasoned gardener, Northern Highbush blueberries deliver reliable harvests with the right care. Let’s get those bushes planted for years of easy picking.
📚 In This Guide
- What you need
- Instructions
- Tips and common mistakes
- Wrapping up and next steps
What you need
- ● Northern Highbush blueberry plants: 3–5 plants (choose cold-hardy varieties like ‘Bluecrop,’ ‘Patriot,’ or ‘Duke’ for zones 3–6).
- ● Well-draining acidic soil: Aim for a pH of 4.5–5.5. Test kits or lab analysis are ideal.
- ● Organic mulch: 2–3 inches of pine bark fines or pine needles (avoid cedar—it’s too acidic).
- ● Fertilizer: Acid-loving plant fertilizer: 10-10-10 or 12-12-12 (apply spring and early summer).
- ● Ammonium sulfate: 1 lb per 100 sq ft (for quick acidity boost).
- ● Slow-release fertilizer: Osmocote or poly-coated urea (for steady nutrient release).
- ● Garden trowel or spade: For digging holes (12–18" deep and wide).
- ● Garden gloves: Heavy-duty to protect against thorns and soil.
- ● pH test kit: Digital or liquid test strips for monitoring soil acidity.
- ● Watering can or hose with a gentle spray nozzle: Blueberries hate soggy roots!
- ● Pruning shears: Sharp, clean shears for shaping and maintenance.
- ● Soil conditioner: Peat moss or composted leaves to improve drainage.
- ● Drip irrigation system: For consistent moisture (blueberries hate drought stress!).
- ● Bird netting: To protect ripe berries from hungry feathered friends.
- ● Mulch volcano blocker: A small ring to keep mulch away from the plant’s base.
Step-by-Step guide to planting and cultivating northern highbush blueberries
Here's how to establish a thriving, cold-resistant blueberry patch that rewards you with fruit for years.
🌱 Step 1: Choose the Right Location and Soil
Northern highbush blueberries demand acidic soil with a pH between 4.5 and 5.5—this is non-negotiable. Test your soil first using a home kit or send a sample to your local extension office. If your soil tests above 5.5, amend it with sulfur or peat moss (2-3 pounds per 100 square feet) and mix it into the top 12 inches of soil.
Select a site that receives full sun (6-8 hours daily) but with afternoon shade in hot climates to prevent leaf scorch. Avoid low spots where cold air pools—blueberries are cold-hardy but not frost-tolerant. Dig a hole twice as wide as the root ball but only as deep as the container's root system. Northern highbush varieties thrive in well-draining soil, so avoid clay-heavy areas unless amended with organic matter.
🪴 Step 2: Plant Bare-Root or Container-Grown Blueberries
For bare-root plants, soak the roots in lukewarm water for 2-4 hours before planting to revive them. Position the plant so the graft union (visible bump near the base) sits 1-2 inches above soil level—this prevents root rot from buried stems. Spread the roots outward gently and backfill with your amended soil, pressing lightly to eliminate air pockets.
If using container-grown plants, remove them from the pot and inspect the roots. Prune any that are circling or damaged with clean, sharp shears. Plant at the same depth as they were growing in the container—burying too deep suffocates the plant, while planting too shallow exposes roots to drying winds. Water deeply immediately after planting to settle the soil around the roots.
☀️ Step 3: Mulch and Water for Establishment
Apply 3-4 inches of pine bark mulch around the base, keeping it 3-4 inches away from the stem to prevent rot. Pine bark slowly acidifies the soil as it breaks down, creating ideal conditions for blueberries. Water the plant deeply twice weekly during the first growing season, ensuring the top 12 inches of soil stay consistently moist—blueberries hate drought stress but despise soggy roots.
Use a drip irrigation system or soaker hose to deliver water directly to the root zone. Avoid overhead watering, which can spread fungal diseases like botrytis blight. After the first year, reduce watering to once weekly during dry spells, as established plants develop deeper root systems. Monitor soil moisture by sticking your finger 2 inches deep—if it feels dry, it's time to water.
✂️ Step 4: Prune and Fertilize for Optimal Growth
Prune in late winter or early spring before new growth begins. Remove dead, diseased, or crossing branches first, then cut back last year's fruiting wood to 6-12 inches from the base to encourage new canes. Thin out overcrowded canes to improve air circulation and reduce pest pressure. Northern highbush varieties produce fruit on second-year wood, so avoid heavy pruning that removes too many potential fruiting stems.
Fertilize in early spring with an acid-loving plant fertilizer (look for high nitrogen and micronutrients like iron and manganese). Apply ½ pound per 100 square feet and water thoroughly to distribute nutrients. Avoid high-phosphorus fertilizers—they can raise soil pH over time. Retest soil pH annually and re-amend if it drifts above 5.5, as blueberries become less productive in neutral or alkaline soil.
🍇 Step 5: Harvest and Prepare for Winter
Harvest blueberries when they easily detach from the stem and turn a deep, rich color (usually mid-to-late summer, depending on your climate). Pick in morning hours when berries are cool and firm—waiting until they're fully ripe ensures sweeter flavor and better storage life. Handle berries gently to avoid bruising, and store them in the fridge for up to 2 weeks or freeze for longer-term use.
After harvest, apply a thick layer of mulch (4-6 inches) to insulate roots from winter temperature swings. Northern highbush varieties are cold-hardy down to -20°F, but young plants benefit from winter protection like burlap wraps or frost blankets in their first few years. Prune lightly in late winter to shape the plant and remove any winter-damaged branches before new growth resumes in spring.
Tips & tricks for perfect northern highbush blueberry cultivation
Between us, these details make the difference between a struggling blueberry bush and a thriving, fruit-bearing powerhouse.
Soil pH Precision: That 4.5-5.5 pH range in Step 1 isn't just a suggestion—it's critical. I've seen blueberries fail spectacularly in soil that's even slightly alkaline. Test your soil before planting, and if you need to amend, sulfur works faster than peat moss for quick corrections. For the 2-3 pounds per 100 square feet recommendation, spread it evenly across the planting area and mix it into the top 12 inches. A pH meter costs about $20 and saves you from years of frustration.
Planting Depth Matters: The 1-2 inches above soil level for the graft union in Step 2 is non-negotiable. I learned this the hard way after losing two plants to root rot from burying them too deep. When planting, use a reference marker (like a small stick) to ensure you're placing the graft union at exactly the right height. For container plants, check the root system—if you see circling roots, trim them with clean shears before planting to encourage outward growth.
Mulching Strategy: That 3-4 inches of pine bark mulch in Step 3 isn't just decoration—it's a slow-release acidifier. Spread it 3-4 inches away from the stem to prevent rot, and refresh it annually. Pro tip: Mix in a handful of coffee grounds (from your kitchen compost) every spring—they're packed with nitrogen and help maintain acidity. Just don't overdo it, or you'll create a coffee-scented bush instead of a berry-producing one.
Winter Protection: While northern highbush varieties handle -20°F just fine, young plants need extra care. In their first winter, wrap the base with burlap and loosely cover with frost blankets (available at garden centers). Remove the blankets during the day to prevent moisture buildup. For established bushes, focus on mulch depth—that 4-6 inches after harvest insulates roots better than any commercial wrap.
Pro Tips for Blueberry Northern Highbush
- Between us, these details make the difference between a struggling blueberry bush and a thriving, fruit-bearing power...
- Soil pH Precision: That 4.5-5.5 pH range in Step 1 isn't just a suggestion—it's critical. I've seen blueberries fail ...
- Planting Depth Matters: The 1-2 inches above soil level for the graft union in Step 2 is non-negotiable. I learned th...
Frequently asked questions
When is the best time to fertilize Northern Highbush blueberries?
The ideal times are early spring (just before buds swell) and late summer (after harvest). Avoid fertilizing in fall—it can encourage tender new growth vulnerable to winter damage. Use a low-nitrogen, acidic fertilizer (like 10-10-10 or 12-12-12 with sulfur) for optimal results.
How often should I fertilize my Northern Highbush blueberries?
Fertilize twice a year for established bushes: once in early spring (March–April) and once in late summer (July–August). Young plants (1–2 years old) need lighter applications—follow the label’s guidelines. Over-fertilizing can harm roots, so test soil pH first (aim for 4.5–5.5).
Can Northern Highbush blueberries survive harsh winters without extra care?
Yes! This variety is cold-hardy (Zones 3–7), but mulching (3–4 inches of pine straw or wood chips) and winter protection (burlap wraps for young plants) help. Avoid heavy mulch near the stem to prevent rot. Prune in late winter to improve airflow and reduce frost damage.
What’s the best fertilizer alternative if I can’t find acidic blueberry blend?
Mix cottonseed meal (10–15 lbs/100 sq ft) with a balanced fertilizer (like 12-12-12) to lower pH naturally. Alternatively, use sulfur (1–2 lbs/100 sq ft) in early spring. Avoid lime or high-nitrogen lawn fertilizers—they’ll raise pH and harm your plants!
Why are my Northern Highbush blueberries yellowing or wilting?
Yellow leaves often signal high pH or nutrient deficiency (test soil—aim for 4.5–5.5). Wilting could mean underwatering, root rot, or heat stress. Check soil moisture (keep consistently moist but not soggy) and ensure proper drainage. If roots are mushy, reduce watering and improve airflow.
Wrapping up and next steps
Growing blueberry Northern Highbush varieties is a rewarding journey that brings sweet, juicy berries to your table—even in colder climates! 🌱 With the right fertilization, soil prep, and care, you’ll enjoy year-round harvests and a thriving bush that outshines the competition.
Whether you’re a seasoned gardener or just starting, these cold-hardy beauties make blueberry growing accessible and delicious.
Ready to take the next step? Start small—plant a few bushes this season, experiment with fertilization, and watch your garden bloom! 💙 For even better results, keep a gardening journal to track growth and adjust your approach. Happy planting!