
Pruning
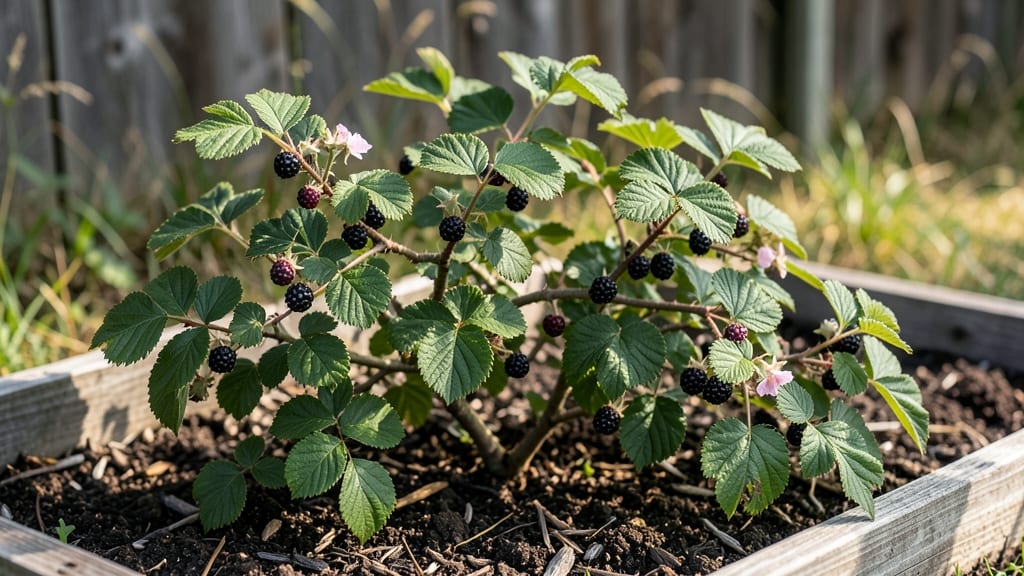
Pruning your bramble berry bush transforms it from a tangled mess into a productive powerhouse—and once you see the results, you'll never skip it again. 🌿 Last summer, my neglected raspberry patch produced half the fruit of my neighbor's meticulously pruned bushes. The difference?
A few sharp cuts at the right time. These bushes thrive with 6-8 hours of sun and well-draining soil, but their real secret is pruning. Thorny varieties like blackberries need aggressive summer pruning, while raspberries benefit from winter cuts.
I've learned to work in layers: first removing dead wood, then shaping for airflow, and finally encouraging new canes for next year's harvest. By late winter, you'll see fresh green shoots pushing through the soil, ready to bear fruit.
The berries themselves—whether sweet black raspberries or tart dewberries—taste richer and more abundant when the plant isn't fighting overcrowded canes. Even container-grown brambles respond well to this method, just scaled down. The key is timing: prune everbearing raspberries in late winter, summer-bearing types in early spring, and always after harvest.
Thorns are the trade-off for productivity, but heavy gloves and long sleeves make harvesting manageable. Trust the process—your future self will thank you at berry-picking time.
📚 In This Guide
- What you need
- Instructions
- Tips and common mistakes
- Wrapping up and next steps
What you need
- ● Pruning shears – Sharp, bypass type (for clean cuts on smaller branches). Size: 6–8 inches.
- ● Loppers – For thicker branches (up to 2 inches in diameter). Size: 18–24 inches.
- ○ Hand saw – For stubborn, woody stems (optional but helpful for thick growth). Type: Pruning saw with a curved blade.
- ● Disinfectant – 70% isopropyl alcohol or a horticultural spray to sterilize tools between cuts.
- ● Gloves – Heavy-duty, thorn-resistant (brambles pack a punch!). Bonus: Long sleeves to protect from scratches.
- ● Trash bags or bucket – For collecting pruned debris (1–2 large bags or a 5-gallon bucket).
- ○ Pruning sealant – Optional but recommended for large cuts (>1 inch) to prevent disease. Type: Tree wound dressing.
- ● Weather check – Prune on a dry, cloudy day (avoid frost or extreme heat).
- ● Map of your bush – Sketch or note key branches (helps track growth patterns).
- ● Compost bin – For repurposing small prunings (avoid diseased wood).
- ● Mulch – Shredded bark or straw (2–3 inches) to protect roots post-pruning.
- ● Fertilizer – Balanced 10-10-10 or organic compost (apply after pruning for a growth boost).
Step-by-Step pruning guide for bramble berry bushes
Here's the method I rely on to keep bramble berry bushes thriving year after year.
✂️ Step 1: Prune in Late Winter Before Bud Break
Timing is everything with brambles. I always prune in late winter—just as buds begin to swell but before any green growth appears. This gives the plant a clean start and prevents disease spread. Use clean, sharp pruners to make cuts at a 45-degree angle about ¼ inch above a bud facing outward.
Remove any dead, diseased, or crossing branches first. These compete for energy and can harbor pests. Look for branches that are brown, brittle, or have blackened cankers. Cut these back to healthy wood immediately. You'll know you're on the right track when you see fresh green buds along the remaining stems.
✂️ Step 2: Thin the Canopy for Better Airflow
Bramble berry bushes grow thick and dense, which can trap moisture and encourage fungal diseases. I aim to thin the center by one-third to improve airflow. Focus on removing the oldest canes first—these are typically the thickest and least productive. Cut them back to the ground to stimulate new growth from the base.
Leave the strongest, most vigorous canes. These are usually the ones with the most buds and the thickest stems. Space remaining canes 6-12 inches apart to allow sunlight to reach all parts of the plant. You'll see new shoots emerging from the base within 4-6 weeks—this is your sign that the plant is responding well to the pruning.
☀️ Step 3: Summer Maintenance Pruning After Harvest
After the berries are harvested, it's time for a lighter pruning session. I remove any branches that produced fruit, cutting them back to the ground. This encourages the plant to put energy into new growth rather than repeating old canes. Also, trim any suckers that emerge from the base—these are the thin, weak shoots that drain energy from the main plant.
Pay attention to the plant's shape. If any branches are rubbing against each other, trim one of them to prevent damage. You'll want to keep the bush open and airy, with sunlight able to penetrate to the center. A well-maintained bramble berry bush should have a balanced shape, with no branches growing straight up or crowding the center.
✂️ Step 4: Fall Cleanup to Prevent Disease
In late fall, after the leaves have dropped, do a final cleanup. Remove all dead leaves, fallen berries, and any remaining debris from around the base of the plant. This reduces overwintering sites for pests and diseases. I also prune any weak or spindly growth that didn't thrive during the season, cutting it back to a strong bud or branch.
Apply a 2-3 inch layer of mulch around the base of the plant, but keep it 6 inches away from the stem to prevent rot. This helps insulate the roots over winter and keeps weeds at bay. By the time spring arrives, your bramble berry bush will be ready to burst into new growth, stronger and healthier than ever.
Tips & tricks for pruning bramble berry bushes like a pro
These hard-earned insights will help you transform your bramble berry bushes into thriving, productive powerhouses.
Tool Prep is Non-Negotiable: Before you even touch a branch, sterilize your pruners with rubbing alcohol or a 10% bleach solution. I learned this the hard way after my bushes developed fungal infections from contaminated tools. Sharp, clean pruners make precise cuts that heal faster and reduce disease risk. Store your tools in a dry place between uses to prevent rust, which can introduce pathogens.
Visual Cues for Perfect Cuts: When making those critical 45-degree cuts in Step 1, imagine you're slicing a pie—aim for a clean, diagonal slice just above a bud. The bud should be facing outward to encourage upward growth. If you're unsure which way a bud is facing, look for the tiny bump where leaves will emerge; that's your guide. This small detail makes all the difference in creating an open, airy structure that prevents fungal issues.
Seasonal Timing Secrets: The late winter timing in Step 1 isn't arbitrary—it's when brambles are fully dormant but buds have begun swelling. This window (typically February-March in most climates) gives you the perfect opportunity to see exactly what needs removal. In colder regions, wait until after the last hard frost but before any green growth appears. The 4-6 week growth response mentioned in Step 2 is your confirmation that you've pruned at the optimal time.
Mulching Mastery: That 2-3 inch mulch layer in Step 4 isn't just decorative—it's a critical winter insulation layer. Use organic mulch like wood chips or straw, and maintain that 6-inch clearance from the stem to prevent rot. I've found that adding a thin layer of compost mixed into the top inch of mulch provides extra nutrients for spring growth. Just avoid fresh manure or untreated wood chips, which can introduce pathogens to your soil.
Pro Tips for Bramble Berry Bush
- These hard-earned insights will help you transform your bramble berry bushes into thriving, productive powerhouses.
- Tool Prep is Non-Negotiable: Before you even touch a branch, sterilize your pruners with rubbing alcohol or a 10% ble...
- Visual Cues for Perfect Cuts: When making those critical 45-degree cuts in Step 1, imagine you're slicing a pie—aim f...
Frequently asked questions
When is the best time to prune a bramble berry bush?
The ideal time to prune bramble berry bushes is late winter or early spring, just before new growth begins. This helps remove dead wood and encourages healthy fruiting canes. Avoid pruning in fall, as it can leave the plant vulnerable to winter damage.
How much should I cut back a bramble berry bush?
Prune back one-third of the oldest canes to the ground each year. These canes are usually 2-3 years old and no longer produce well. Keep 2-3 healthy, younger canes per plant for optimal fruit production. Avoid over-pruning, as it can reduce next year’s harvest.
Will pruning affect berry production?
Pruning actually boosts berry production by redirecting energy to new, healthy growth. Removing old canes prevents overcrowding, which can lead to smaller, lower-quality berries. Think of it as a reset button for your bush!
What if my bramble berry bush isn’t fruiting after pruning?
If your bush isn’t fruiting, check these common issues:
- Age of canes: Berries form on 2-year-old canes. If you’ve cut everything back too aggressively, give it a year to recover.
- Sunlight: Brambles need 6+ hours of sun daily. Shady spots reduce fruit production.
- Soil health: Test soil pH (ideal: 5.5–6.5) and amend with compost if needed.
Can I prune bramble berries in containers or small spaces?
Yes! Container-grown brambles need regular pruning to control size. Use dwarf varieties (like ‘Chehalem’ or ‘Thornless Evergreen’) and prune aggressively to maintain shape. Just ensure the pot has drainage holes and room for roots to spread.
Wrapping up and next steps
Growing a thriving bramble berry bush is all about timing, technique, and a little patience!
By mastering the art of pruning—whether for spring renewal, summer maintenance, or winter cleanup—you’ll ensure lush foliage, bountiful harvests, and a healthier plant year after year. 🌿 With the right tools and knowledge, you’re well on your way to becoming a bramble berry pruning pro!
Ready to take the next step? Start small:
- Pick one bush this season to practice your pruning skills.
- Keep a pruning journal to track growth and adjustments.
- Share your progress with fellow gardeners—community tips make all the difference!