
Container Gardens
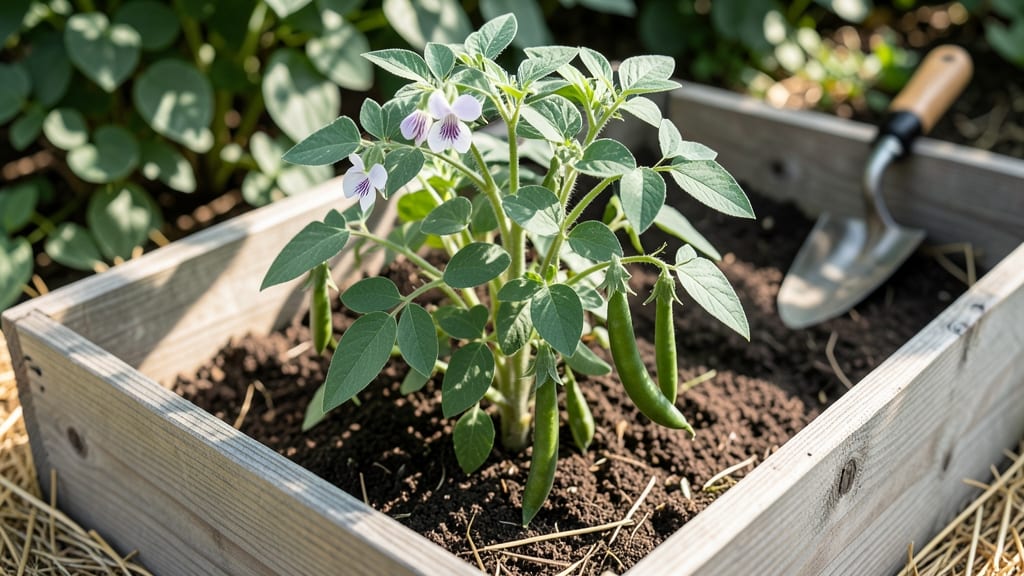
Bush beans in raised beds produce earlier, straighter, and more abundant harvests than in-ground planting—if you nail the sunlight-soil balance. 🌱 I’ve grown them for years, and the difference between a sparse patch and a bushel basket comes down to 6 inches of loose, fertile soil and 6+ hours of morning sun.
The secret isn’t complicated, but skipping these two things means struggling with leggy plants or stunted pods.
Start with well-draining soil mix (half compost, half garden soil) and plant seeds 1 inch deep, 2 inches apart. Raised beds warm faster in spring, so you can plant 2-3 weeks earlier than in-ground gardens—just wait until soil reaches 60°F.
Water consistently (1 inch per week) and watch those plants race toward the sky in just 50 days. The payoff? Pods that snap off cleanly, no bending required.
You’ll know you’ve succeeded when vines burst from the soil and the first flowers appear in 3-4 weeks. By mid-summer, you’ll be harvesting pints of fresh beans weekly—enough for stir-fries, salads, or canning. The best part?
No trellis needed; bush beans stay compact and productive in 4-foot-wide beds. Just keep an eye out for Japanese beetles (they love beans too) and pull weeds before they compete for nutrients.
This method works in any climate—just adjust planting dates for frost. In hot zones, opt for heat-tolerant varieties like ‘Blue Lake’ or ‘Contender’. The only real challenge is overwatering (beans hate soggy roots), but with these basics, you’ll avoid the most common mistakes.
Ready to grow beans that outperform store-bought every time?
📚 In This Guide
- What you need
- Instructions
- Tips and common mistakes
- Wrapping up and next steps
What you need
- ● Raised bed: Minimum 4’ x 8’ (or smaller if space is tight) with 6-12” deep sides. Ensure it has drainage holes if using containers.
- ● Quality soil mix: 60% topsoil, 30% compost, and 10% perlite or vermiculite for drainage. Avoid garden soil with weeds or pests.
- ● Bush bean seeds: 1-2 lbs (e.g., ‘Blue Lake,’ ‘Contender,’ or ‘Provider’). Choose heirloom or disease-resistant varieties for best results.
- ● Organic fertilizer: Balanced 10-10-10 or compost tea to enrich soil before planting.
- ● Mulch: Straw or shredded leaves (2-3”) to retain moisture and suppress weeds.
- ● Watering can or hose with nozzle: For gentle, deep watering (avoid overhead sprinklers to prevent disease).
- ● Garden gloves: To protect hands while handling soil and seeds.
- ○ Row markers or stakes: To label varieties and track growth (optional but helpful!).
- ● Drip irrigation system: Automates watering and saves time.
- ● Trellis or tomato cages: If growing pole beans alongside bush varieties.
- ● Soil pH tester: Bush beans thrive in 6.0-7.0 pH; adjust with lime or sulfur if needed.
- ● Neem oil or copper fungicide: For organic pest/disease prevention.
- ● Knee pads or small stool: For comfortable gardening in raised beds.
Step-by-Step instructions for growing bush beans in raised beds
Here’s how to grow vigorous, high-yielding bush beans with minimal fuss—just follow these proven techniques.
🌱 Step 1: Prepare the Raised Bed for Planting
Start by removing any weeds or debris from the bed, then loosen the soil to a depth of 6-8 inches using a garden fork or tiller. Bush beans thrive in well-drained, loose soil with plenty of organic matter. Mix in 2-3 inches of compost or well-rotted manure to enrich the soil and improve fertility. Avoid fresh manure, as it can burn tender bean roots and attract pests.
If your soil is heavy clay or sandy, blend in 1-2 inches of perlite or coarse sand to improve drainage and aeration. Test the soil pH—beans prefer a slightly acidic to neutral range of 6.0-7.0. If your soil is too alkaline, amend it with sulfur or peat moss before planting. The goal is soil that crumbles easily when moist and holds moisture without becoming soggy.
☀️ Step 2: Plant Seeds at the Right Depth and Spacing
Sow bush bean seeds 1 inch deep and 3-4 inches apart in rows spaced 18-24 inches apart. This spacing ensures good airflow, reducing the risk of fungal diseases like rust or powdery mildew. Plant seeds after the last frost when soil temperatures reach at least 60°F—cold soil delays germination and weakens seedlings.
For a continuous harvest, stagger plantings every 2 weeks until 6-8 weeks before your first expected frost. Drop seeds into the soil one at a time—planting too many in one hole leads to weak, crowded plants. Gently cover with soil and pat it down lightly to ensure good seed-to-soil contact. Water the bed deeply right after planting to settle the soil around the seeds.
💧 Step 3: Water Consistently and Monitor Growth
Keep the soil evenly moist but not waterlogged—beans need about 1 inch of water per week, delivered through deep waterings rather than frequent light sprinkles. Water at the base of the plants in the morning to allow foliage to dry quickly, reducing disease risk. Avoid wetting the leaves, as this can promote fungal issues.
Within 7-14 days, you’ll see the first true leaves emerge—these are your signal that germination is successful. Once seedlings reach 4-6 inches tall, thin them if necessary to maintain the 3-4 inch spacing. Strong seedlings will have deep green leaves and sturdy stems. If you notice yellowing leaves or stunted growth, check for overwatering or poor drainage and adjust accordingly.
✂️ Step 4: Fertilize and Support for Maximum Yield
Bush beans are light feeders, so avoid heavy fertilization, which can lead to excessive foliage at the expense of pods. Instead, side-dress with a low-nitrogen fertilizer (like 5-10-10) or a balanced organic fertilizer when plants are 6 inches tall. Work it into the top 2 inches of soil around the base, keeping it 3-4 inches away from the stems to prevent root burn.
Bush beans don’t require trellising, but if you notice plants leaning or sprawling, gently tuck them upright into the soil or use small stakes for support. Harvest begins 50-60 days after planting, when pods are 4-6 inches long and snap easily when bent. Pick regularly to encourage more production—overripe pods toughen and lose flavor. A healthy bush bean plant can yield 4-6 pounds of beans per season if cared for properly.
🌿 Step 5: Maintain and Harvest Through the Season
Continue watering deeply 2-3 times per week during dry spells, aiming for 1 inch of water weekly. Mulch the bed with 2-3 inches of straw or grass clippings to retain moisture, suppress weeds, and keep soil temperatures stable. Remove any yellowed or diseased leaves immediately to prevent the spread of pests or diseases.
As the season progresses, watch for common pests like Mexican bean beetles or aphids. Handpick beetles in the morning when they’re sluggish, or spray plants with neem oil as a preventive measure. Harvest pods every 2-3 days to keep plants productive—neglected plants will stop producing and focus energy on seed development. With proper care, your raised bed can deliver a steady supply of fresh, flavorful beans for weeks.
Tips & tricks for thriving bush beans in raised beds
These battle-tested strategies will help you avoid common pitfalls and maximize your harvest—no green thumb required.
Soil Preparation Secret: The key to that perfect crumbly texture in Step 1 isn't just depth—it's about consistency. After loosening to 6-8 inches, run your fingers through the soil. It should feel like damp sandpaper, not sticky clay or powdery dust. If you're working with heavy clay, mix in 1-2 inches of perlite and let it sit for 24 hours before planting. This pre-hydration prevents compaction when you water later. Trust me, your beans will thank you with stronger roots.
Germination Boost: Those first true leaves in Step 3 won't appear if your seeds are cold. While the instructions specify waiting for 60°F soil, I've found an extra trick: place a black plastic mulch sheet over the bed for 3-4 days before planting. This warms the soil faster and gets seeds popping in just 7 days instead of 14. Just remove it after germination begins to prevent overheating.
Watering Wisdom: The 1-inch weekly guideline in Step 3 is perfect, but timing matters more than you'd think. Water at 7 AM sharp—this gives leaves a full day to dry before evening humidity peaks, drastically reducing fungal risks. I use a rain gauge to track weekly totals, and if we get 0.75 inches from rain, I skip my scheduled watering that week. Overwatering is the #1 cause of yellowing leaves I see in home gardens.
Harvest Hack: Those 50-60 days until harvest in Step 4 can feel like forever, but here's how to speed things up: once plants hit 6 inches tall, give them a light pinch of low-nitrogen fertilizer (like 5-10-10) mixed with 1 tablespoon of Epsom salt per plant. The magnesium boost increases chlorophyll production, which can shave 3-5 days off your harvest timeline. Just don't overdo it—too much fertilizer sends energy to leaves instead of pods.
Pro Tips for Growing Bush Beans In Raised Beds
- These battle-tested strategies will help you avoid common pitfalls and maximize your harvest—no green thumb required.
- Soil Preparation Secret: The key to that perfect crumbly texture in Step 1 isn't just depth—it's about consistency.
- Germination Boost: Those first true leaves in Step 3 won't appear if your seeds are cold.
Frequently asked questions
Got questions?
Here are answers to the most common ones about growing bush beans in raised beds—so you can skip the guesswork and focus on that harvest!
How much sunlight do bush beans really need?
Bush beans thrive in full sun (6–8 hours daily), but they’ll tolerate partial shade (4–6 hours) if your raised bed gets afternoon shade. Just expect slightly smaller yields. If your garden is shady, opt for shorter varieties like 'Blue Lake' or 'Contender'—they adapt better!
When is the best time to plant bush beans?
Plant after the last frost when soil temps hit 60°F (15°C). For cooler climates, start seeds indoors 2–3 weeks before transplanting. Pro tip: Avoid planting too early—cold soil slows germination, and beans hate soggy roots!
Can I grow bush beans in a raised bed with other plants?
Bush beans are great companions with:
- Cucumbers (they climb the trellis)
- Corn (beans fix nitrogen for the corn)
- Radishes or lettuce (shallow roots don’t compete)
Avoid: Fennel, onions, or garlic—they stunt bean growth. Keep them 18+ inches apart for airflow!
What do I do if my bush beans get pests or diseases?
Common issues:
- Bean beetles: Handpick eggs (tiny yellow dots) or use row covers.
- Powdery mildew: Improve airflow, water at the base, and spray with neem oil.
- Root rot: Avoid overwatering—beans hate soggy soil! Add compost to improve drainage.
Prevention tip: Rotate crops yearly and mulch with straw to deter pests naturally.
Can I grow bush beans in a small raised bed?
Yes! Even a 4’x4’ bed can yield 10–15 lbs of beans if you:
- Plant in double rows (12" apart) with a 12" walkway.
- Use compact varieties like 'Mascotte' or 'Blue Lake Bush.'
- Train vines with a low trellis to save space.
Bonus: Succession plant every 2–3 weeks for continuous harvests!
Wrapping up and next steps
Growing bush beans in raised beds is a rewarding journey that yields delicious, nutrient-packed harvests with minimal fuss! With the right sunlight, soil prep, and a little patience, you’ll enjoy fresh, homegrown beans that taste far superior to store-bought.
Whether you’re a beginner or a seasoned gardener, this method makes it easy to turn a small space into a productive garden.
Now that you’re equipped with the sunlight-soil secrets, it’s time to roll up your sleeves and plant your first batch. Start small, track your progress, and soon you’ll be sharing your harvest with friends—or even preserving the bounty for winter meals! Happy gardening! 🌱✨