
Container Gardens
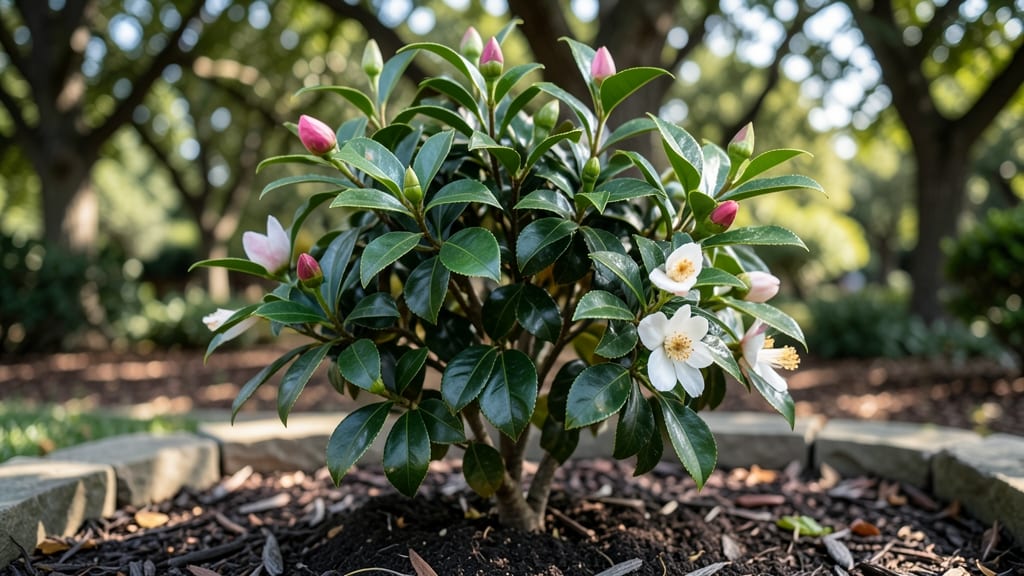
Growing tea bushes in your garden means waking up to the scent of fresh leaves every morning. 🌿 I learned the hard way that these delicate plants need just the right mix of sunlight, soil, and pruning to thrive—especially if you want that year-round fragrance.
The secret isn’t complicated, but it does require patience and a few key techniques to keep them lush and productive.
You’ll need well-draining, slightly acidic soil (think pH between 5.0 and 6.0) and a spot with morning sun and afternoon shade—too much direct sun scorches the leaves, while too little slows growth.
A container with drainage holes works perfectly, and if you’re in a cooler climate, a sheltered spot or even an indoor windowsill can extend the growing season. The payoff? A bush that stays fragrant, healthy, and ready for harvesting for years.
Pruning is where the magic happens—cutting back in late winter or early spring encourages bushier growth and more leaves for steeping. I’ve found that light, regular trims (not drastic cuts) keep the plant compact and prevent woody stems.
The result? A tea bush that looks stunning year-round and rewards you with fresh leaves whenever you want a cup. Even in colder zones, with the right care, you can keep it alive indoors until spring.
Troubleshooting is simple once you know what to watch for: yellow leaves mean overwatering, while slow growth often signals a need for more sunlight or nutrients.
With these basics, you’ll avoid the most common pitfalls and enjoy a thriving tea bush that’s as rewarding to grow as it is to sip from. Ready to get started?
📚 In This Guide
- What you need
- Instructions
- Tips and common mistakes
- Wrapping up and next steps
What you need
- ● Tea bush plants: 1-3 young Camellia sinensis plants (choose between Camellia sinensis var. sinensis for black/green tea or Camellia sinensis var. assamica for robust varieties). Opt for 1-2 year old, nursery-grown plants for best results.
- ● Well-draining soil: 5-10 gallons of a mix of 60% acidic potting soil (pH 5.0-6.5), 30% perlite or sand, and 10% compost. Avoid garden soil unless amended.
- ● Containers (if applicable): 1-2 large pots (12-18 inches deep) with drainage holes for each plant. Use glazed ceramic or food-grade plastic to prevent root rot.
- ● Pruning shears: Sharp, bypass pruners (sterilized with rubbing alcohol) for precise cuts. Avoid dull tools that crush stems.
- ● Organic mulch: 2-3 inches of pine bark or cedar chips to retain moisture and acidify soil naturally.
- ● Slow-release fertilizer: A balanced, acidic fertilizer (e.g., 10-10-10 or 8-3-9 with micronutrients) labeled for azaleas/camellias. Apply 2-3 times per year.
- ● Watering can or hose with a gentle nozzle: Tea bushes hate soggy roots—aim for 1-1.5 inches of water per week (adjust for containers).
- ● Soil pH test kit: Ensures your mix stays in the ideal 5.0-6.5 range. Tea bushes are picky about acidity!
- ● Root stimulator: A mycorrhizal fungus or seaweed-based tonic to boost root health during transplanting.
- ● Shade cloth (30-50% coverage): Protects young plants from harsh afternoon sun in hot climates.
- ● Humidity tray: A shallow tray with pebbles and water to increase moisture around container-grown bushes.
- ● Garden gloves: Save your hands from prickly stems and soil-borne bacteria.
Step-by-Step instructions for cultivating tea bushes
Here’s how to grow fragrant, productive tea bushes that thrive year-round with minimal fuss.
🌱 Step 1: Choose the Right Location and Soil
Tea bushes need partial shade—think 4-6 hours of morning sun and afternoon shade, especially in hotter climates. I plant mine under taller trees or on the east side of the house to avoid scorching. The soil should be well-draining, slightly acidic (pH 5.5-6.5), and rich in organic matter.
Amend heavy clay soil with compost or peat moss to improve drainage. Tea plants hate soggy roots, so raise beds slightly if your yard holds water. A 2-inch layer of mulch (like pine needles or shredded bark) keeps roots cool and retains moisture without compacting.
☀️ Step 2: Plant and Water for Establishment
Dig a hole twice as wide as the root ball but only as deep. Gently loosen roots if they’re circling, then place the plant so the top of the root ball sits just below soil level. Backfill with native soil mixed with compost, pressing lightly to eliminate air pockets.
Water deeply right after planting—1-2 gallons per bush—to settle the soil. Keep the area consistently moist (not soggy) for the first 4-6 weeks. You’ll know it’s right when the top inch of soil feels damp but not wet. After that, water 2-3 times weekly unless it rains.
✂️ Step 3: Prune for Shape and Fragrance
Prune twice yearly: once after the first flush of new growth in spring, and again lightly in early summer. Cut back one-third of the oldest growth each year to encourage fresh, fragrant shoots. I use clean, sharp pruners and make cuts just above a leaf node at a 45-degree angle to prevent water pooling.
Remove any dead, diseased, or crossing branches immediately. This keeps air circulating and reduces pests. Tea bushes respond well to shaping—let them grow 3-4 feet tall for easy harvesting. The more you prune, the bushier and more fragrant the new growth becomes.
🌿 Step 4: Maintain Year-Round Care
Fertilize lightly in early spring with a balanced, organic fertilizer (like 10-10-10). Too much nitrogen makes leaves soft and less aromatic. I skip fall fertilization—tea bushes go semi-dormant in cooler months and need a break to build resilience.
Watch for aphids or spider mites on new growth. Spray with neem oil if you spot sticky residue or fine webbing. Tea bushes are hardy but appreciate a light dusting of sulfur in late summer if leaves yellow—it’s a sign of overwatering or poor drainage.
⏰ Step 5: Harvest for Peak Flavor
Harvest young, tender leaves in spring when they’re 2-3 inches long. Use clean scissors to snip just above a leaf node. For the best flavor, pick early in the morning when essential oils are most concentrated. Avoid harvesting after rain—wet leaves bruise easily.
You’ll get 3-4 harvests per year if you prune correctly. Store fresh leaves in the fridge for up to 5 days or dry them in a shady, well-ventilated spot for loose-leaf tea. The more you harvest, the bushier the plant grows—just don’t take more than one-third of the new growth at a time.
Tips & tricks for perfect tea bush cultivation
Here's what nobody tells you about keeping your tea bushes thriving—and fragrant—throughout the seasons.
Location Science: That 4-6 hours of morning sun is non-negotiable for flavor development, but afternoon shade is your secret weapon against scorching. I've learned the hard way that south-facing windows or open patios work best—just avoid full sun after noon, especially in summer. Tea bushes will tolerate up to 8 hours of sun in cooler climates, but the leaves develop a bitter edge when overheated.
The Pruning Paradox: When you cut back one-third of the oldest growth each year in Step 3, you're not just shaping the plant—you're forcing it to produce fresh, aromatic shoots. The key is timing: prune just after the first spring flush when new growth is 2-3 inches long. This ensures you're removing last year's less flavorful stems while preserving this year's potential. I mark my calendar for late March and early June to stay consistent.
Watering Wisdom: That first 4-6 weeks of consistent moisture is critical, but here's the thing about tea bushes: they hate soggy roots. I use a moisture meter to check the top inch of soil—it should read "damp" not "wet." After establishment, let the top 2 inches dry out between waterings. Overwatering in summer causes yellow leaves, which is why I always check soil moisture before adding more water.
Harvest Hack: The 2-3 inch length guideline in Step 5 is your flavor benchmark—any longer and the leaves get tough. I harvest with clean scissors (not my garden shears!) and always pick from the top down to encourage bushier growth. Pro tip: harvest just before the leaves unfurl fully—they're most fragrant at that tender stage. Store harvested leaves in a paper bag in the fridge for up to 5 days to preserve freshness.
Pro Tips for Growing Tea Bushes
- Here's what nobody tells you about keeping your tea bushes thriving—and fragrant—throughout the seasons.
- Location Science: That 4-6 hours of morning sun is non-negotiable for flavor development, but afternoon shade is your secret weapon against scorching.
- The Pruning Paradox: When you cut back one-third of the oldest growth each year in Step 3, you're not just shaping the plant—you're forcing it to produce fresh, aromatic shoots.
Frequently asked questions
Got questions about nurturing your tea bushes? You’re not alone! Here are some of the most common queries—plus expert answers to keep your fragrant green friends thriving year-round.
How often should I prune my tea bushes?
Prune your tea bushes twice a year: once in early spring (just before new growth starts) and again in late summer (after harvest). Light trimming between harvests keeps them bushy and healthy. Avoid heavy pruning in winter—your plants need rest!
When is the best time to harvest tea leaves?
Harvest young, tender leaves in spring and early summer for the best flavor. Look for 2–3 inch shoots with 2–3 leaves—these are ideal for steeping. Avoid harvesting after heavy rain or frost, as it dulls the flavor. Pro tip: Morning harvests yield the freshest leaves!
Can I grow tea bushes in containers?
Tea bushes thrive in 5–7 gallon containers with well-draining soil and a mix of sand or perlite. Ensure pots have drainage holes and place them in a spot with 6+ hours of sunlight daily. Dwarf varieties like Camellia sinensis ‘Compacta’ are perfect for containers.
Why are my tea bush leaves turning yellow or dropping?
Yellow leaves often signal overwatering, nutrient deficiency, or pests. Check soil moisture—tea bushes prefer slightly dry conditions. Yellowing edges? It could be iron deficiency (try chelated iron). For pests, inspect for aphids or spider mites and treat with neem oil or insecticidal soap.
Do tea bushes need cold protection in winter?
Most tea bushes are hardy to USDA Zone 7–10, but younger plants or colder climates need protection. Wrap pots in burlap or frost cloth and mulch the soil. If temps drop below 20°F, move potted bushes to a sheltered spot like a garage or under eaves.
Wrapping up and next steps
Growing your own tea bushes is a rewarding journey that blends patience, science, and a touch of green-thumb magic—and you’ve just unlocked the secrets to year-round fragrance and lush growth!
Whether you’re a seasoned gardener or a curious beginner, the key lies in understanding pruning techniques, soil needs, and seasonal care. With the right tools and a little dedication, your container garden can become a fragrant oasis, offering both beauty and the soothing aroma of freshly plucked leaves.
Now that you’re armed with knowledge, it’s time to roll up your sleeves and get growing!
Start by selecting your favorite tea bush variety, prep your containers, and follow the pruning schedule to keep your plants thriving. Your next step? Grab those shears, head outside, and watch your green sanctuary flourish—one snip at a time! ☕🌿