
How To
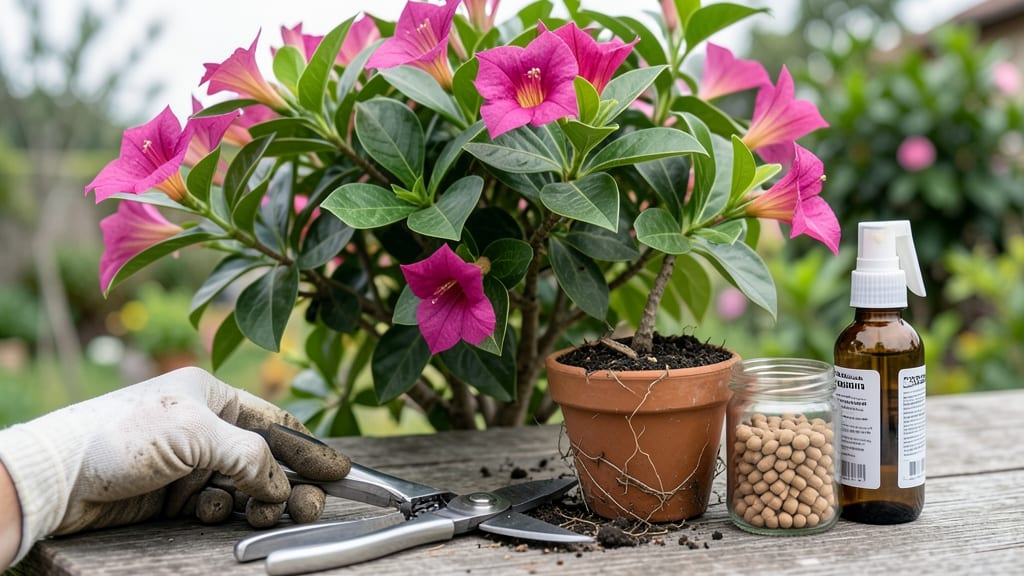
Your Dipladenia’s leggy stems are begging for a reset—how do you make a bushy Dipladenia? This is how you turn them into a lush, flower-covered bush. 🌿 The secret lies in strategic pruning, not just hacking at random branches.
I've nursed my Mandevilla from a sad, sparse vine into a bloom-heavy beauty by mastering three simple cuts: the rejuvenation cut, the shaping cut, and the flower-preservation cut.
Start in early spring when new growth appears, using clean, sharp pruners to avoid tearing stems. Cut just above a leaf node at a 45-degree angle—this encourages bushier growth. For severely leggy plants, trim one-third of the plant back to encourage dense branching.
The key is patience: after each pruning, new shoots emerge within 2-3 weeks, and flowers return within 6-8 weeks.
Pair pruning with balanced fertilization—use a 10-10-10 formula in spring and summer, but cut back in fall to let the plant rest. Morning sun and afternoon shade keep your Dipladenia thriving without scorching.
With these tricks, you'll have a full, vibrant bush by summer, covered in trumpet-shaped blooms that last all season.
This method works for container-grown plants too—just use slightly smaller pots to encourage root density. And yes, you can prune even in winter if you live in a mild climate, but hold off if frost is in the forecast.
Your Dipladenia will thank you with nonstop blooms and a shape that turns heads at your front door.
📚 In This Guide
- What you need
- Instructions
- Tips and common mistakes
- Wrapping up and next steps
What you need
- ● Pruning shears or bypass pruners: Sharp, clean tools to make precise cuts (avoid dull blades that crush stems). Quantity: 1 pair.
- ● Rubbing alcohol (70% or higher) or bleach solution: For sterilizing tools between cuts to prevent disease. Quantity: Small bottle or spray.
- ○ Garden gloves: Protect your hands from thorns and sap. Quantity: 1 pair (optional but recommended!).
- ● Well-draining potting mix: If repotting or refreshing soil (e.g., mix of peat, perlite, and compost). Quantity: Enough to fill container or refresh top 2–3 inches.
- ● Balanced liquid fertilizer (10-10-10 or 20-20-20): For post-pruning growth boost. Quantity: Small bottle (follow label instructions).
- ● Rooting hormone: Speeds up growth of cuttings if propagating. Quantity: Small container.
- ● Mulch (orchid bark or pine needles): Retains moisture and mimics natural habitat.
- ● Support stakes or trellis: Helps guide new growth if training vines.
- ● Spray bottle with water: For misting cuttings or new growth.
Step-by-Step pruning guide for a full, flower-laden dipladenia bush
Here's the method I've used to transform leggy dipladenias into lush, blooming powerhouses—no fancy tools required.
✂️ Step 1: Time Your Pruning for Maximum Impact
Dipladenias bloom best when pruned right after their last major flowering cycle, typically in late winter or early spring before new growth begins. This gives your plant 6-8 weeks to recover and produce fresh, bushy stems before summer heat sets in. If you notice leggy growth stretching toward light, that's your cue—don't wait for flowers to fade.
I always prune mine in February here in Zone 9, right after the Christmas blooms drop. The key is cutting back just as new buds begin to swell on the main stems. You'll see tiny green bumps forming—those are your future branches. If you prune too early, you'll cut off potential flowers; too late, and you risk overstimulating weak growth before summer.
✂️ Step 2: Cut Back to the Right Spots for Bushy Growth
Use clean, sharp pruners (or even sterilized scissors) to make 45-degree angled cuts about ¼ inch above a leaf node—the bump where leaves attach to the stem. This angle prevents water from pooling and rotting the cut. Never cut directly above a node or you'll leave a stub that won't heal properly.
For leggy stems, I cut back one-third to one-half of the plant's height. Focus on the longest, weakest stems first—these are the ones stealing energy from potential side branches. You'll notice the plant looks nearly naked at first, but within 3-4 weeks, you'll see new shoots bursting from the nodes you preserved. These will become your bushy framework.
🌿 Step 3: Encourage Branching with Strategic Pinching
Once your dipladenia starts producing new 4-6 inch growth, it's time to pinch. Using your fingers (no tools needed), gently squeeze off the top 2-3 inches of the strongest new stems. This might seem counterintuitive, but it forces the plant to redirect energy into lateral buds below the pinch point, creating more branches.
I repeat this pinching every 2-3 weeks during the growing season, always targeting the most vigorous new growth. You'll see smaller side shoots emerge within 7-10 days of pinching. These secondary stems are where your bushy structure comes from—each one can eventually produce flowers. The goal is to create a multi-tiered shape rather than a single tall stem.
☀️ Step 4: Optimize Light and Nutrition for Bushy Recovery
After pruning, move your dipladenia to bright, indirect light for 2-3 weeks to reduce stress. Too much direct sun right after cutting can scorch new growth. I place mine under a sheer curtain during the hottest afternoon hours. Once new shoots appear, gradually reintroduce morning sun to harden them off.
Feed with a balanced liquid fertilizer (10-10-10) diluted to half strength every 2 weeks during the growing season. Dipladenias are heavy feeders, but too much nitrogen will give you lush leaves with no flowers. Look for dark green, glossy leaves—that's your sign the plant is happy. If leaves yellow between veins, you're overwatering or using too much fertilizer.
⏰ Step 5: Maintain Shape and Bloom Through the Season
Throughout the growing season, do light maintenance pruning to shape your bush. Remove any dead, diseased, or crossing branches at the base with clean cuts. I also trim back any spent flowers (deadheading) right after they fade—this prevents seed pods from forming and redirects energy into new blooms.
By mid-summer, your dipladenia should be a compact, multi-branched bush. If any stems still look leggy, give them another light pinch to encourage more branching. The key is consistent pruning—don't let it go unchecked for months. A well-maintained dipladenia will produce continuous blooms from spring through fall with the right care.
Tips & tricks for pruning dipladenias to encourage bushy growth
Here's what I've learned from years of transforming leggy dipladenias into vibrant, flowering powerhouses—these details make all the difference.
Timing is Everything: The 6-8 week recovery window mentioned in Step 1 is non-negotiable for Zone 9 climates. If you're in cooler zones, adjust your pruning to late spring instead of February—just make sure to prune before the first major heatwave. I've seen plants struggle when pruned too early in cold climates because they don't have enough growing season to recover before summer. Watch for those tiny green buds swelling on your main stems—they're your cue that the plant is ready to be reshaped.
Pruning Precision Matters: When making those 45-degree angled cuts in Step 2, think of it like writing with a pencil—you want the cut to be clean and slanted. This isn't just about looks; the angle prevents water from collecting on the cut surface, which would otherwise lead to rot. I've ruined several plants by making flat cuts that left water pooling. Also, that ¼ inch above the node is crucial—it's the sweet spot where new growth will emerge. If you cut too close, you'll damage the growth point; too far, and you'll leave an unsightly stub.
Pinching Pays Off: The 2-3 inch pinch in Step 3 might seem drastic, but trust me—this is where the magic happens. I used to skip pinching, thinking it would stunt growth, but now I do it religiously. The key is to pinch the most vigorous stems first—these are the ones hogging all the plant's energy. Within 7-10 days, you'll see those lateral buds wake up and start growing. This creates that beautiful multi-tiered shape that dipladenias are known for. Think of it like training a dog—you're teaching the plant which stems to prioritize.
Light Management is Critical: That 2-3 week transition to bright, indirect light in Step 4 is often where people go wrong. I've seen plants get sunburned because people rush them back into direct sunlight. The sheer curtain trick works wonders—it filters the harsh afternoon rays while still providing plenty of light. You'll know your plant is ready for more sun when you see new growth starting to harden off. Gradually move it to morning sun first, then slowly introduce afternoon sun over the course of a week or two.
Pro Tips for How Do You Make A Dipladenia Bushy
- Here's what I've learned from years of transforming leggy dipladenias into vibrant, flowering powerhouses—these details make all the difference.
- Timing is Everything: The 6-8 week recovery window mentioned in Step 1 is non-negotiable for Zone 9 climates.
- Pruning Precision Matters: When making those 45-degree angled cuts in Step 2, think of it like writing with a pencil—you want the cut to be clean and slanted.
Frequently asked questions
Got more questions about transforming your dipladenia into a lush, bushy beauty? Here are some of the most common ones—and their answers!
Can I prune dipladenia at any time of year?
While you can prune dipladenia year-round, the best times are early spring (just as new growth starts) or right after flowering. Avoid heavy pruning in late fall or winter, as the plant needs energy to recover before spring. Light trimming to shape? Go ahead anytime!
How often should I fertilize after pruning?
After pruning, feed your dipladenia with a balanced, water-soluble fertilizer (like 10-10-10) every 4-6 weeks during the growing season (spring to fall). Skip fertilizing in winter when growth slows. Pro tip: Dilute fertilizer to half-strength to avoid burning delicate new shoots!
What if my dipladenia looks leggy after pruning?
Leggy growth is normal post-prune! To encourage bushiness, pinch back the tips of new growth (just above a leaf node) to prompt branching. Also, ensure your plant gets 6+ hours of bright, indirect light daily—low light slows compact growth. A little patience pays off!
Can I propagate cuttings from my pruned dipladenia?
Use 4-6 inch cuttings from healthy, non-flowering stems. Dip the ends in rooting hormone (optional), plant in moist perlite or sand, and cover with a plastic bag to retain humidity. Roots usually form in 2-4 weeks if kept warm and humid. Bonus: This is a great way to multiply your bushy beauties!
Why isn’t my dipladenia getting bushier after pruning?
Check these common culprits:
- Not enough light: Move to a brighter spot (but avoid harsh sun).
- Overwatering: Let the top inch of soil dry between waterings.
- Underfeeding: Fertilize lightly every 4-6 weeks in growing season.
- Dormancy: If pruned in winter, wait until spring for new growth.
Wrapping up and next steps
Growing a lush, flower-laden Dipladenia is totally within your reach! With the right pruning techniques—like pinching back new growth, trimming leggy stems, and encouraging bushier habits—your plant will thrive and reward you with vibrant blooms.
Remember, consistency is key, so check your Dipladenia regularly and adjust your approach based on its response.
Now that you’re armed with these tricks, roll up your sleeves and get pruning! 🌿✨ Start with one session and watch your bushy, beautiful Dipladenia transform over time. Happy gardening!