
Landscaping
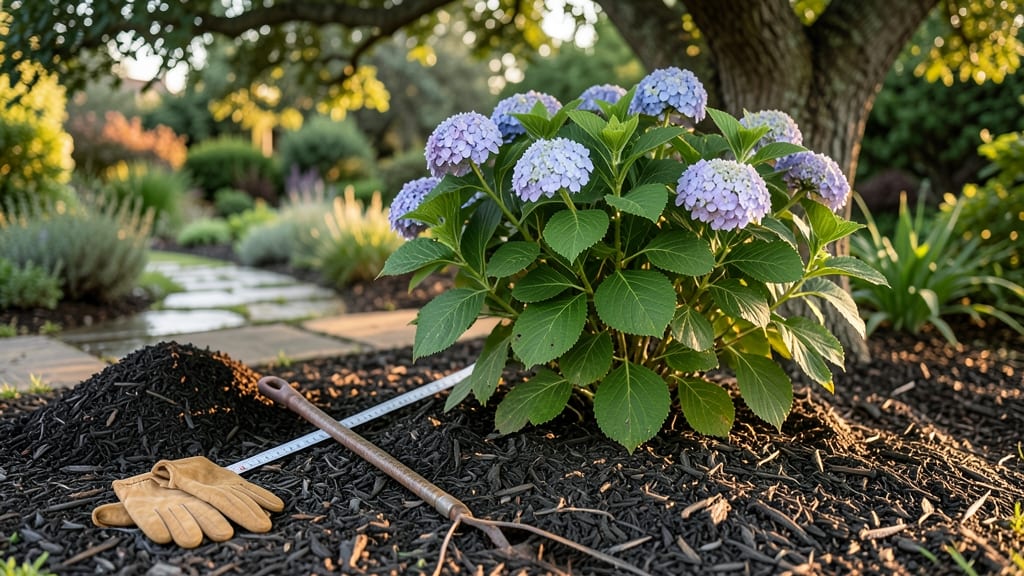
Mulching around bushes isn’t just about looks—it’s the secret weapon for keeping them moist, healthy, and thriving all year. 🌿 I’ve seen firsthand how a simple layer of mulch can transform struggling shrubs into lush, vibrant plants, especially in hot summers or dry climates.
The right technique saves you watering time, blocks weeds, and even protects roots from temperature swings. Organic mulches like wood chips or straw break down over time, feeding the soil, while inorganic options like gravel or rubber mulch last longer but don’t improve soil.
For most bushes, aim for 2–4 inches deep, keeping it 2 inches away from the stem to prevent rot. Timing matters too—spring and fall are ideal, but never pile mulch too high around young plants.
The payoff is immediate: less watering, fewer weeds, and soil that stays cool and moist even in heatwaves. Your bushes will reward you with stronger growth, better blooms, and fewer pests. And the best part? It’s a one-time task that keeps working for months.
Works for shrubs, berry bushes, and even roses—just adjust depth and material based on your plant type. Here’s how to do it right the first time.
📚 In This Guide
- What you need
- Instructions
- Tips and common mistakes
- Wrapping up and next steps
What you need
- ● Mulch: Organic: 2–4 inches of shredded bark, wood chips, straw, or pine needles (decomposes over time, enriching soil).
- ● Inorganic: 2–3 inches of gravel, pebbles, or landscape fabric (long-lasting, weed-suppressing).
- ● Garden Rake: 1 medium-sized rake (for spreading mulch evenly).
- ● Garden Gloves: 1 pair (to protect your hands from sharp edges or prickly mulch).
- ● Hoe or Spade: 1 lightweight tool (to clear weeds or level the soil before mulching).
- ● Watering Can or Hose: (to dampen soil slightly before applying mulch).
- ● Edge Tool: For creating clean, defined borders around bushes.
- ● Landscape Fabric: 1 roll (if using inorganic mulch, to block weeds).
- ● Compost or Fertilizer: A small bag (to mix into soil before mulching for extra nutrients).
- ● Wheelbarrow or Bucket: For hauling mulch to hard-to-reach spots.
Step-by-Step guide to mulching around bushes for long-term health
Here’s how I keep my bushes thriving with the perfect moisture barrier—no guesswork, just proven results.
🌱 Step 1: Clear the Area and Prepare the Soil
Start by removing any weeds, grass, or debris within a 3-inch radius around the base of your bush. I use a small hand trowel to dig out stubborn roots—this prevents competition for water and nutrients. Rake the soil surface gently to create a smooth, even layer where mulch will settle.
Check for any low-lying branches touching the ground. If they’re present, trim them back to 6 inches above the soil line. This ensures airflow and prevents rot when mulch is applied. A quick inspection now saves headaches later when your bush struggles to thrive.
🪴 Step 2: Apply a Thin Layer of Organic Matter (Optional)
Before adding mulch, spread a ½-inch layer of compost or well-aged manure over the soil surface. This step feeds beneficial microbes and improves soil structure over time. I skip this if my soil is already rich, but for new plantings or poor soil, it’s worth the extra effort.
Work the compost into the top ½ inch of soil with your fingers or a small rake. Avoid digging deeper—you don’t want to disturb the roots. This light incorporation is enough to kickstart decomposition without overwhelming the bush.
💧 Step 3: Spread Mulch Evenly in a 3-Inch Ring
Use 2-4 inches of organic mulch (like shredded bark, straw, or wood chips) and spread it in a 3-inch-wide ring around the base of the bush. Keep the mulch 2-3 inches away from the trunk or stems—piling it against the bark can trap moisture and cause rot. I like to mound it slightly higher at the outer edge to help direct water toward the roots.
For larger bushes, use a rake to create a slight depression in the center of the mulch ring. This creates a natural water catchment that keeps moisture close to the roots during dry spells. The goal is to mimic nature’s own moisture-retaining layer.
✂️ Step 4: Refresh and Maintain Seasonally
Check your mulch every 3-6 months—when it breaks down to 1 inch or less, add a fresh layer to maintain the 2-4 inch depth. I top up in early spring and again after summer to keep the moisture barrier intact. Avoid over-mulching, which can smother roots and create anaerobic conditions.
In late winter, fluff the mulch with a rake to improve airflow and prevent compaction. This is especially important for evergreen bushes, which need their roots to breathe even in cooler months. A quick once-over keeps everything healthy without disturbing the plant.
☀️ Step 5: Adjust for Seasonal Needs
In hot, dry climates, add a thicker layer (3-4 inches) of mulch in summer to lock in moisture. In cooler regions, reduce to 2 inches to allow heat absorption. I monitor my bushes closely—they’ll tell you what they need through leaf color and growth rate.
For newly planted bushes, apply 1-2 inches of mulch immediately after planting to protect young roots from temperature swings. Over time, this creates a stable microclimate that encourages strong, consistent growth.
Tips & tricks for perfect bush mulching
These simple strategies will help you create an effective moisture barrier that keeps your bushes thriving all year.
Timing is Everything: The 3-6 month refresh schedule in Step 4 is crucial for maintaining proper mulch depth. I've learned the hard way that waiting too long between refreshes leads to compacted mulch that repels water instead of retaining it. Set calendar reminders for early spring and late summer to stay on track.
Mulch Selection Matters: Not all mulches work equally well. For best moisture retention, choose organic mulches like shredded bark or wood chips that break down slowly. Pine needles or straw work too, but avoid thick layers of grass clippings—they mat down and create thatch. I always keep a bag of cedar mulch on hand for its natural pest-repelling properties.
Seasonal Adjustments: The 3-4 inch summer layer in Step 5 makes all the difference in hot climates. I've seen bushes with insufficient mulch develop crispy edges during dry spells. In cooler regions, that 2 inch winter layer helps insulate roots from freezing temperatures. Pay attention to your local climate patterns when deciding on thickness.
Visual Cues for Proper Application: When creating your 3-inch ring in Step 3, imagine a donut shape around the bush. The mulch should be thickest at the outer edge to direct water toward the roots. If you're unsure about the 2-3 inch distance from the trunk, use a ruler or measuring tape—this prevents rot while maintaining moisture retention.
Pro Tips for Mulch Around Bushes
- These simple strategies will help you create an effective moisture barrier that keeps your bushes thriving all year.
- Timing is Everything: The 3-6 month refresh schedule in Step 4 is crucial for maintaining proper mulch depth. I've le...
- Mulch Selection Matters: Not all mulches work equally well. For best moisture retention, choose organic mulches like ...
Frequently asked questions
Got questions about mulching around your bushes? You’re not alone! Here are some of the most common concerns—plus straightforward answers to keep your plants thriving.
When is the best time to mulch bushes?
Mulch bushes in early spring or late fall for best results. Avoid mulching right after planting—wait 4-6 weeks to let roots establish. In hot climates, apply mulch anytime to retain moisture, but avoid piling it against stems to prevent rot.
How thick should mulch be around bushes?
Aim for 2–4 inches of mulch. Too thin (under 2 inches) won’t retain moisture well, while too thick (over 4 inches) can suffocate roots and attract pests. Use organic mulch (like shredded bark) for best decomposition and nutrient benefits.
Can I reuse old mulch from last year?
Yes, but with caution! If the old mulch is dry, compacted, or moldy, refresh it with a new layer (1–2 inches). Break up clumps and mix in compost to restore nutrients. Avoid reusing mulch from diseased plants to prevent spreading issues.
Will mulch attract pests like slugs or ants?
Mulch can attract pests, but proper techniques minimize risks. Use coarse mulch (like pine straw or wood chips) to deter slugs, and keep mulch 6+ inches away from stems. For ants, opt for cedar mulch, which naturally repels them.
What’s the difference between organic and inorganic mulch for bushes?
| Type | Pros | Cons |
|---|---|---|
| Organic (e.g., wood chips, leaves) | Improves soil over time, retains moisture, adds nutrients. | Breaks down faster; may need replenishing yearly. |
| Inorganic (e.g., gravel, rubber mulch) | Long-lasting, doesn’t decompose, suppresses weeds. | Doesn’t enrich soil; can overheat roots in summer. |
For bushes, organic mulch is usually the best choice!
Wrapping up and next steps
Mulching around your bushes isn’t just a chore—it’s a game-changer for their health and your gardening success! 🌱 By retaining moisture, suppressing weeds, and regulating soil temperature, you’re giving your plants a thriving foundation year-round.
Whether you’re a seasoned gardener or just starting out, the right mulch and technique make all the difference.
Now that you’re equipped with the how-to, grab your tools and get ready to transform your garden. Next up? Try experimenting with different mulch types or adding a layer of compost for extra nutrients—your bushes will thank you! 🌿