
Propagation
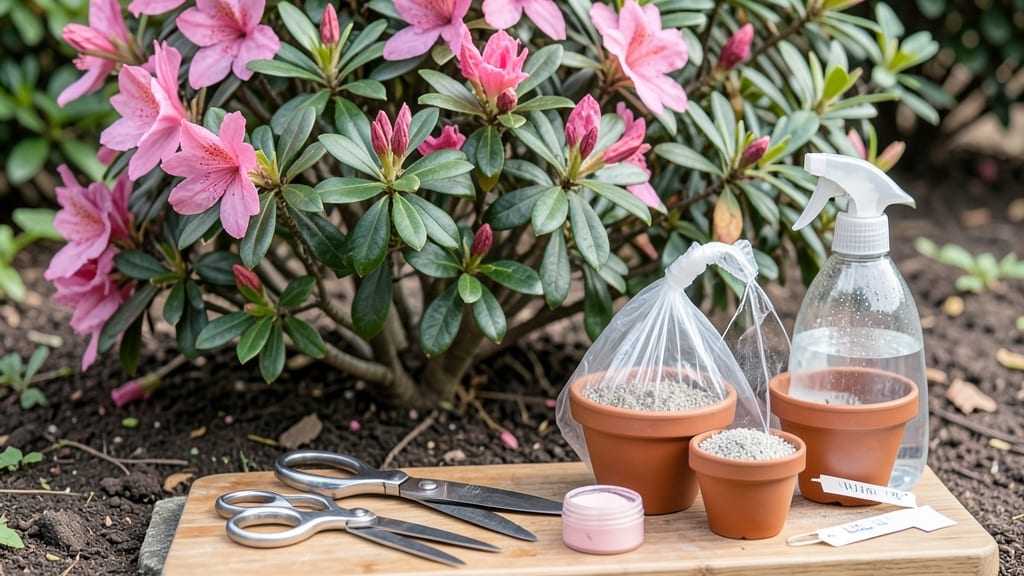
The secret to how to propagate azalea bushes without digging up your yard is right in front of you. ✨ Layering azalea stems creates identical plants with minimal effort—no greenhouses or fancy tools required.
I’ve propagated dozens this way, and the best part? You can do it anytime the soil stays workable, even in partial shade where azaleas thrive.
All you need is a sharp pair of pruners, some rooting hormone (optional but helpful), and a little patience. The process takes about 3-6 months from start to transplant, but the payoff is bushier, more vibrant azaleas that match your original plants exactly.
No root shock, no nursery price tags—just free, healthy growth from your existing bushes.
By summer’s end, you’ll have rooted layers ready to separate and replant. The new plants bloom just as reliably as their parents, and you’ll finally have that extra azalea for your friend’s garden (or your own secret stash).
The key is keeping the soil moist and the layer protected until roots form—then it’s just time to cut and replant.
Works for both evergreen and deciduous azaleas, and the same method applies whether you’re filling a shady border or sharing plants with fellow gardeners. Let’s get those roots growing!
📚 In This Guide
- What you need
- Instructions
- Tips and common mistakes
- Wrapping up and next steps
What you need
- ● Healthy azalea bush(es): Choose mature bushes (3+ years old) with flexible, semi-ripe stems (not too woody). Aim for 3–5 stems per plant for best results.
- ● Sharp pruning shears or bypass pruners: Sterilized (rubbing alcohol wipe) to prevent disease. Size: 6–8 inch blades for precision cuts.
- ○ Rooting hormone (optional but recommended): A powder or gel with 1–3% IBA (Indole-3-Butyric Acid) to boost root growth. Brand examples: Dip ‘N Grow or Clonex.
- ● Plastic or metal plant clips: 2–3 per stem (e.g., 1/4-inch wire clips or plastic plant propagation clips).
- ● Moisture-retentive medium: Option 1: Sphagnum moss (pre-moistened, 1–2 inches thick per layer).
- ● Option 2: Peat moss + perlite mix (50/50 ratio, 2–3 inches deep in a tray).
- ● Clear plastic bag or humidity dome: To create a mini greenhouse (e.g., 1-gallon Ziploc bag or 6-inch propagation dome).
- ● Spray bottle with water: Room-temperature, filtered water to mist layers daily.
- ● Garden twine or rubber bands: For securing layers to the main plant (if not using clips).
- ● Hormone-free alternative: Cinnamon powder (antifungal) to dust cuts before layering.
- ● Heat mat (70–75°F): Speeds up rooting in cooler climates (e.g., 4-inch x 12-inch mat).
- ● pH test kit: Ensure your medium is acidic (pH 4.5–5.5)—azaleas thrive in acidic soil!
- ● Labeling tags: Mark stems with plant names/dates (e.g., wooden or plastic plant labels).
Step-by-Step instructions for propagating azalea bushes
Here’s how to multiply your azaleas naturally—no digging required, just clever layering.
🌿 Step 1: Select and Prepare Healthy Shoots
Choose 4-6 low-growing, flexible shoots no thicker than a pencil from the outer edges of your azalea bush. These should be 12-18 inches long and have at least 3-4 leaves—they’ll need energy to grow roots. Avoid shoots with flowers or buds, as they’ll focus on blooming instead of rooting.
Use clean, sharp pruning shears to make a 45-degree cut about ½ inch above a leaf node (the bump where leaves attach). This angled cut prevents water from pooling and encourages faster healing. Gently bend the shoot downward—you’ll hear a slight snap when it’s flexible enough to root without breaking.
🌱 Step 2: Create a Root-Inducing Wound
About 3-4 inches from the tip, make a small, shallow slit (about ¼ inch deep) in the shoot’s bark using a sterilized knife. This wound triggers root growth by exposing the cambium layer—the plant’s growth tissue. Rub the slit gently with a rooting hormone (optional but helpful) to boost success.
Bury the wounded section 2-3 inches deep into moist, well-draining soil (or a mix of 50% peat moss and 50% perlite). If your azalea is in the ground, create a small trench or mound nearby. For potted azaleas, use a separate 4-inch pot with the same soil mix. Keep the rest of the shoot above ground.
💧 Step 3: Secure and Hydrate the Layer
Use a U-shaped wire or bent piece of rebar to hold the shoot in place without crushing it. Cover the buried section with 1-2 inches of soil, leaving the top leaves exposed to light. Water gently until the soil is evenly moist but not soggy—azalea roots need oxygen, not waterlogged conditions.
Place the layered shoot in partial shade (morning sun is ideal) and maintain consistent moisture. You’ll know it’s working when you see new growth at the tip after 4-6 weeks. This confirms the shoot is photosynthesizing while roots develop below ground.
⏰ Step 4: Separate and Transplant New Plants
After 8-12 weeks, check for roots by gently tugging the shoot. If it resists, roots have formed. Use a small trowel to dig around the buried section and carefully sever it from the mother plant. Replant the new cutting in its own 6-inch pot with acidic potting mix (pH 4.5-5.5).
Keep the soil moist but not wet for the first 2 weeks to reduce transplant shock. Gradually introduce it to more sunlight over 7-10 days before moving it outdoors. Avoid full sun until it’s fully established—young azaleas scorch easily.
☀️ Step 5: Maintain and Encourage Growth
Once rooted, fertilize lightly with a balanced, acidic fertilizer (10-10-10) every 4-6 weeks during the growing season. Azaleas thrive in dappled shade—too much sun stresses them, while too little slows growth. Prune leggy stems to encourage bushier growth, but avoid heavy cuts that remove more than ⅓ of the foliage at once.
Your new azaleas will bloom in 2-3 years, but the real reward is watching them mirror their parent’s vibrant colors. This method works best in spring or early summer when temperatures are mild and humidity is high—ideal for rooting.
Tips & tricks for perfect azalea propagation
Between us, these little details make all the difference when you're working with azalea layering.
Shoot Selection Matters: The shoots you choose are the foundation of success. Look for ones that are 12-18 inches long with at least 3-4 leaves, but here's the thing—thickness counts too. Shoots thicker than a pencil will be tougher to bend and may not root as easily. I've found that slightly younger shoots (just starting to harden) root better than mature, woody ones. Also, avoid any shoots with flower buds—they'll focus their energy on blooming instead of growing roots.
The Wound Technique: That shallow slit you make in Step 2 is where the magic happens. The key is to expose the cambium layer without damaging the inner tissues. I learned this the hard way after trying to make deeper cuts—it actually inhibits root growth. Use a sterilized knife to create a clean, ¼-inch deep slit about 3-4 inches from the tip. This wound signals the plant to start producing roots at that exact spot. Pro tip: If your knife isn't sharp, you'll crush the tissues instead of making a clean cut.
Moisture Management: Azalea roots need consistent moisture, but not soggy conditions. After burying your wounded shoot, water until the soil is evenly moist but drains freely. The 4-6 week waiting period requires patience—check moisture daily during hot weather. I've seen propagation fail when people either underwater (roots dry out) or overwater (roots suffocate). A good test is to stick your finger 1 inch into the soil—it should feel like a damp sponge, not a wet towel.
Seasonal Timing: The instructions mention spring or early summer as ideal, and there's good reason. During these seasons, temperatures are mild (50-75°F) and humidity is naturally higher—both perfect for root development. If you're in a hotter climate, try morning shade and afternoon watering to prevent stress. I've had better success in spring when the plant is already gearing up for new growth rather than trying this in fall when it's preparing to go dormant.
Pro Tips for Propagate Azalea Bushes
- Between us, these little details make all the difference when you're working with azalea layering.
- Shoot Selection Matters: The shoots you choose are the foundation of success. Look for ones that are 12-18 inches lon...
- The Wound Technique: That shallow slit you make in Step 2 is where the magic happens. The key is to expose the cambiu...
Frequently asked questions
Got questions about propagating azaleas? You’re not alone! Here are some of the most common concerns—and their straightforward solutions—to help you grow new bushes with confidence.
When is the best time to layer azalea bushes?
The ideal window is late spring to early summer (May–June) when new growth is strong but before extreme heat sets in. This gives roots time to establish before winter. If you miss this, early fall (September) is a backup—just avoid freezing temps!
Why aren’t my layered azalea stems rooting?
Rooting struggles often stem from too much moisture (rotting roots) or not enough (dry soil). Check your soil mix—it should stay consistently damp but not soggy. Also, ensure the stem is firmly bent (not loose) and the wound is clean. If roots still refuse to form, try a rooting hormone for a boost.
Can I propagate azaleas from cuttings instead of layering?
Yes! While layering is easier, softwood cuttings (from new growth) work too. Take 3–4 inch tips, dip in rooting hormone, and plant in perlite/peat mix. Keep humid and warm (70–75°F) under a plastic bag. Roots may appear in 8–12 weeks, but success rates are lower than layering.
How long does it take for layered azaleas to be ready to transplant?
Patience pays off! Most layered stems develop roots in 4–6 months, but wait until they’ve grown 3–4 inches of new roots before separating. Transplant on a cloudy day to reduce stress, and water deeply for the first week to help them settle in.
Do azalea layers need special care in winter?
Newly layered stems are tender—protect them with mulch (2–3 inches) around the base and a light frost cover (like burlap) if temps drop below 20°F. Avoid heavy snow buildup, which can break fragile stems. Prune back any dead growth in early spring to encourage fresh growth.
Wrapping up and next steps
Propagating azalea bushes through layering is a rewarding way to expand your garden without the hassle of digging!
With the right timing, tools, and patience, you can encourage strong root growth and create thriving new plants. Remember: consistency is key—keep your layers moist, protect them from extreme conditions, and soon you’ll have lush, self-sustaining azaleas to enjoy.
Ready to give it a try? Start with one bush this season and watch your garden flourish! 🌿✨