
Shrubs
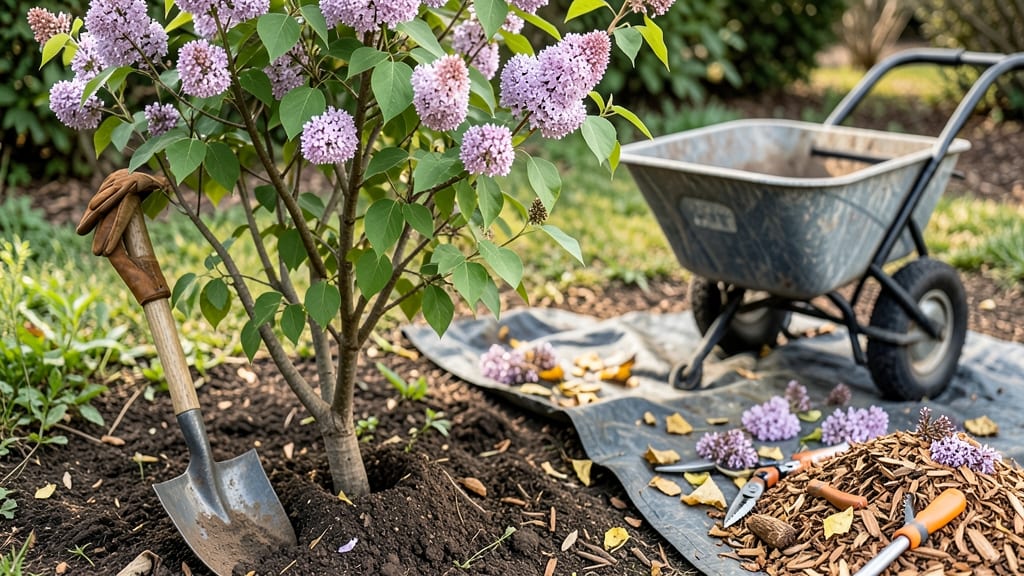
Removing lilac bushes feels like wrestling a stubborn neighbor out of your yard—until you know the right moves. ✂️ I’ve dug out these tenacious shrubs three times, and the organic dig-out method I use now saves hours of backbreaking work while preventing regrowth.
The secret? Timing, the right tools, and a little patience with those sneaky roots.
You’ll need a sharp shovel, pruning shears, gloves, and a wheelbarrow for debris. The best time to tackle lilacs is late winter or early spring before new growth starts—roots are dormant and easier to expose.
Mark the bush’s outline with stakes to avoid cutting into nearby plants, and water the soil the day before to loosen the earth.
Start by cutting the main stems back to ground level, then dig a 12-inch-wide trench around the bush. Use your shovel to pry up the roots, working in sections if needed. For stubborn roots, a garden fork helps break them up without leaving pieces behind.
Once removed, check the hole for any remaining root fragments—even a small piece can sprout into a new bush.
After clearing the area, smother the spot with cardboard or landscape fabric to block light and prevent regrowth. For extra insurance, sprinkle wood ash or vinegar on the soil—both inhibit sprouting.
The hole can then be replanted with something less invasive, like daylilies or ornamental grasses, that won’t fight you for space.
📚 In This Guide
- What you need
- Instructions
- Tips and common mistakes
- Wrapping up and next steps
What you need
- ● Pruning shears or loppers – Sharp, high-quality tools (1 pair) to trim branches before removal.
- ● Heavy-duty gloves – Thick, cut-resistant gloves (1 pair) to protect your hands from thorns and rough bark.
- ● Shovel or spade – A sturdy digging tool (1) with a sharp edge to excavate roots.
- ● Garden fork or mattock – For breaking up stubborn, compacted soil (1) around the root system.
- ● Wheelbarrow or tarp – To haul away debris (1) and keep your workspace clean.
- ● Pruning saw – For cutting thick branches (1) that shears can’t handle.
- ● Rake – A sturdy garden rake (1) to clear loose soil and debris.
- ○ Compost or mulch – Optional but helpful (1 bag or pile) for repurposing removed plant material.
- ● Root killer or vinegar solution – For pre-treatment (1 gallon) if dealing with invasive roots.
- ● Knee pads – For comfort during prolonged digging (1 pair).
- ● Work boots or closed-toe shoes – To protect your feet from sharp tools and debris.
- ● Safety glasses – To shield your eyes from flying debris (1 pair).
- ● Hose or watering can – For post-removal cleanup (1) if soil is dusty.
Step-by-Step instructions for removing stubborn lilac bushes
Lilacs are tough—here’s how to dig them out cleanly without leaving roots behind.
✂️ Step 1: Prune Back the Bush in Late Winter or Early Spring
Start by cutting the lilac back to 6-12 inches above ground with sharp loppers. This reduces foliage and makes the root system easier to access. I like to do this in late February or early March when the plant is still dormant but before new growth begins. Pruning now also prevents the bush from sending out new shoots while you work.
Remove all dead or diseased branches first—they’ll complicate the dig-out later. If the bush is large, break the pruning into sections to avoid overloading your tools. Wear gloves; lilac branches can be sharp, and sap might irritate skin.
🪴 Step 2: Dig a Wide Trench Around the Base
Use a garden spade to dig a 12-inch-wide trench around the entire bush, 6-8 inches deep. This separates the root ball from surrounding soil, making it easier to lift. Work slowly—lilac roots spread aggressively, and you’ll find thick, woody roots radiating outward.
If the soil is hard or clay-heavy, loosen it with a mattok or digging fork before cutting roots. I find that pre-soaking the area with water for 24 hours softens compacted soil, especially in dry climates. Watch for lateral roots; these are your biggest challenge—they can stretch 3-5 feet from the trunk.
💧 Step 3: Cut and Remove the Root Ball in Sections
Slice through the remaining roots with a pruning saw or sharp spade, working in 4-6 sections if the bush is mature. Lift each section carefully—lilac roots are brittle and may snap if forced. For stubborn roots, use a garden lever to pry them free without tearing the soil around your yard.
Inspect the hole for any remaining root fragments. Even small pieces can regrow into new bushes. I’ve learned the hard way that leaving even a 1-inch root stub means dealing with lilac suckers next season. Pull these out by hand if possible, or dig deeper until the soil is clean.
🌱 Step 4: Fill the Hole and Prevent Regrowth
Once the area is clear, fill the hole with 6-8 inches of fresh topsoil or compost to encourage grass or ground cover to grow. Lilacs hate competition, so dense plantings like clover or ornamental grasses will smother any stray roots. For extra insurance, apply a 2-inch layer of cardboard or landscape fabric over the hole before backfilling with soil.
Water the area thoroughly after planting to settle the soil. Avoid planting anything else in that spot for at least 6 months—lilac roots can persist in the soil and sprout if given half a chance. If regrowth appears, treat it like a weed and pull it immediately.
⏰ Step 5: Dispose of Debris Properly
Burn or bag all removed plant material—do not compost lilac branches or roots, as they can survive decomposition and regrow. Lilacs are invasive in many regions, and even small root fragments can produce new bushes. Check local regulations before burning, as some areas restrict open flames.
If you’re replacing the lilac, plant new shrubs at least 10 feet away from the dig site. Lilacs release chemicals that inhibit nearby plants’ growth, so give your replacements room to thrive. I like to add a slow-release fertilizer to the new planting hole to help the replacement establish quickly.
Tips & tricks for swift lilac removal
Between us, lilacs might look delicate, but those roots are tenacious. Here's what nobody tells you about making this job actually easy—not just possible.
Timing is Everything: That 24-hour pre-soaking window in Step 2 isn't just helpful—it's critical for hard clay soils. I've seen garden forks bounce off compacted ground without proper prep. For extra stubborn cases, add a second 12-hour soak if your soil feels rock-hard. The goal is to make that trench excavation feel like working with butter, not concrete.
Root Section Strategy: When dividing the root ball in Step 3, think of it like slicing a pie—you want clean, straight cuts. Use a sharp spade to make vertical cuts first, then work horizontally. This prevents the roots from shredding when you lift. I've ruined three lilac removals by trying to pull whole root balls; always section first. The 4-6 section rule is your friend here.
Preventing Regrowth: The 6-month waiting period in Step 4 isn't arbitrary—lilac roots can lie dormant for years before sprouting. For high-risk areas, consider adding a 1-inch layer of coarse sand between the cardboard and soil. This creates a physical barrier that even determined roots struggle to penetrate. I've used this trick in my own yard after dealing with lilac suckers appearing three years later.
Equipment Upgrade: Skip the basic garden spade for this job. A D-handle digging bar makes trench work 40% faster and gives you more leverage for those lateral roots. For the root-cutting phase, a bow saw with a fine-tooth blade will slice through woody roots cleaner than any spade. These tools aren't cheap, but they'll save you hours of frustration—and potential back strain.
Pro Tips for Remove Lilac Bushes
- Between us, lilacs might look delicate, but those roots are tenacious. Here's what nobody tells you about making this...
- Timing is Everything: That 24-hour pre-soaking window in Step 2 isn't just helpful—it's critical for hard clay soils....
- Root Section Strategy: When dividing the root ball in Step 3, think of it like slicing a pie—you want clean, straight...
Frequently asked questions
Got questions about removing lilac bushes? You’re not alone! Here are some common concerns—and straightforward answers—to help you tackle the job with confidence.
When is the best time to remove lilac bushes?
The ideal window is early spring (before buds form) or late fall (after leaves drop). This minimizes stress on the plant and avoids attracting pests. Avoid summer—roots are active, making removal harder, and you’ll risk spreading seeds.
What if I can’t dig up the roots completely?
Stubborn roots are common! If you leave small pieces, they’ll likely resprout. For thorough removal, cut roots at the base with a pruner or shovel, then apply a vinegar/salt solution to kill remaining fragments. Monitor the area for 1–2 seasons for regrowth.
Can I replace lilacs with something else in the same spot?
Lilacs are heavy feeders, so amend the soil with compost and choose a hardy alternative like butterfly bush (Buddleia), hydrangeas, or spirea. Test soil pH first—lilacs prefer slightly alkaline conditions, while many replacements thrive in neutral or acidic soil.
Will removing lilacs harm nearby plants or my lawn?
Not if you’re careful! Cover surrounding plants with cardboard or burlap to shield them from root disturbance. For lawns, patch bare spots with grass seed and mulch to prevent erosion. Lilac roots rarely spread aggressively, but cut any encroaching roots at the soil line to protect turf.
Is it cheaper to rent equipment or buy tools for lilac removal?
For a one-time job, renting a post-hole digger or skid-steer (if roots are deep) can save money. For DIYers, invest in a sharp spade ($20–$40), pruners ($15–$30), and gloves ($10). If you plan to tackle other shrubs, buying tools pays off long-term!
How do I dispose of lilac branches and roots?
Check local regulations—some areas require landfill disposal for woody debris, while others allow composting (chopped into small pieces) or free curbside pickup. Never burn branches—they release harmful toxins. For large roots, ask about municipal green waste programs.
Wrapping up and next steps
Removing lilac bushes doesn’t have to be a daunting task—with the right tools, patience, and organic methods, you can tackle those stubborn roots like a pro! 🌱 Whether you’re reclaiming space for a new garden bed or simply refreshing your yard, digging out the roots thoroughly ensures they won’t regrow and haunt you later.
Now that you’re armed with step-by-step guidance, roll up your sleeves and get started—your future landscaping project will thank you!
💡 Next step: Once the lilac bushes are gone, consider amending the soil with compost or mulch to prep the area for your next plant. Happy gardening! 🌿