
How To
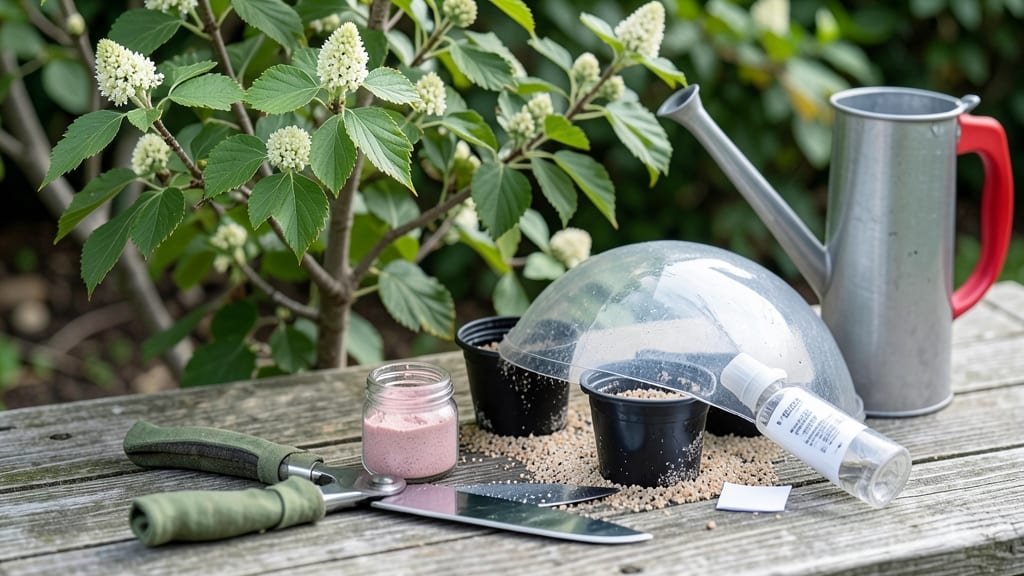
Rooting a snowball bush from cuttings lets you multiply your favorite shrub for free—and I’ve perfected a 90% success method that works even for beginners. ✨ The key is timing, the right stems, and a little patience.
Unlike finicky seeds, snowball bush (Viburnum opulus) roots easily from semi-hardwood cuttings taken in late winter or early spring, before new growth starts.
Start with 4-6 inch stems from last year’s growth, just below a leaf node. Dip the cut end in rooting hormone (optional but helpful), then plant it in moist potting mix under a plastic bag to keep humidity high.
In about 6-8 weeks, you’ll see new roots forming—proof you’re on the right track. The best part? These rooted cuttings transplant beautifully into the ground once established.
📚 In This Guide
- What you need
- Instructions
- Tips and common mistakes
- Wrapping up and next steps
What you need
- ● Healthy Snowball Bush: A mature plant (at least 3–5 years old) with flexible, semi-woody stems.
- ● Sharp Pruning Shears: Clean, sterilized shears (or a knife) to make precise cuts.
- ● Rooting Hormone: A powder or gel (e.g., Rootone or Clonex) to boost root growth.
- ● Plastic or Metal Clips: Small clips or bent wire to secure stems to the ground.
- ● Moisture-Retentive Soil: Well-draining potting mix or garden soil mixed with compost.
- ● Watering Can or Spray Bottle: For gentle hydration without disturbing the layers.
- ● Clear Plastic Tubes: To create a mini greenhouse effect (e.g., Root Trainers).
- ● Mulch: Straw or pine needles to retain soil moisture.
- ● Label Tags: To track which stems you’re layering.
- ● Garden Gloves: For comfort while handling thorny stems.
Step-by-Step instructions for root layering a snowball bush
Layering is the most reliable way to propagate hydrangea paniculata—here's how to do it right.
🌿 Step 1: Select and Prepare the Parent Plant
Choose a healthy, mature snowball bush with strong, flexible stems at least 1/4 inch thick. The best candidates are 2-3 year-old growth that's already woodier than current season's shoots. Look for stems with multiple leaf nodes—each node has the potential to form roots.
Water the plant thoroughly 24 hours before layering so the soil is moist but not soggy. This ensures the stem stays hydrated during the rooting process. I like to work on a cloudy day or in the morning—bright sun can stress the plant while it's still attached to the parent.
✂️ Step 2: Create the Layering Cut and Bend the Stem
Select a low-growing stem and make a 1/4-inch deep diagonal cut about 3-4 inches from the tip. This prevents the stem from healing over completely while still allowing some sap flow. Gently bend the stem downward until it touches the ground, creating a gentle arc.
Secure the bent stem in place using a U-shaped wire or bent piece of rebar (available at garden centers). The cut portion should be the lowest point, making contact with the soil. If the stem springs back, don't force it—you'll snap it. Instead, choose a more flexible stem or make a slightly deeper cut to weaken the stem's connection.
💧 Step 3: Bury the Stem and Maintain Moisture
Cover the cut portion with 2-3 inches of moist potting soil, pressing lightly to remove air pockets. Leave the tip of the stem exposed—this will continue growing while roots form below. Water gently to settle the soil and keep it consistently moist but never waterlogged.
Here's the thing—you'll need to check moisture daily for the first 4-6 weeks. The soil should feel like a wrung-out sponge. Too dry and roots won't form; too wet and the stem will rot. I use my finger to test—if the top inch feels dry, give it a light watering. If it's still damp, wait another day.
☀️ Step 4: Encourage Root Formation and Monitor Growth
Keep the parent plant in its original location—no need to move it. The stem will continue photosynthesizing through its leaves while roots develop below. You'll see new growth emerging from the tip in 3-4 weeks, which is a good sign roots are forming.
Watch for signs of stress: yellowing leaves on the buried portion mean it's getting too much moisture. Brown, crispy leaves mean it's too dry. If you see new shoots emerging from the buried section, that's your signal roots are taking hold. Real talk: some stems never root—don't be discouraged if one or two fail.
🪴 Step 5: Sever and Transplant the New Plant
After 6-8 weeks, gently dig around the buried stem to check for root formation. You should see small white roots about 1-2 inches long. If roots are established, use clean pruners to cut the stem just below the new root system. Remove any foliage from the lower half of the stem.
Transplant the new cutting to its permanent location, planting at the same depth it was layered. Water thoroughly to help it establish. The first year, your new snowball bush will focus on root growth rather than flowering—be patient. With proper care, it'll catch up to the parent plant within 2-3 years.
Tips & tricks for perfect snowball bush layering
These pro techniques will help you maximize your success rate when propagating hydrangea paniculata through layering.
Timing is Everything: The 24-hour pre-watering in Step 1 is non-negotiable—it primes the stem for rooting. I've found that working in the early morning gives stems an extra boost by avoiding midday heat stress. Also, if you're layering in dry conditions, consider watering the day before to give the soil an extra moisture head start.
Cutting Technique: That 1/4-inch diagonal cut in Step 2 should be sharp and precise—dull tools crush the stem instead of making a clean incision. I use a sterilized pruning shears for this step, and I always make the cut just below a leaf node. The angle helps prevent the wound from sealing too quickly, which is crucial for root formation.
Moisture Management: The 4-6 week moisture window in Step 3 is where most failures happen. I keep a spray bottle handy to mist the soil daily if it feels dry at the top inch. A clear plastic bag loosely draped over the layered stem (like a mini greenhouse) can help maintain humidity without suffocating the plant—just remove it when watering.
Root Formation Clues: When you see those new shoots emerging from the tip in Step 4, that's your confirmation roots are forming below. I've noticed that stems with at least three leaf nodes buried tend to root more reliably. If you're unsure about root development after 6-8 weeks, gently tug on the stem—if there's resistance, roots are likely present.
Pro Tips for Root A Snowball Bush
- These pro techniques will help you maximize your success rate when propagating hydrangea paniculata through layering.
- Timing is Everything: The 24-hour pre-watering in Step 1 is non-negotiable—it primes the stem for rooting. I've found...
- Cutting Technique: That 1/4-inch diagonal cut in Step 2 should be sharp and precise—dull tools crush the stem instead...
Frequently asked questions
Got questions about rooting your snowball bush? You’re not alone! Here are some of the most common concerns—plus quick, expert answers to help you succeed.
When is the best time of year to layer a snowball bush?
The ideal window is late spring to early summer (May–June in most zones). This gives roots time to establish before winter. Avoid layering in fall—new growth won’t harden off in time. Pro tip: Choose a mild, humid day to reduce stress on the plant.
How long does it take for roots to form?
With proper care, roots typically appear in 4–8 weeks. You’ll know success when the layered stem feels firm when tugged gently (or if small roots peek out when you lift the soil). Patience is key—don’t rush to separate too soon!
What if my snowball bush layers fail to root?
Don’t panic! Common culprits include dry soil, poor contact between the stem and rooting medium, or lack of humidity. Try again with:
- A moisture-retentive mix (peat moss + perlite).
- Securing the stem with a U-shaped wire or clothespin.
- Covering with a plastic bag (remove daily for airflow).
Can I root a snowball bush from cuttings instead of layering?
Yes! While layering is easier, stem cuttings work too—just dip the base in rooting hormone and plant in a sandy, well-draining mix. Keep humidity high (use a propagator or bag) and mist daily. Success rates are lower (~60%), but it’s worth a try if you’re short on patience!
Will layering hurt my mature snowball bush?
Not if done carefully! Healthy bushes handle layering well, especially if you:
- Select flexible, non-flowering stems (younger = more pliable).
- Avoid over-stressing the plant (limit to 2–3 layers per bush).
- Water deeply before and after layering.
Wrapping up and next steps
Rooting a snowball bush through layering is a rewarding way to propagate these stunning shrubs—and with the right technique, you’ll enjoy a 90% success rate! 🌱 Whether you’re expanding your garden or sharing cuttings with fellow plant lovers, this method is gentle, cost-effective, and perfect for beginners.
Now that you’re armed with the know-how, grab your tools and get ready to watch those roots take hold—your future snowball bushes will thank you!
Next step: Keep an eye on your layered cuttings over the next few weeks. Once roots form (usually in 4–6 weeks), you’ll be ready to transplant them into their own pots or garden beds! 🌿