
Shrubs
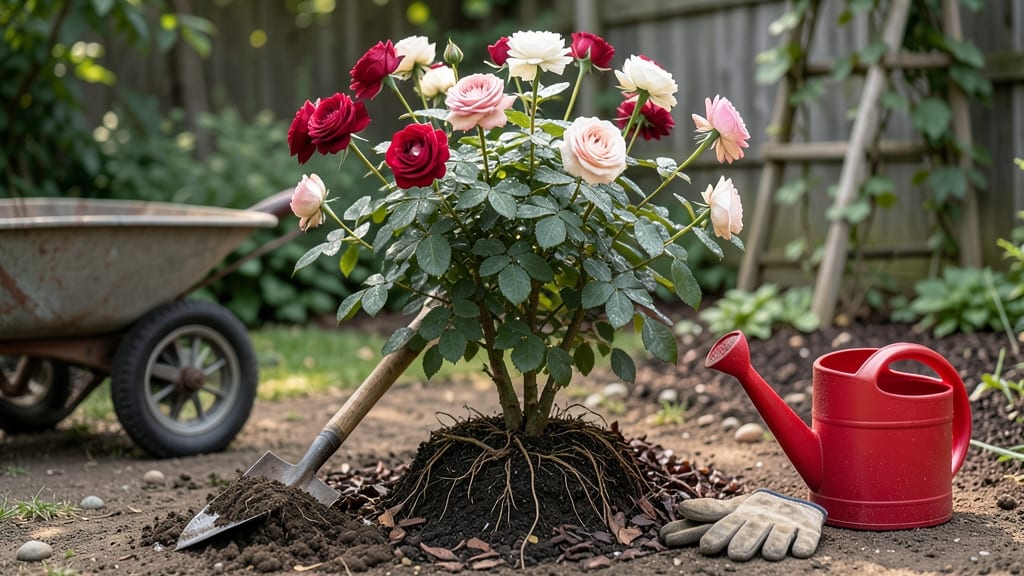
Transferring rose bushes doesn’t have to mean losing those showstopping blooms—done right, your plants will bounce back stronger than ever. 🌹 I’ve moved roses in both spring and fall, and the dormant season is your golden window for minimal stress and maximum success.
The key? Timing, careful handling, and a little prep work that keeps roots happy and stems healthy.
You’ll need basic tools—a sharp pruner, a wheelbarrow, a trowel, and some burlap if the roots are tangled. The new spot should get at least 6 hours of sun and have well-draining soil—amend heavy clay with compost or sand if needed.
Prune back about one-third of the plant before moving to reduce shock, and water deeply the day before digging.
Once you lift the bush, keep those roots moist by wrapping them in damp burlap or a towel, and plant at the same depth they were growing before.
Mulch well afterward to retain moisture and protect roots from temperature swings. Within 4-6 weeks, you’ll see fresh growth—proof your roses are thriving in their new home.
Pro tip: Avoid transferring roses during extreme heat or cold, and don’t skip the watering routine for the first two weeks. If you time it right, your roses will reward you with even bigger blooms next season—no stress, just stunning results.
📚 In This Guide
- What you need
- Instructions
- Tips and common mistakes
- Wrapping up and next steps
What you need
- ● Pruning shears or sharp bypass pruners – Clean, sharp tools to trim roots and stems (1 pair). Pro tip: Sterilize with rubbing alcohol to prevent disease spread! 💡
- ○ Garden fork or spading shovel – For digging up the root ball (1-2, depending on bush size). A 5-gallon bucket or burlap sack (optional but helpful for transport).
- ● Garden hose or watering can with a spray nozzle – To keep roots moist during transfer (1).
- ● Compost or well-aged manure – 2-3 gallons to enrich the new planting hole.
- ● Mulch (pine straw, shredded bark, or compost) – 2-3 inches to retain moisture and suppress weeds.
- ○ Staking materials (optional) – 2-3 6-foot bamboo stakes + soft plant ties if the rose is tall or top-heavy.
- ● Choose the right time: Early spring (before new growth) or early fall (6-8 weeks before frost) for minimal stress. ⏰
- ● New planting spot prepared: Loose, well-draining soil with full sun (6+ hours/day). Test soil pH (ideal: 6.0-6.5).
- ● Weather check: Overcast day or late afternoon transfer to reduce sun stress on roots.
- ● Root stimulator or mycorrhizal fungi – Boosts root establishment (follow package instructions).
- ● Slow-release fertilizer (balanced 10-10-10) – 1-2 tablespoons mixed into the planting hole.
- ● Epsom salt (magnesium sulfate) – 1 tablespoon dissolved in water for a post-transfer nutrient boost.
- ○ Planting hole frame (optional) – A cardboard box or plastic container to shape the hole evenly.
Step-by-step instructions for transferring rose bushes
Here’s how I move roses with minimal shock—so they’ll bloom just as beautifully in their new spot.
🪴 Step 1: Prepare the New Location and Timing
Pick a time when roses are dormant—early spring or fall—when they’re not actively blooming. The new spot should get at least 6 hours of sun daily and have well-draining soil. I always test drainage by digging a hole, filling it with water, and waiting—if it doesn’t drain within 30 minutes, amend the soil with 2-3 inches of compost or sand.
Clear weeds and loosen the soil to 12 inches deep with a garden fork. This gives roots room to spread without fighting compacted earth. If your soil is heavy clay, mix in a 50/50 blend of garden soil and compost to improve texture. The goal is soil that feels like a damp sponge—not rock-hard or muddy.
🌱 Step 2: Prune and Dig Up the Rose Bush
Two weeks before moving, give the rose a light pruning—cut back 1/3 of the oldest canes to reduce stress. On moving day, water the bush deeply the night before so the roots are hydrated but not soggy. Dig a trench around the bush, 12-18 inches from the center, using a spade or garden fork to avoid cutting roots.
Gently loosen the roots in a wide, shallow circle—you want to lift the root ball intact, not tear it. For larger bushes, I use a grafting knife to carefully sever roots that won’t come up easily. Wrap the root ball in burlap or a tarp to keep it moist during transport. If moving a distance, keep the wrapped bush in the shade and water lightly every 2-3 hours to prevent drying.
💧 Step 3: Plant the Rose in Its New Home
Place the rose in the prepared hole so the graft union (the swollen bump near the base) sits 2 inches below soil level. This prevents the graft from dying if the soil shifts. Spread the roots out gently—no bending or folding—and fill the hole with soil, tamping lightly every 2 inches to remove air pockets.
Water deeply until the soil settles, then add 2-3 inches of mulch around the base (but not touching the stem) to retain moisture. I use wood chips or shredded bark because they break down slowly and improve soil structure over time. Avoid fresh mulch, which can rob nitrogen from the soil and stress the plant.
☀️ Step 4: Care for the Rose Post-Move
Keep the soil evenly moist but not soggy for the first 4-6 weeks—water when the top 2 inches of soil feel dry. Avoid overhead watering, which can spread disease. If the leaves wilt or yellow, it’s often a sign of transplant shock, not failure. Give it time—roots take 4-8 weeks to establish in new soil.
Wait until new growth appears (usually 6-8 weeks) before fertilizing. I use a balanced, slow-release fertilizer (10-10-10) at half strength to avoid burning tender roots. Prune lightly again in late spring to encourage bushier growth. With patience, your rose will rebound and bloom just as vibrantly in its new home.
Tips & tricks for relocating rose bushes without stress
Moving roses can be nerve-wracking, but these simple strategies will help your bushes thrive in their new home.
Timing is Everything: The dormant seasons—early spring or fall—are ideal because roses aren’t actively growing. If you must move during summer, do it on a cloudy day to reduce stress from sun exposure. I’ve seen roses moved in summer survive, but they require extra care with consistent watering every 2-3 hours during transport to prevent drying.
Root Ball Protection: When lifting the root ball, aim for a wide, shallow circle rather than a deep trench. This preserves more feeder roots that absorb water and nutrients. For stubborn roots, a grafting knife works wonders—it gives you precision without damaging the main root structure. Wrap the root ball in burlap or a tarp immediately to lock in moisture, especially if moving more than a few feet.
Soil Prep Secrets: The 30-minute drainage test is non-negotiable—if water pools after 30 minutes, your roses will suffer from root rot. For heavy clay soil, I mix in a 50/50 blend of garden soil and compost to create a loamy texture. This improves aeration and drainage, giving roots room to breathe. Think of it as giving your roses a spa day before they even arrive in their new spot.
Post-Move Recovery: The first 4-6 weeks are critical—water when the top 2 inches of soil feel dry, but avoid soggy conditions. I check moisture by sticking my finger into the soil; if it’s dry past my first knuckle, it’s time to water. Mulch with wood chips or shredded bark (never fresh mulch!) to retain moisture and improve soil structure over time. This simple step can mean the difference between a struggling rose and one that blooms beautifully.
Pro Tips for Transfer Rose Bushes
- Moving roses can be nerve-wracking, but these simple strategies will help your bushes thrive in their new home.
- Timing is Everything: The dormant seasons—early spring or fall—are ideal because roses aren’t actively growing. If yo...
- Root Ball Protection: When lifting the root ball, aim for a wide, shallow circle rather than a deep trench. This pres...
Frequently asked questions
Got questions about moving your rose bushes without the drama?
You’re not alone! Here are answers to the most common concerns—so you can transfer those beauties like a pro.
When is the best time to transfer rose bushes?
The ideal window is early spring (before new growth) or fall (after blooming). Avoid extreme heat or frost—roses hate stress! If you’re in a mild climate, late winter or early autumn works too. Just water deeply 1–2 days before moving to reduce shock.
How do I know if my rose bush is ready to be transplanted?
Look for these signs: healthy, flexible canes (not brittle), lush green leaves (no yellowing or spots), and roots peeking through the soil when you gently dig around the base. If it’s root-bound (circling roots), it’s definitely time to relocate!
Can I transfer rose bushes in pots instead of digging them up?
Container-grown roses
are easier to move—just lift the pot, trim any circling roots, and repot with fresh soil. For bare-root transfers, soak the roots in water for 1–2 hours first. Pro tip: Use a larger pot (1–2 sizes up) to give roots room to stretch.
What if my rose bush looks sad after transplanting?
Don’t panic! Wilting or slow growth is normal for 2–4 weeks. Keep soil moist (not soggy), avoid fertilizing for 4–6 weeks, and prune any dead canes. If leaves turn yellow, it might need chelated iron—roses love a little boost!
How far apart should I space rose bushes after transferring?
Spacing depends on the type:
- Climbing roses: 8–12 feet apart (they’ll reach for trellises!)
- Bush roses: 3–5 feet (check the tag for variety-specific needs)
- Standard roses: 4–6 feet (account for their mature width)
Wrapping up and next steps
Transferring rose bushes doesn’t have to be stressful—with the right tools, timing, and care, your roses can thrive in their new home! 🌹 Whether you’re dividing overgrown plants, relocating for better sunlight, or expanding your garden, the key is patience and preparation.
Follow these steps to ensure your roses take root and bloom beautifully for years to come.
Now that you’re ready to act, pick a calm day and get started! Need extra inspiration? Explore our guide on post-relocation care to keep your roses happy and flourishing. Happy gardening!