
How To
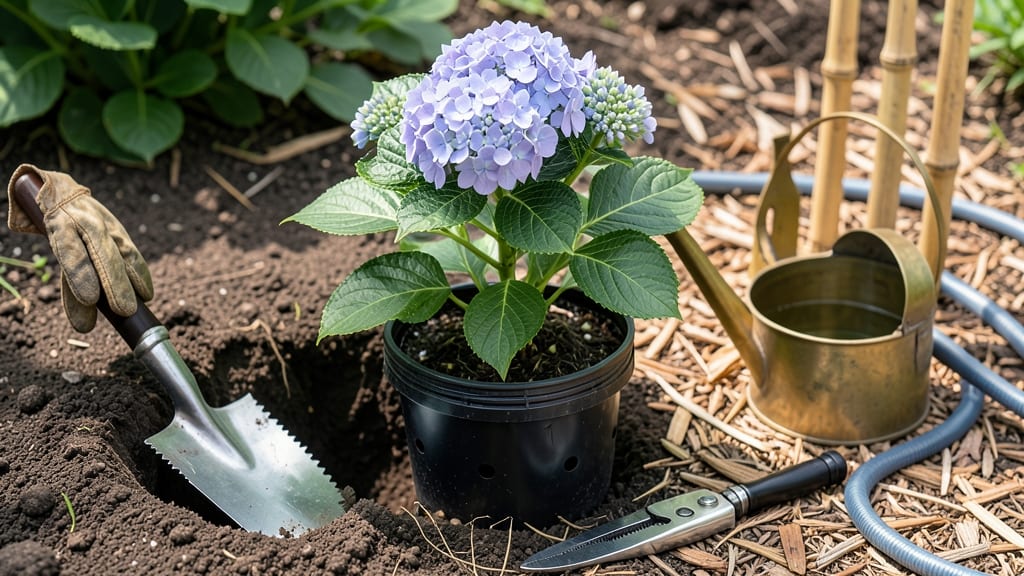
Transplanting bushes the right way means roots that settle fast and plants that bounce back stronger—no more wilted, struggling shrubs. 🌿 I’ve moved everything from hydrangeas to lilacs, and the secret isn’t brute force but timing, soil prep, and gentle handling.
Skip the guesswork with this foolproof method that cuts transplant shock by half.
Start by digging a hole twice as wide as the root ball and enrich the native soil with compost—roots will thank you later. Water deeply the day before moving to hydrate roots, then prune any damaged stems or overgrown branches to focus energy on recovery.
The key is keeping the root ball intact: wrap it in burlap if you’re moving large shrubs, and never let roots dry out during the process.
📚 In This Guide
- What you need
- Instructions
- Tips and common mistakes
- Wrapping up and next steps
What you need
- ● Garden trowel or spade: A sturdy, sharp-edged tool (18–24" long) for digging roots and soil.
- ● Pruning shears or loppers: For trimming overgrown branches (sterilize blades with rubbing alcohol).
- ● Bucket or wheelbarrow: 5+ gallon capacity to transport soil and plants.
- ● Garden hose or watering can: With a gentle spray nozzle for post-transplant hydration.
- ● Burlap or landscape fabric: 3–4 ft wide to wrap roots and protect them during transport.
- ○ Mulch (optional but recommended): 2–3 inches of shredded bark, pine straw, or compost to retain moisture.
- ● New planting site: Pre-dug hole twice as wide and slightly shallower than the root ball.
- ● Amended soil: Mix in compost or organic matter (e.g., peat moss) if your soil is clay-heavy or sandy.
- ● Weather check: Transplant on a cool, overcast day or early morning to minimize stress.
- ○ Stakes & ties (optional): For tall or top-heavy bushes—use 2–3 stakes per plant.
Step-by-step instructions for transplanting bushes
Here's the method I rely on to move bushes with minimal shock and maximum root survival.
🪴 Step 1: Prepare the New Location
Choose a spot with similar light and soil conditions to where the bush currently grows. Dig a hole twice as wide and 1-2 inches deeper than the root ball. This extra space prevents root circling and encourages outward growth. I always loosen the native soil at the bottom of the hole with a fork—it helps roots establish faster.
Mix the excavated soil with 2 inches of compost or aged manure to improve drainage and fertility. The amended soil should feel crumbly when squeezed, not compact. Water the hole thoroughly 24 hours before transplanting so the soil settles and absorbs moisture evenly.
✂️ Step 2: Prune and Prepare the Bush
Water the bush deeply 1-2 days before moving to encourage full root hydration. Trim back 1/3 of the foliage to reduce stress—this helps the plant focus energy on root establishment rather than supporting leaves. I use clean, sharp pruners to make cuts just above leaf nodes or branch collars.
For larger bushes, consider wrapping the root ball in burlap or a tarp to protect roots during transport. If the bush is in a container, water it until water runs from the drainage holes, indicating the roots are fully saturated. This step is critical—dry roots break easily during transplanting.
🌱 Step 3: Dig and Move the Root Ball
Dig around the bush in a 12-inch radius, working the shovel straight down to avoid cutting roots. Lift the bush carefully, keeping as much of the original soil attached as possible. If the root ball is large, use a tarp or wheelbarrow to support the weight. I always check for any remaining roots still attached to the old hole—these can stunt regrowth.
Place the bush in the prepared hole, ensuring the top of the root ball sits level with the surrounding soil. Never bury the stem deeper than it was before—this can cause rot. Have a helper hold the bush upright while you backfill with the amended soil mixture, tamping gently every 2 inches to eliminate air pockets.
💧 Step 4: Water and Mulch for Recovery
Water the bush immediately after transplanting with 2-3 gallons of water, applied slowly at the base. This helps settle the soil and removes air gaps around the roots. Continue watering daily for 1-2 weeks, then taper to 2-3 times per week once new growth appears.
Spread 2-3 inches of organic mulch (like wood chips or straw) around the base, keeping it 6 inches away from the stem to prevent rot. Mulch conserves moisture and regulates soil temperature, which is especially helpful during hot afternoons. Avoid heavy mulch that could compact around the roots.
Tips & tricks for perfect bush transplanting
Here's what I've learned to ensure your transplanted bushes thrive instead of struggle.
The Timing Secret: That 24-hour watering of the new hole isn't just about moisture—it's about giving the soil time to settle properly. I've seen too many transplants fail because the hole was watered right before planting, causing the soil to compact around the roots. The extra day lets the soil particles arrange themselves naturally, creating perfect spaces for roots to grow into.
Root Ball Protection: When moving larger bushes, I can't stress enough how important it is to keep that root ball intact. Wrap it in burlap or use a tarp to prevent roots from drying out or breaking during transport. I've had to replant bushes twice because I rushed this step—once the roots are damaged, the plant's recovery becomes much harder. For container plants, that saturated soil test is crucial. If water runs from the drainage holes, you're ready to move.
Soil Mixing Strategy: The 2 inches of compost recommendation isn't arbitrary—it's the perfect balance for most soil types. Too little and you're not improving drainage enough; too much and you risk altering the soil chemistry too drastically. I always test the amended soil by squeezing it: it should hold its shape but crumble easily when released. This texture gives roots both support and room to grow.
Post-Transplant Care: Those first 2-3 gallons of water after planting aren't just about hydration—they're about settling the soil around the roots. I've found that pouring water slowly at the base helps eliminate air pockets that could strangle new root growth. And that daily watering for 1-2 weeks? It's not about drowning the plant—it's about maintaining consistent moisture while roots establish. I keep a watering can with a slow pour spout handy for this critical period.
Pro Tips for Transplant Bushes
- Here's what I've learned to ensure your transplanted bushes thrive instead of struggle.
- The Timing Secret: That 24-hour watering of the new hole isn't just about moisture—it's about giving the soil time to settle properly.
- Root Ball Protection: When moving larger bushes, I can't stress enough how important it is to keep that root ball intact.
Frequently asked questions
Got questions about transplanting bushes? You’re not alone—this process can feel tricky, but with the right know-how, you’ll have thriving plants in no time. Here are answers to the most common concerns to help you feel confident before digging in.
When is the best time to transplant bushes?
The ideal times are early spring (just as new growth starts) or early fall (before the first frost). Avoid extreme heat or cold, as stress from temperature swings can harm roots. For container-grown bushes, you can transplant anytime except during freezing temps.
How do I keep my transplanted bush alive after moving it?
Water deeply before transplanting, then give it a thorough soak after. Mulch around the base to retain moisture, and avoid overwatering—soggy soil can suffocate roots. For the first few weeks, water lightly but frequently to help roots establish.
How long does it take for a bush to recover after transplanting?
Most bushes show signs of recovery in 4–6 weeks, but full root establishment can take up to a year. Watch for new growth as a sign of success. If leaves yellow or wilt, it may need more time or adjusted care (like pruning damaged branches).
Can I transplant a bush in full sun if it was grown in shade?
Yes, but gradually! Move it to a spot with partial sun first, then slowly increase exposure over weeks. Sudden full sun can scorch leaves. Check the bush’s tags for light preferences—some, like hydrangeas, tolerate shifts better than others.
What do I do if my bush’s leaves turn brown after transplanting?
Brown leaves often mean transplant shock or stress. Trim damaged foliage to redirect energy to roots. Ensure it’s getting the right water (not too much or too little) and check for pests. If the issue persists, the bush may need a second season to adjust.
Are there bushes that are easier to transplant than others?
Deciduous bushes (like lilacs or forsythia) transplant more easily than evergreens. Container-grown bushes also adapt better than those dug from the ground. For tougher species, consider root pruning a year before moving to reduce shock.
Wrapping up and next steps
Transplanting bushes doesn’t have to be a daunting task—with the right prep, timing, and care, your plants will thrive in their new home! 🌱 The key is minimizing stress by watering deeply, protecting roots, and giving them time to adjust.
Your hard work will pay off with lush, healthy growth.
Now that you’re ready to tackle your garden, why not plan your next project? Consider adding companion plants, mulching for extra protection, or even expanding your green space with new shrubs. Happy gardening! 🌿