
Pruning
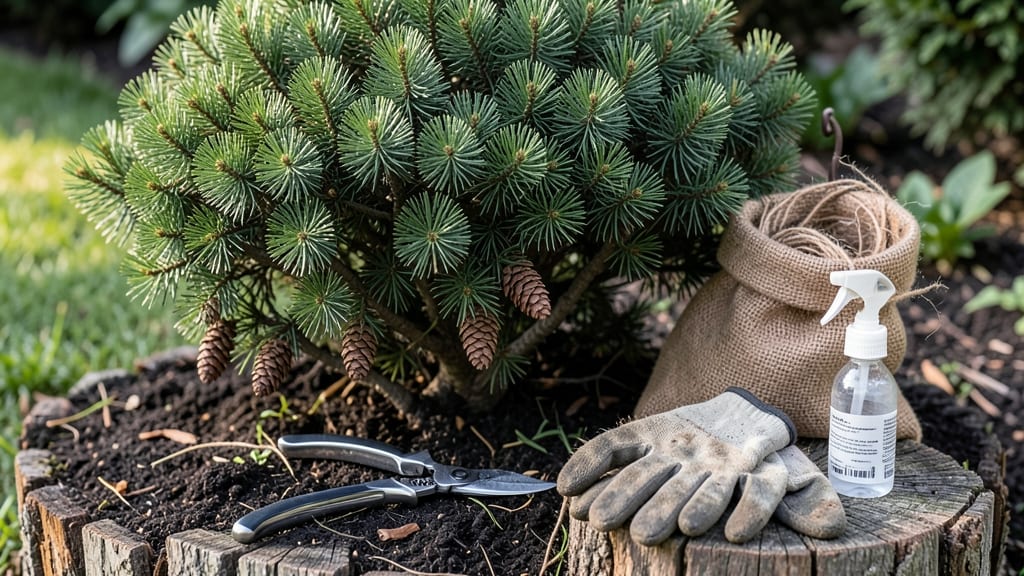
Trimming pine bushes keeps them healthy and looking sharp all year—if you do it right. ✂️ I’ve spent years shaping mine, and the difference between a ragged bush and one that looks like it belongs in a nursery comes down to timing, technique, and avoiding common mistakes.
Late winter or early spring is prime time, when new growth is just waking up and the plant can heal quickly.
The right tools make all the difference—a sharp pair of bypass pruners for small branches and a hand saw for thicker stems. Skip the hedge trimmers unless you’re working with a large, formal hedge, and always sterilize your tools with rubbing alcohol to prevent disease.
You’ll also want gloves to protect your hands from sap and sharp needles.
Start by removing dead or diseased branches first—they’re easy to spot and should go completely. Then, shape the bush by cutting just outside the branch collar where the branch meets the trunk.
For a natural look, trim back to a side branch or bud, and avoid cutting into old wood. Patience here pays off: a well-trimmed pine stays full, vibrant, and resilient for years.
Ornamental pines need less frequent trimming than evergreens used for hedges, but both benefit from a light cleanup every 1-2 years. The key is to never remove more than 25% of the foliage in one go—pines are tough, but they won’t bounce back from heavy-handed pruning.
Think of it like giving your bush a haircut: less is more.
📚 In This Guide
- What you need
- Instructions
- Tips and common mistakes
- Wrapping up and next steps
What you need
- ● Pruning shears or bypass pruners: Sharp, bypass-style shears (not anvil-type) to make clean cuts. Choose 5-inch to 7-inch blades for thicker branches.
- ● Loppers: For branches ½-inch to 1½-inches thick. Opt for bypass loppers with 8-inch to 10-inch handles for leverage.
- ● Pruning saw: A curved-tooth saw (like a bow saw) for branches thicker than 1½ inches. Avoid straight-tooth saws—they can tear pine bark.
- ● Gloves: Heavy-duty, cut-resistant gloves (e.g., mechanics’ gloves or pruning gloves) to protect against pine needles and sharp branches.
- ● Safety glasses: ANSI-rated goggles to shield your eyes from flying debris.
- ○ Disinfectant (optional but recommended): 70% isopropyl alcohol or a 10% bleach solution to clean tools between cuts and prevent disease spread.
- ● Ladder or step stool: A stable, extendable ladder (e.g., aluminum extension ladder) or a foldable step stool (for smaller bushes). Ensure it’s rated for your height and weight.
- ● Trash bags or bucket: For collecting pruned branches and debris.
- ● Rubbing alcohol wipes: Quick cleanup for sticky pine sap on tools.
- ● Hand saw or pole saw: For overhead branches (if your ladder can’t reach).
- ● Pruning sealant: Tree wound sealant (like Tanglefoot Tree Wound Pruning Seal) for large cuts on mature pines (controversial but some gardeners swear by it!).
- ● Work apron with pockets: Keeps tools and debris contained.
- ● Spray bottle with water: Dampens pine needles to reduce dust and make cutting easier.
Step-by-Step guide to trimming pine bushes
Healthy pines thrive with the right cuts—here's how to shape them without harming growth.
🌲 Step 1: Choose the Right Time and Tools
Trim pines in late winter or early spring, just before new growth begins. This timing lets you shape the bush without stressing it during active growth periods. I always use sharp, clean pruning shears or loppers—dull tools tear branches and leave ragged cuts that invite disease. Disinfect your tools with rubbing alcohol between cuts to prevent spreading pathogens.
For larger branches, I switch to a pruning saw with a fine-tooth blade. Pines have tough, resinous wood that dulls regular saws quickly. Always cut just outside the branch collar—the swollen area where the branch meets the trunk—to ensure proper healing. Never leave stubs, even if it means making a slightly longer cut.
✂️ Step 2: Identify and Remove Dead or Diseased Branches
Start by scanning the entire bush for branches that are brown, brittle, or covered in needles that crumble at the touch. These are dead and must be removed immediately. I like to work from the bottom up, making it easier to spot hidden problems. Cut these branches back to the main trunk or a healthy lateral branch—never leave dead wood attached.
Look for signs of disease like fungal growth, oozing sap, or unusual discoloration. These branches should be removed entirely, even if they're still green. Bag and dispose of infected material immediately—don't compost it. Healthy pines have vibrant green needles that feel firm when pinched. If a branch feels spongy or smells off, it's time to cut it out.
🌿 Step 3: Shape the Bush for Balance and Airflow
Step back and visualize the pine's natural shape. Pines grow in a conical form, so I aim to maintain that silhouette while removing any branches that grow inward or cross over others. These "water sprouts" compete for sunlight and weaken the bush. Cut them back to a lateral branch or the main trunk, making sure your cut is clean and angled slightly away from the branch collar.
Focus on improving airflow by thinning out dense areas. You want sunlight to reach the inner branches—this prevents fungal issues and encourages even growth. Never remove more than 25% of the bush's foliage in one season. Pines are resilient, but over-trimming stresses them and can lead to dieback. If you're unsure, err on the side of caution and remove less.
⏰ Step 4: Clean Up and Monitor for Recovery
After trimming, rake up all fallen needles and debris from the base of the bush. This prevents pests and diseases from taking hold in the soil. I also like to water the root zone lightly to help the pine recover from the stress of pruning. Avoid heavy watering immediately after trimming—just enough to keep the soil slightly moist.
Watch the pine over the next few weeks for signs of stress. New growth should appear within 4-6 weeks if the cuts were made correctly. If you see yellowing needles or wilting branches, you may have trimmed too aggressively. Healthy new growth will be bright green and firm. If you notice any issues, adjust your approach for next year's trimming.
Tips & tricks for perfect pine bush trimming
Here's what nobody tells you about keeping your pines looking sharp without harming their health.
Timing Secret: Late winter or early spring is your sweet spot because the pine isn't actively growing yet. I learned this the hard way after trimming in summer and watching new growth get stressed. If you miss this window, wait until fall—but avoid trimming in late summer when the tree is preparing for winter dormancy. The 4-6 weeks recovery time mentioned in Step 4 gives you a clear window to work within each year.
Tool Technique: That branch collar I mentioned in Step 1 is your secret weapon—it's where the branch naturally heals. I always make my cut just outside it, even if it means cutting a little farther back than I'd like. Using the wrong tool can ruin this: pruning shears for small branches, loppers for medium, and a fine-tooth saw for anything thicker than your wrist. And for heaven's sake, keep those tools sharp—dull blades crush rather than cut, which damages the plant's tissues.
Visual Cue for Healthy Branches: When you're checking for dead branches in Step 2, here's the test I use: gently pinch a needle between your thumb and forefinger. Healthy needles should feel firm and spring back slightly. If they crumble or feel mushy, that branch is dead. For disease detection, look for unusual discoloration or sticky residue—these are red flags. I've seen pines with fungal infections that looked green on the outside but had blackened wood underneath when I cut into them.
Airflow Strategy: That 25% foliage limit in Step 3 isn't arbitrary—it's based on how much stress pines can handle. I think of it like giving the tree a breath of fresh air. When thinning, I always aim to create a conical shape that lets sunlight reach all parts of the bush. You'll notice the inner branches start looking healthier after just one season of proper airflow. And remember, you're not just shaping the bush—you're creating an environment where it can thrive.
Pro Tips for Trim Pine Bushes
- Here's what nobody tells you about keeping your pines looking sharp without harming their health.
- Timing Secret: Late winter or early spring is your sweet spot because the pine isn't actively growing yet. I learned ...
- Tool Technique: That branch collar I mentioned in Step 1 is your secret weapon—it's where the branch naturally heals....
Frequently asked questions
Got questions about trimming pine bushes? You’re not alone! Here are answers to the most common concerns—from timing to tools—to keep your pines looking sharp and thriving.
When is the best time to trim pine bushes?
Late winter or early spring (just before new growth starts) is ideal. Avoid trimming in fall or winter when the plant is dormant, as it may stress the tree. For evergreens like pines, never trim more than 25% of the foliage at once—this can harm the plant’s health.
Can I use regular shears or do I need special tools?
For small pines, sharp bypass pruners work fine. For larger branches or thick growth, invest in loppers or a handsaw. Avoid hedge trimmers—they can tear needles and damage the tree. Always disinfect tools with rubbing alcohol to prevent disease spread.
How do I fix over-trimming mistakes?
If you’ve trimmed too much, don’t panic! Prune lightly in the next growing season to encourage new growth. Water deeply and fertilize with a slow-release, pine-specific formula. In severe cases, consult a local arborist—they can assess damage and recommend recovery steps.
What parts of a pine bush should I never trim?
Avoid cutting into the central leader (the main upright stem) or removing more than 1/3 of the crown at a time. Never trim the lower branches of mature pines—they provide shade and protect the trunk from sunburn. Focus on shaping outer growth and thinning dense areas.
How often should I trim my pine bushes?
Light maintenance trimming (removing dead or crossing branches) can happen once or twice a year. For shaping, aim for once every 2–3 years. Over-trimming yearly weakens the tree. Observe growth patterns—if branches look leggy or unbalanced, that’s your cue to step in!
Wrapping up and next steps
Trimming your pine bushes doesn’t have to be intimidating—with the right tools, timing, and techniques, you can keep them lush and thriving while avoiding stress or damage. Remember to prioritize clean cuts, seasonal maintenance, and safety to encourage healthy growth year-round.
Whether you’re a seasoned gardener or a beginner, your green thumb is just a few snips away!
Ready to give your pine bushes the care they deserve? Grab your pruners, mark your calendar for the best trimming windows, and start shaping those branches with confidence! 🌲✂️