
Pruning
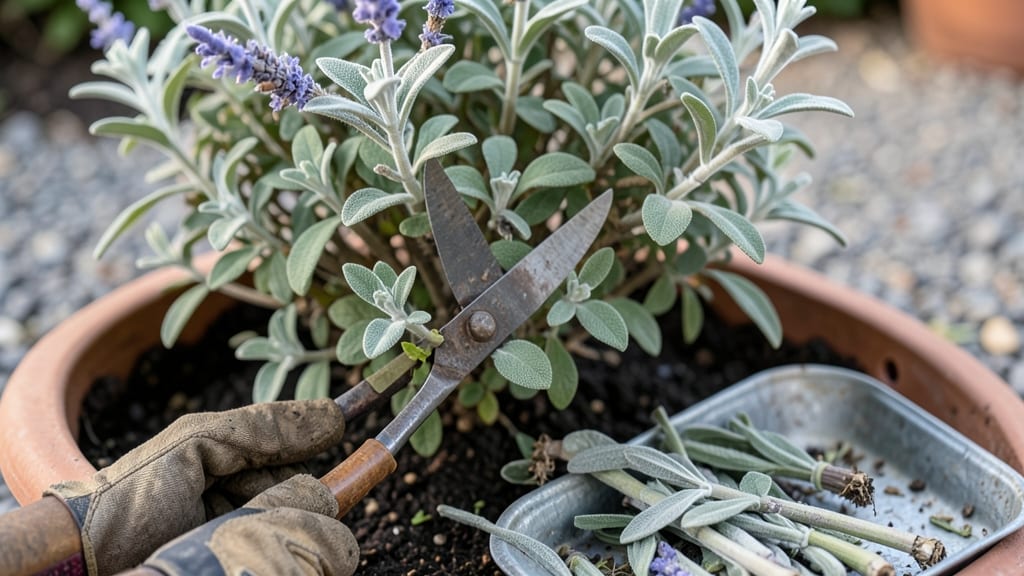
Trimming your sage bush isn’t just about keeping it neat—it’s about unlocking year-round health and lush growth. 🌿 I’ve watched my own sage go from scraggly to thriving just by following a few key timing and technique rules.
The secret lies in when (and how) you cut, not just how much. Most gardeners prune too late in the season or too aggressively, which stresses the plant. Instead, focus on cutting right after flowering in early summer, then again lightly in late winter.
Use clean, sharp pruners to make cuts just above leaf nodes—this encourages new growth where you want it, not random sprouts. You’ll end up with a bush that stays compact, produces more fragrant leaves, and even flowers better next year.
The first few cuts might feel hesitant, but once you see those fresh green shoots pushing out, you’ll never go back to random snipping. For woody stems or overgrown branches, don’t panic—sage is resilient. Simply cut back to live growth, and the plant will bounce back stronger.
Avoid heavy pruning in fall, as it leaves the plant vulnerable to winter damage.
📚 In This Guide
- What you need
- Instructions
- Tips and common mistakes
- Wrapping up and next steps
What you need
- ● Pruning shears or hand pruners: Sharp, clean, and disease-free (sterilize with rubbing alcohol if reused). Choose bypass pruners for clean cuts (avoid anvil-style for delicate sage stems).
- ● Long-handled loppers: For thicker branches (if your sage bush has grown over 1–2 inches in diameter). Opt for bypass loppers with a 6–8 inch blade.
- ● Gloves: Heavy-duty gardening gloves (preferably nitrile-coated) to protect against thorns and sap.
- ● Disinfectant solution: 1 part rubbing alcohol to 9 parts water (or a 10% bleach solution) to sterilize tools between cuts and prevent disease spread.
- ● Trash bag or bucket: For collecting clippings (sage can be composted, but avoid piling it near the base to prevent fungal issues).
- ● Watering can or hose: With a gentle spray nozzle to hydrate the plant post-pruning (especially in dry climates).
- ○ Staking materials (optional but helpful): Soft plant ties or bamboo stakes if your sage is leggy or needs support after trimming.
- ● Mulch: Organic mulch (like straw or shredded bark) to retain moisture and suppress weeds after pruning.
- ● Fertilizer: A balanced, slow-release fertilizer (10-10-10 ratio) if your sage looks nutrient-deficient post-trim.
- ● Sage propagation supplies: Small pots and potting mix if you plan to root cuttings from your trimmings!
- ● Safety glasses: If your sage is particularly thorny or you’re working in bright sunlight.
Step-by-Step instructions for trimming sage bush
Here’s how I keep my sage bushes thriving year-round with simple, seasonal cuts.
✂️ Step 1: Prune for Shape in Early Spring
Use clean, sharp pruning shears to remove up to one-third of the bush’s height in early spring, just as new growth begins. Focus on shaping the outer edges first—sage grows in a rounded form, so I trim just enough to encourage that natural shape without cutting into old, woody stems.
Watch for new shoots emerging along the stems; these are your signal that the bush is waking up. Remove any dead, brown, or crossing branches first—they’ll only compete with healthy growth. I like to step back every few cuts to check the balance, as sage can get leggy if you’re too aggressive.
✂️ Step 2: Lightly Trim After Flowering
Once your sage finishes flowering (usually mid-to-late summer), give it a light trim to remove spent blooms and encourage a second flush of growth. Cut back just enough to keep the bush tidy—sage flowers are beautiful, but deadheading prevents seed production that can weaken the plant.
Here’s the thing—sage often blooms in late summer, and those flowers can look messy by fall. I trim them back to just above a set of healthy leaves, which keeps the bush looking neat while still allowing for new growth. Avoid cutting into old wood, as sage struggles to regrow from bare stems.
✂️ Step 3: Renew Growth in Late Summer or Early Fall
In late summer or early fall, focus on rejuvenating the bush by cutting back one-third of the oldest stems to the ground. This encourages fresh, vigorous growth from the base and prevents the center from becoming woody and bare. I always work on a dry, sunny day to avoid stressing the plant.
You’ll notice the bush looks a bit sparse after this cut—that’s normal! Sage recovers quickly, and the new growth will fill in by next spring. If your sage is particularly leggy, I’ll also trim back some of the longer stems to half their length, which helps thicken the foliage and improves air circulation.
✂️ Step 4: Minimal Winter Pruning
In winter, sage is dormant, so pruning is minimal. Remove any dead, damaged, or diseased branches immediately, and lightly shape the bush if needed. Avoid heavy cuts—sage is hardy but can be sensitive to winter stress, especially in colder climates.
If your sage looks overgrown by late winter, I’ll do a very light trim to tidy it up, but I never cut more than 10-15% of the bush’s total volume. The goal here is to keep it looking neat without disrupting its natural cycle. A quick cleanup with shears ensures it’s ready to burst into growth as soon as spring arrives.
🌿 Step 5: Year-Round Maintenance Tips
Throughout the year, keep an eye out for overcrowded branches or stems growing inward—they’ll compete for sunlight and air. Trim these out as soon as you spot them to maintain a healthy, open structure. Sage is forgiving, but consistency is key.
I also like to harvest leaves regularly—pinching off sprigs for cooking encourages bushier growth. Just avoid taking more than one-third of the foliage at a time, or you’ll stress the plant. A little maintenance now means a lush, productive sage bush for years to come.
Tips & tricks for perfect sage bush trimming
Mastering the art of sage pruning takes just a few smart strategies to keep your plant thriving year after year.
Tool Prep: Always start with clean, sharp pruning shears—dull blades tear stems and invite disease. I sterilize mine with rubbing alcohol between cuts to prevent spreading any potential pathogens. This is especially important when working with older stems where sap can harbor bacteria. For larger bushes, consider investing in bypass pruners for cleaner cuts.
Seasonal Timing Secret: The early spring cut in Step 1 should happen when you see those first tender new shoots emerging, not before. I test by gently pinching a stem—if it bends easily, it's ready. This timing ensures you're encouraging growth rather than cutting into dormant wood. In Step 3, wait until after the first frost has passed in fall to avoid shocking the plant with cold stress.
Visual Cues for Cutting: When trimming in Step 2, look for the first set of healthy leaves just below the spent blooms—this is your perfect cutting point. For Step 3's rejuvenation cut, aim to remove stems that are thicker than a pencil, as these are the woody stems that won't regrow. The goal is always to cut just above a leaf node or bud where new growth can emerge.
Harvesting Hack: While pruning, harvest leaves for cooking by pinching off sprigs with your fingers rather than cutting with shears. This encourages bushier growth at the cut points. I always leave at least two-thirds of the foliage intact to maintain the plant's energy reserves. For culinary use, harvest in the morning when essential oils are most concentrated.
Pro Tips for Trim Sage Bush
- Mastering the art of sage pruning takes just a few smart strategies to keep your plant thriving year after year.
- Tool Prep: Always start with clean, sharp pruning shears—dull blades tear stems and invite disease.
- Seasonal Timing Secret: The early spring cut in Step 1 should happen when you see those first tender new shoots emerging, not before.
Frequently asked questions
about trimming your sage bush can save you time and stress. Here are answers to the most common queries to keep your plant thriving!When is the best time to trim my sage bush?
The ideal times are early spring (just as new growth appears) and late summer (after flowering). Avoid heavy pruning in winter, as cold stress can harm the plant. Light trimming to remove dead or overgrown branches is fine year-round!
How much can I trim off without harming the sage bush?
Never remove more than one-third of the plant’s foliage in a single session. For mature bushes, this means cutting back to about 12–18 inches from the base. Over-trimming can stress the plant, so always leave plenty of healthy growth behind.
What should I do if my sage bush looks leggy or sparse?
Leggy or sparse growth often signals it’s time for a rejuvenation cut. In early spring, trim back one-third of the oldest stems to the ground. This encourages fresh, bushier growth. Avoid fertilizing right after—let the plant recover first!
Why are my sage leaves turning yellow or brown after trimming?
Yellowing or browning can happen due to over-trimming, fungal issues, or environmental stress (like drought or overwatering). Prune only when the plant is healthy, and ensure it has well-draining soil. Remove affected leaves promptly to prevent spread.
Can I use sage trimmings for cooking or crafts?
Fresh sage leaves are perfect for cooking (think pasta, soups, or roasted meats), and dried leaves work well for potpourri or sachets. Just avoid trimming heavily for harvest—leave enough foliage for the plant’s health. Pro tip: Harvest leaves in the morning for maximum flavor!
Wrapping up and next steps
Trimming your sage bush doesn’t have to be intimidating—with the right tools, timing, and techniques, you’ll keep it thriving year-round! Remember, seasonal cuts (spring, summer, and fall) are key to promoting healthy growth, while avoiding winter pruning ensures your plant survives the cold.
Whether you’re shaping for aesthetics or encouraging bushier foliage, consistency is your best friend.
Now that you’re armed with knowledge, grab those shears and get pruning! 🌿 For extra confidence, watch a quick video tutorial or join a local gardening group to swap tips. Happy trimming—your sage bush (and future harvests) will thank you!