
Planting
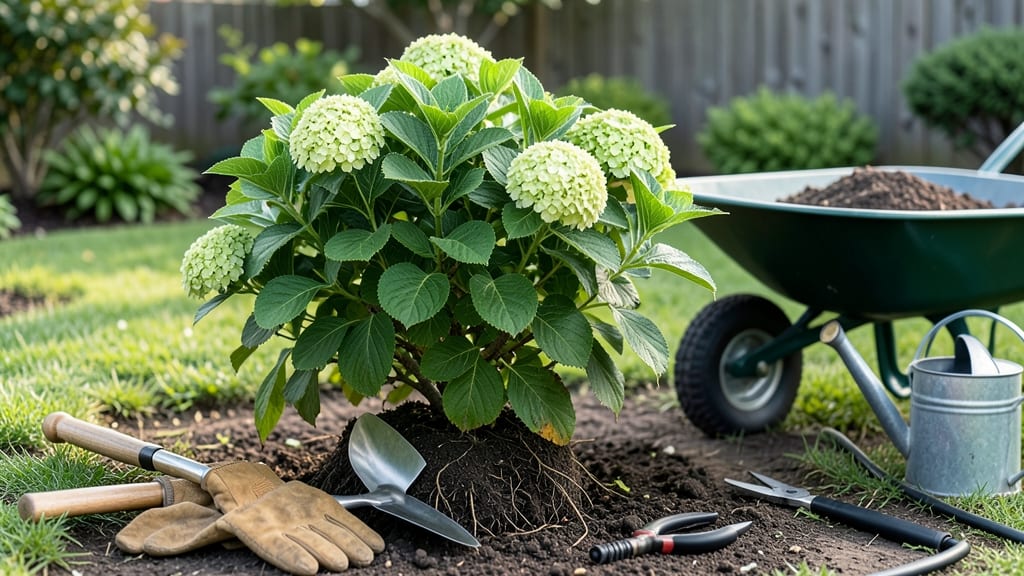
The best time to move bushes is during their dormant season—when they’re least stressed and most likely to thrive after transplanting.
Picture this: You’ve spent years nurturing a beautiful 🌿 bush, only to watch it wilt and struggle after moving it at the wrong time. The difference between a thriving transplant and a sad, struggling shrub often comes down to one key factor—timing.
For most regions, including USDA Zone 6a, late winter to early spring (March–April) is ideal, just before new growth begins. This gives roots time to establish before summer heat sets in.
But climate plays a role—cooler northern areas may also consider early fall, while warmer southern zones should avoid summer moves entirely.
In this guide, I’ll walk you through the science-backed secrets for moving bushes with confidence, from soil prep to post-transplant care, so your plants bounce back stronger than ever.
Why dormant season is the best time to move bushes
Moving bushes might seem like a simple task, but the timing can make or break your plant's survival. When you transplant during the dormant season, you're giving your bushes the best chance to recover with minimal stress.
This is when plants naturally slow down growth, conserving energy for root development—perfect for handling the shock of relocation.
During dormancy, bushes focus on root regrowth rather than producing leaves or flowers. This means they can establish new roots in their new location without competing with active foliage.
Plus, cooler temperatures and reduced pest activity create an ideal environment for recovery. Understanding these biological advantages can transform a risky transplant into a successful landscaping upgrade.
Let's break down the science behind why late fall or early spring are the golden windows for moving bushes. The key factors include reduced transplant shock, optimized moisture retention, and lower exposure to pests and diseases.
These conditions work together to create the perfect scenario for your bushes to thrive after relocation.
Here's a quick comparison of why dormant season excels for bush transplantation:
| Factor | Dormant Season Advantage | Active Growth Season Risk |
|---|---|---|
| Root Development | Plants focus 100% on root growth with no foliage demands | Competes with leaf/flower production |
| Pest Pressure | Minimal insect activity during cool months | Peak pest season increases damage risk |
| Moisture Retention | Cooler temps reduce evaporation | Hot weather increases water loss |
| Temperature Range | Ideal 40-60°F (4-15°C) for recovery | Extreme heat/cold stresses roots |
| Soil Conditions | Moist but workable soil | Dry or waterlogged conditions |
The optimal temperature range for moving bushes falls between 40-60°F (4-15°C). This range provides the perfect balance for root systems to establish without the stress of extreme conditions.
In USDA Zones 3-7, late fall (October-November) works beautifully, while gardeners in Zones 8-10 should aim for early spring (February-March) to avoid summer heat.
Regional variations play a crucial role in determining the exact timing. For example, in northern climates, the window closes earlier due to frost risks, while southern regions can extend their dormant season slightly later.
Always check your local last frost date and aim to transplant at least 4-6 weeks before or after frost events to give your bushes adequate recovery time.
One of the biggest advantages of dormant season transplantation is the reduced moisture stress. Cooler temperatures mean soil stays moist longer, giving newly transplanted roots the hydration they need without the risk of fungal issues that come with overwatering during hot months.
This is particularly important for broadleaf evergreens and hydrangeas, which are prone to moisture-related stress.
Pest avoidance is another critical factor. During active growth seasons, insects and diseases are at their peak, making newly transplanted bushes prime targets.
In contrast, dormant season offers a natural pest break, allowing your bushes to focus solely on establishing themselves without battling aphids, mites, or fungal pathogens that thrive in warm, humid conditions.
For evergreen bushes, the dormant season approach is even more critical. Unlike deciduous varieties, evergreens don't have the luxury of shedding foliage to conserve energy. Moving them during dormancy minimizes the risk of desiccation and allows their root systems to recover before the next growing season.
Always choose mild, overcast days for transplantation to further reduce stress on these moisture-sensitive plants.
Remember that proper aftercare is just as important as timing. After moving your bushes during dormancy, maintain consistent moisture (but avoid waterlogging) and apply a 2-3 inch layer of mulch to protect roots and regulate soil temperature.
This combination of ideal timing and careful post-transplant care gives your bushes the best possible start in their new location.
Step-by-step guide to moving bushes in dormant season
Moving bushes during their dormant season minimizes stress and ensures a smoother transition. Whether you're relocating a mature shrub or a young ornamental bush, following these steps will help your plants thrive in their new home.
The key is to work when the plant is naturally resting, typically in late fall or early spring, before new growth begins.
Before you start, gather your tools and prepare the new planting site. A well-prepared root ball and proper soil conditions are critical for success. Let’s break down each step to ensure your bushes settle in beautifully without shock or damage.
Step-by-Step Guide to Moving Bushes
-
Step 1: Choose the Right Time
Move bushes in late fall (October-November) or early spring (March-April), when plants are dormant. Avoid summer heat or winter frost.
-
Step 2: Gather Essential Tools
You’ll need: shovel, pruners, wheelbarrow, burlap, garden hose, mulch, and gloves.
-
Step 3: Prune for Easier Transport
Trim back 1/3 of the foliage to reduce stress. Focus on dead or damaged branches and any that may interfere with the move.
-
Step 4: Dig Around the Root Ball
Dig a 12-inch-wide trench around the root ball, going down 2-3 inches deeper than the roots. Use a shovel or spade to loosen soil.
-
Step 5: Lift and Wrap the Root Ball
Carefully lift the bush and wrap the root ball in burlap or use a root ball container if moving a large shrub. Keep the root ball intact to avoid damage.
-
Step 6: Prepare the New Planting Hole
Dig a hole twice as wide as the root ball and just as deep. Amend the soil with compost or organic matter for better drainage.
-
Step 7: Replant and Water Thoroughly
Place the bush in the hole, ensuring the top of the root ball is level with the ground. Backfill with soil, water deeply, and add 2-3 inches of mulch.
-
Step 8: Post-Transplant Care
Water every 2-3 days for the first 2 weeks, then taper to weekly deep watering. Avoid fertilizing for 6-8 weeks to reduce stress.
After transplanting, monitor your bushes closely for signs of transplant shock, such as wilting leaves or yellowing foliage. Most bushes recover within a few weeks, especially if moved during the dormant season. For large shrubs, consider staking for support until roots establish.
Adjust your timing based on your USDA hardiness zone. In warmer climates (Zones 8-10), late fall is ideal, while cooler zones (3-7) may prefer early spring. Always check the moisture level of the soil before moving to avoid unnecessary stress on the plant.
With careful planning and execution, your relocated bushes will not only survive but thrive in their new location. Happy gardening! 🌿