
Shrubs
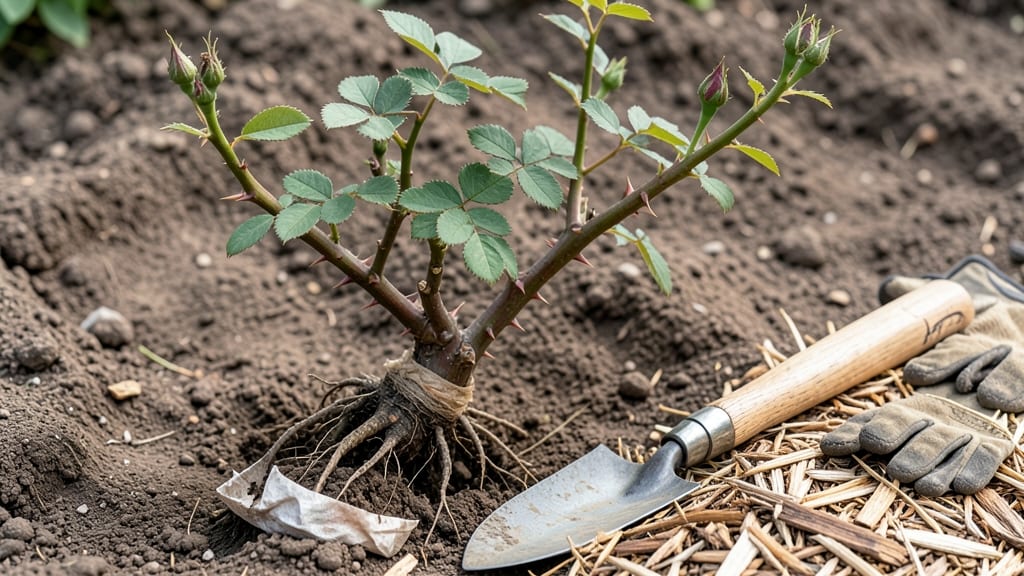
Planting new rose bushes the right way means no transplant shock and roses that burst into bloom by next summer. 🌹 I’ve buried more roses than I’d like to admit—until I learned the secrets of soil prep, spacing, and timing that make all the difference.
The key isn’t just digging a hole; it’s creating an environment where roots can spread freely from day one. Start with well-draining soil mixed with compost (no soggy roots here), and plant in early spring or fall when temperatures cooperate.
Space bushes 3–4 feet apart for airflow, and dig the hole twice as wide as the root ball but no deeper—roses hate sitting too low. Water deeply right after planting, then again in a week, to encourage roots to stretch into the soil.
By summer, you’ll see vibrant new growth instead of wilted leaves, and within a year, those bushes will be the showstopper of your garden. The trick is patience—roses reward careful planting with decades of blooms, not just one season of struggle.
This method works for bare-root, container-grown, or balled-and-burlapped roses, so whether you’re starting from scratch or replacing old bushes, the principles stay the same. Let’s get those roots settled right!
📚 In This Guide
- What you need
- Instructions
- Tips and common mistakes
- Wrapping up and next steps
What you need
- ● Rose bushes: 1–5 (depending on your garden size and design). Choose bare-root (dormant, no soil) or potted (in containers) varieties. Ensure they’re healthy with firm stems and no signs of disease.
- ● Garden trowel or shovel: A 5–7 inch trowel for precision or a round-point shovel for digging holes.
- ● Garden fork or spade: For loosening soil in the planting area (especially if it’s compacted).
- ● Compost or well-aged manure: 5–10 pounds per bush to enrich the soil. Avoid fresh manure—it can burn roots!
- ● Slow-release fertilizer: A balanced 10-10-10 or rose-specific formula (follow package instructions for dosage).
- ● Mulch: 2–3 inches of organic mulch (e.g., wood chips, straw, or pine bark) to retain moisture and suppress weeds.
- ● Watering can or hose with a gentle spray nozzle: For thorough watering without disturbing the soil.
- ● Pruning shears: Bypass pruners (clean and sharp) to trim dead or damaged canes.
- ○ Planting hole markers or stakes: Optional but helpful for spacing (see below for details).
- ● Root stimulator: A mycorrhizal fungi or seaweed-based product to boost root growth.
- ● Epsom salt: 1 tablespoon per bush mixed into the planting hole for magnesium (great for roses!).
- ● Staking system: 3–4 foot bamboo stakes + soft ties for young or top-heavy roses.
- ● Soil test kit: To check pH (roses prefer 6.0–6.5) and adjust with lime or sulfur if needed.
- ● Garden gloves: To protect your hands from thorns and dirt.
- ● Knee pads or a small stool: For comfort during planting.
- ● Choose a sunny spot: Roses need at least 6 hours of direct sunlight daily.
- ● Test your soil: Ensure it’s well-draining (roses hate soggy roots!). Amend heavy clay or sandy soil with compost.
- ● Plan spacing: Give each bush 3–4 feet of space (or more for large varieties like Knock Out® roses).
- ● Time it right: Plant bare-root roses in early spring or fall (when temps are cool). Potted roses can go in spring through early summer.
Step-by-Step instructions for planting new rose bushes
Here's the method I've used for decades to establish roses that bloom like they've been in the ground for years.
🪴 Step 1: Choose the Perfect Planting Location
Roses need 6-8 hours of direct sun daily, but the afternoon sun in hot climates can scorch new leaves. I plant mine where they get morning sun and afternoon shade from nearby trees or structures. The spot should also have well-draining soil—roses hate soggy roots.
Dig a hole that's twice as wide as the root ball but only as deep. Deeper planting buries the graft union (the swollen area near the base) and encourages suckers to grow. Test the soil by squeezing a handful—if it forms a tight ball, amend with compost to improve drainage.
🌱 Step 2: Prepare the Soil and Root System
Remove the rose from its container and gently loosen the roots with your fingers. If roots are circling tightly (a common nursery practice), make 2-3 vertical cuts along the root ball to encourage outward growth. This prevents the "pot-bound" shock that stunts new plants.
Mix the removed soil with half a bucket of compost and a handful of bone meal for phosphorus. Spread this mixture in the bottom of the hole to create a nutrient-rich base. Avoid fresh manure—it burns tender roots. Water the amended soil lightly before placing the rose in the hole.
💧 Step 3: Plant at the Correct Depth and Water Thoroughly
Position the rose so the graft union sits 1-2 inches above soil level. This protects it from soil-borne diseases while allowing air circulation. Backfill with the amended soil, tamping gently every 2 inches to eliminate air pockets. The hole should settle about 1 inch when finished.
Water immediately with 5 gallons of water to settle the soil and eliminate air gaps. You'll see the soil surface sink slightly—this is normal. After planting, create a 3-inch-high berm of soil around the base to direct water toward the roots. This prevents runoff during watering.
☀️ Step 4: Mulch and Protect for the First Critical Weeks
Spread 2-3 inches of mulch around the base, keeping it 4 inches away from the stem to prevent rot. I use shredded hardwood mulch because it breaks down slowly and improves soil structure over time. This mulch layer also insulates roots from temperature swings.
Install a stake or support system immediately—even young roses need guidance. Tie the main stem loosely with soft cloth strips (not wire) to prevent stem damage. For the first 2-3 weeks, water deeply every other day until new growth appears. This establishes roots before summer heat sets in.
✂️ Step 5: Prune for Strong Growth and Disease Prevention
After 4-6 weeks of new growth, inspect the plant for any dead, crossing, or inward-growing branches. Remove them with clean, sharp pruners at a 45-degree angle just above an outward-facing bud. This encourages an open, airy structure that prevents fungal diseases.
Cut back any suckers that sprout below the graft union immediately. These vigorous shoots drain energy from the main plant. Once established, roses need minimal pruning, but this initial shaping sets the foundation for years of healthy blooms. Fertilize lightly with a balanced rose food in 6-8 weeks to support root development.
Tips & tricks for planting new rose bushes
Here's what I've learned after decades of planting roses that thrive from day one—these little details make all the difference.
Location Intelligence: That 6-8 hours of sun matters, but timing is everything. In hot climates, I always plant roses where they get morning sun and afternoon shade from nearby trees. This prevents leaf scorch while still giving them the light they need to thrive. The afternoon sun is the real villain—it's intense enough to crisp tender new leaves.
Root System Rescue: When you see those circling roots in Step 2, don't just yank them apart—make 2-3 clean vertical cuts with a sharp knife. This encourages outward root growth and prevents that "pot-bound" shock that stunts new plants. I've seen roses with perfect root systems fail because the roots couldn't spread properly after planting.
Watering Wisdom: Those 5 gallons of water in Step 3 aren't just for show—they're essential for settling the soil around the roots. After planting, I always create that 3-inch berm to direct water straight to the roots. Without it, you'll end up with water running off and leaving your roots high and dry. This simple trick prevents transplant shock better than anything else.
Pruning Precision: When you're pruning those crossing branches in Step 5, make your cuts at a 45-degree angle just above an outward-facing bud. This isn't just about aesthetics—it creates a natural shield that protects the bud from rain and wind. I've seen roses with perfect cuts thrive while others with sloppy cuts struggle with disease.
Pro Tips for Planting New Rose Bushes
- Here's what I've learned after decades of planting roses that thrive from day one—these little details make all the difference.
- Location Intelligence: That 6-8 hours of sun matters, but timing is everything.
- Root System Rescue: When you see those circling roots in Step 2, don't just yank them apart—make 2-3 clean vertical cuts with a sharp knife.
Frequently asked questions
Got questions about planting new rose bushes? You’re not alone! Here are answers to the most common concerns—so you can dive in with confidence and avoid rookie mistakes.
When is the best time to plant rose bushes?
The ideal windows are early spring (after the last frost) or early fall (6 weeks before your first frost). Planting in these seasons gives roots time to establish before extreme heat or cold sets in. Avoid summer—high temps stress young plants!
Can I plant roses in winter?
Only in mild climates (USDA Zones 7-10) with minimal freezing. In colder zones, winter planting risks frost damage. If you must plant in winter, use extra mulch (4-6 inches) and protect with burlap or frost blankets until spring.
Why did my rose bush turn yellow after planting?
Yellowing leaves often signal transplant shock or overwatering. Check soil drainage—roses hate soggy roots! Also, ensure you’re not over-fertilizing (wait 4-6 weeks post-planting). If leaves drop entirely, it may be root damage; trim dead foliage and monitor closely.
Should I prune roses when I plant them?
Light pruning helps! Trim dead or damaged stems and cut back by ⅓ if the bush looks leggy. Avoid heavy pruning—save that for spring. Focus on shaping the plant and removing crowded canes to encourage airflow and reduce disease risk.
What’s a good alternative if I can’t plant bare-root roses?
No problem! Container-grown roses are a great option—they’re already established and easier to handle. Just dig a hole twice as wide as the root ball (but no deeper) and water thoroughly after planting. Container roses adapt faster to their new home!
How do I prevent deer from eating my new rose bushes?
Deer love tender rose shoots! Use physical barriers like chicken wire (6 feet tall) or plant deer-resistant companions nearby (e.g., lavender, catmint, or allium). Spraying with hot pepper wax or commercial repellents can also help.
Wrapping up and next steps
Planting new rose bushes is a rewarding journey that blends patience with beauty—and you’ve got all the tools to succeed! 🌹 From choosing the perfect variety to nurturing them through their first season, every step ensures your roses thrive with confidence.
Now that you’re armed with the right techniques, it’s time to roll up your sleeves and dig in—your garden’s future blooms are waiting!
Your Next Step:
- 📅 Mark your calendar for your local planting season (spring or fall) and set a reminder to prep your soil.
- 🛒 Grab your supplies—gloves, roses, and a little sunshine—and start planting with the know-how you’ve gained.
- 💧 Stay consistent with watering and care—your roses will thank you with vibrant blooms in no time!