
Shrubs
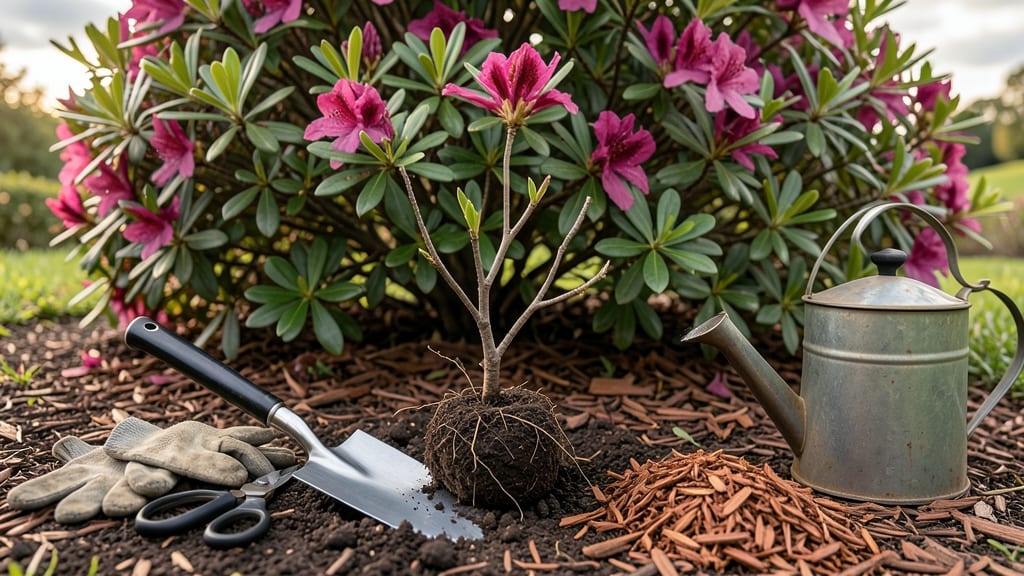
When replanting azalea bushes, timing and technique make all the difference—especially if your plant looks root-bound and stressed. 🌿 I’ve replanted azaleas in every season, and the ones moved in spring or early fall always bounce back faster with fewer setbacks.
The key isn’t brute force; it’s patience, the right soil mix, and avoiding common pitfalls like overwatering or planting too deep.
Start by choosing a spot with morning sun and afternoon shade, just like azaleas love in the wild. Dig a hole twice as wide as the root ball but no deeper—azaleas hate soggy roots.
Loosen the roots gently if they’re circling, then place the bush so the top of the root ball sits 1 inch above ground level. This prevents water pooling and future rot.
After replanting, water deeply but don’t drown the roots—think 1 gallon for every 12 inches of plant height. Mulch with 2-3 inches of pine bark to keep moisture in and weeds out, but keep it 6 inches away from the trunk.
You’ll see new growth in 4-6 weeks if the roots adjust well, and by next season, your azalea will look like it never left its old home.
Pro tip: If your azalea looks stressed after replanting, trim back one-third of the foliage—it sounds counterintuitive, but it forces the plant to focus on root recovery instead of supporting too many leaves.
And avoid replanting during heatwaves or frost; azaleas are sensitive to temperature shocks. Patience is the real secret weapon here.
📚 In This Guide
- What you need
- Instructions
- Tips and common mistakes
- Wrapping up and next steps
What you need
- ● Azalea bushes: 1–3 plants (depending on size; check root-bound signs like circling roots or stunted growth).
- ● Garden trowel or spade: Medium-sized (10–12 inches) for digging holes and lifting roots.
- ● Pruning shears: Sharp, sterilized shears (for trimming roots or shaping if needed).
- ● Organic mulch: 2–3 inches of pine bark fines or pine straw (azaleas love acidic mulch!).
- ● Garden hose or watering can: With a gentle spray nozzle for post-replant hydration.
- ● Gloves: Heavy-duty gardening gloves (to protect against thorns and soil).
- ○ Lime or sulfur: Optional but helpful if your soil isn’t acidic (test pH first!).
- ● Root stimulator: A liquid or powder (like Mycorrhizal fungi) to boost root growth.
- ● Slow-release fertilizer: Acid-loving plant formula (e.g., 10-10-10 or azalea-specific).
- ● Soil pH test kit: To confirm your soil’s acidity (ideal: 4.5–6.0 pH).
- ● Container or burlap wrap: For transporting root-bound plants if replanting isn’t immediate.
Step-by-Step instructions for replanting azalea bushes
Reviving root-bound azaleas takes patience and precision—here's how to do it right.
🌱 Step 1: Prepare the New Planting Site
Azaleas thrive in acidic, well-draining soil with a pH between 4.5 and 6.0. Test your soil first—if it's alkaline, amend with sulfur or peat moss (about 2 pounds per square foot) and mix in 3 inches of organic compost to improve structure. I like to dig the hole twice as wide as the root ball but only as deep—azaleas hate sitting too low, which causes root rot.
Place the bush in the hole and check the soil line on the root ball. It should sit 1 inch above ground level—this prevents waterlogging. If your soil drains poorly, add a 2-inch layer of coarse sand or gravel at the bottom of the hole to improve drainage. Water the area thoroughly before moving the plant to help settle the soil.
🪴 Step 2: Carefully Remove and Prune the Root Ball
Water the azalea 24 hours before replanting to reduce root damage. Gently dig around the base, working a shovel 6-8 inches away from the trunk to avoid cutting into healthy roots. If the roots are tightly circling the root ball (a sign of being root-bound), use your hands or a knife to loosen the outer roots—never force them apart, as this can tear delicate feeder roots.
Trim any dead, mushy, or excessively long roots with clean pruners. Healthy roots should be white or light tan and firm to the touch. If you see black or slimy roots, those are rotted and should be removed entirely. This is the moment to assess the plant’s health—if more than 30% of the roots are damaged, consider whether replanting is worth the effort.
✂️ Step 3: Replant and Establish for Long-Term Health
Position the azalea in the hole so the top of the root ball aligns with your 1-inch-high soil line. Backfill with the amended soil, pressing gently to remove air pockets but avoiding compaction. Water deeply until moisture runs out the drainage holes—this helps settle the roots into place. Mulch the base with 2-3 inches of pine bark or wood chips, keeping it 3 inches away from the trunk to prevent rot.
Azaleas need consistent moisture but hate soggy soil. Water once a week for the first month, then taper to every 10-14 days once established. Fertilize with an acid-loving plant formula (like 10-10-10 with sulfur) in early spring—never fertilize in fall or winter, as this encourages tender new growth that won’t survive cold snaps. Watch for new leaf growth in 4-6 weeks—that’s your sign the replanting worked.
Tips & tricks for replanting azalea bushes
Reviving azaleas isn't rocket science—here's how to make it foolproof and avoid common pitfalls.
Timing is Everything: That 24-hour pre-watering before replanting is non-negotiable. I learned this the hard way after replanting a stressed azalea without prepping it—it lost half its leaves before recovering. The extra moisture helps roots absorb shock and reduces breakage when you're loosening that root ball.
Root Assessment: When you're trimming those circling roots in Step 2, think of it like giving your azalea a haircut—you're not trying to remove all the roots, just the unhealthy ones. Focus on the outer roots that are tightly wound. If you see more than 30% of the roots looking black or mushy, consider whether replanting is worth the effort—sometimes it's better to start fresh with a new plant.
Soil Line Secret: The 1-inch-high soil line isn't just arbitrary—it's about creating the perfect balance. Too high and you'll suffocate the roots; too low and you'll drown them. Use a small stake or marker to create a reference point before backfilling. I've seen azaleas die from improper planting depth, so this is worth double-checking.
Mulching Matters: That 2-3 inch layer of pine bark mulch isn't just for looks—it's about moisture control and temperature regulation. Keep it 3 inches away from the trunk to prevent rot, but don't skimp on the coverage. The mulch should extend out to the drip line of the bush, which is typically the width of the canopy. This helps protect those delicate roots during temperature fluctuations.
Pro Tips for Replanting Azalea Bushes
- Reviving azaleas isn't rocket science—here's how to make it foolproof and avoid common pitfalls.
- Timing is Everything: That 24-hour pre-watering before replanting is non-negotiable.
- Root Assessment: When you're trimming those circling roots in Step 2, think of it like giving your azalea a haircut—you're not trying to remove all the roots, just the unhealthy ones.
Frequently asked questions
Got questions about replanting azaleas? You’re not alone! Here are some of the most common concerns—and their straightforward solutions—to help your root-bound bushes thrive after replanting.
When is the best time to replant azalea bushes?
The ideal window is early spring or early fall, when temperatures are mild (50–70°F) and the plant isn’t under stress from heat or cold. Avoid replanting during summer heatwaves or winter freezes—azaleas hate extreme conditions while recovering. If you must replant in summer, do it on a cloudy day and keep the soil moist for 2 weeks.
How long does it take for azaleas to recover after replanting?
Most azaleas show signs of recovery in 4–6 weeks, but full vigor may take 1–2 growing seasons. Watch for new growth (tiny leaves or buds) and avoid fertilizing until you see at least 3–4 inches of fresh foliage. Patience is key—root systems heal gradually, especially if the plant was severely root-bound.
Should I water differently after replanting?
Yes! Water deeply 2–3 times per week for the first month to encourage root expansion. Use a soaker hose or drip irrigation to avoid disturbing the soil. After that, taper to 1 inch of water per week, but keep the root zone consistently moist (not soggy). Mulch with 2–3 inches of pine bark to retain moisture and mimic their natural acidic habitat.
Can I replant azaleas in containers instead of the ground?
Containers work well if you choose the right size (at least 18–24 inches deep for mature bushes) and use acidic, well-draining potting mix (like a 50/50 blend of peat moss and pine bark). Ensure the pot has drainage holes and move it to partial shade (6+ hours of dappled light). Container azaleas need more frequent watering and fertilizing (use an azalea-specific formula every 4–6 weeks in growing season).
What if my azalea’s leaves turn yellow or drop after replanting?
Yellowing leaves often signal transplant shock or root damage, but it’s usually temporary. Check for these fixes:
- Over/under-watering: Stick your finger 1–2 inches into the soil—if it’s dry, water; if it’s muddy, let it dry out.
- Poor drainage: Azaleas hate soggy roots. Amend heavy clay soil with compost or sand.
- Nutrient deficiency: Wait 8–12 weeks before fertilizing; use a low-nitrogen, acidic fertilizer (like 8-3-9) if needed.
- Pests/disease: Inspect for lace bugs (tiny black dots on leaves) or fungal spots. Treat with neem oil or fungicide if necessary.
If leaves stay yellow for more than 6 weeks, the plant may need a second round of root pruning or a different location.
Wrapping up and next steps
Replanting azalea bushes can feel like a daunting task, but with the right approach, you’ll breathe new life into your garden and enjoy vibrant blooms for years to come! 🌸 The key is patience—carefully handling the roots, choosing the perfect spot, and giving your azaleas time to adjust.
Now that you’re armed with the tools and know-how, there’s no better time to roll up your sleeves and get growing.
Ready to take the next step? Mark your calendar for the best replanting window in your climate, gather your supplies, and start transforming your azaleas into thriving, root-bound beauties. Your future self—and your garden—will thank you!