
Shrubs
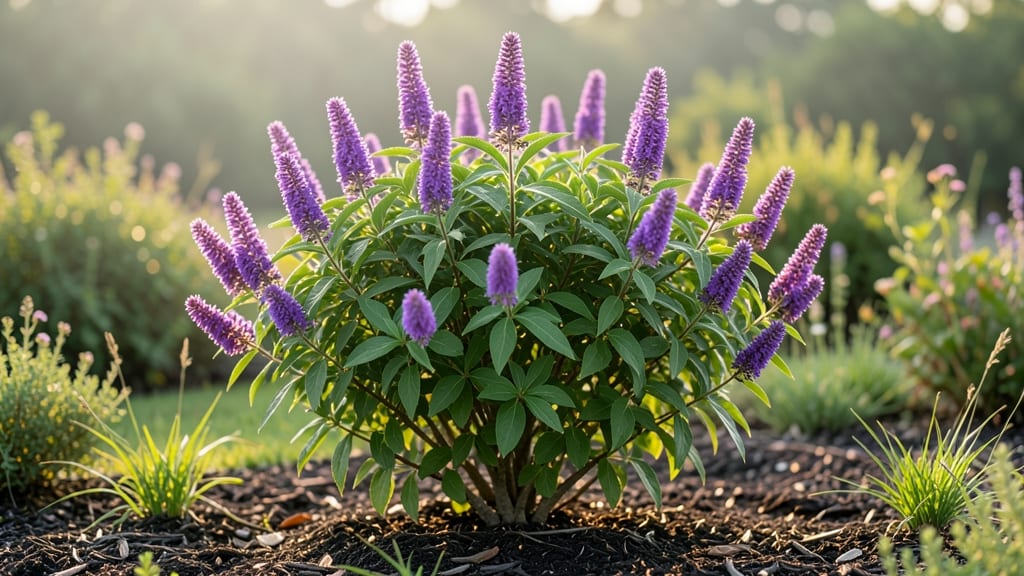
Nothing beats the sight of a Butterfly Bush in full bloom, humming with wings and color all season long. 🌸 Starting from nursery roots is the easiest way to get these sun-loving shrubs thriving in your landscape, and I’ll walk you through every step—from soil prep to the first flush of fragrant flowers.
The secret to success lies in well-draining soil, full sun exposure, and a little strategic pruning. Most gardeners overwater these drought-tolerant plants, so we’ll focus on the right balance—just enough moisture to keep roots happy without drowning them.
With the proper care, your Butterfly Bush will reward you with vibrant blooms from early summer through frost, attracting butterflies like a magnet.
📚 In This Guide
- What you need
- Instructions
- Tips and common mistakes
- Wrapping up and next steps
What you need
- ● Root Butterfly Bush (Buddleja davidii): 1–3 nursery-grown plants (or seeds/cuttings if propagating)
- ● Note: Choose disease-resistant varieties like ‘Lo & Behold®’ or ‘Pink Delight’ for easier care!
- ● Soil: Well-draining loamy soil (pH 6.0–7.5)
- ○ Optional: Amend with compost (1–2 inches mixed into topsoil) for nutrient boost
- ● Sunlight: Full sun (6+ hours daily) or partial shade (4–6 hours) in hot climates
- ● Watering Supplies: Garden hose or watering can with soaker nozzle (for deep watering)
- ○ Drip irrigation kit (optional, for consistent moisture)
- ● Planting Tools: Trowel or garden spade (for digging)
- ● Gloves (to protect hands)
- ● Fertilizer: Balanced 10-10-10 NPK fertilizer (apply in early spring)
- ● Slow-release organic granules (like composted manure)
- ● Mulch: 2–3 inches of wood chips or straw (to retain moisture and suppress weeds)
- ● Pruning Tools: Bypass pruners or loppers (for shaping and deadheading)
- ● Pest Control: Neem oil or insecticidal soap (if aphids or spider mites appear)
Step-by-Step instructions for planting and cultivating butterfly bush
Here's the foolproof method I use to establish thriving butterfly bushes that burst with color year after year.
🌱 Step 1: Choose the Perfect Planting Location
Butterfly bush thrives in full sun to partial shade with at least 6 hours of direct sunlight daily. I always scout the site first—look for areas where other sun-loving perennials already flourish. The plant handles heat well but will reward you with more abundant blooms when given maximum sunlight.
Test your spot by observing how other plants respond: if nearby shrubs show signs of stress (yellowing leaves, stunted growth) in afternoon sun, choose a slightly shadier location. The ideal site also has well-draining soil—if water pools after rain, you'll need to amend the area with compost or sand before planting.
🪴 Step 2: Prepare the Soil and Plant at Optimal Depth
Dig a hole twice as wide as the root ball but only as deep—planting too deep suffocates the roots. Loosen the sides of the hole with a garden fork to encourage root spread. I always mix the excavated soil with 2-3 inches of compost to improve fertility and drainage.
Remove the butterfly bush from its container and gently tease apart any circling roots. Position the plant so the top of the root ball sits 1 inch below soil level. This slight burial prevents stem rot while encouraging strong root establishment. Backfill with the amended soil, pressing lightly to eliminate air pockets.
☀️ Step 3: Water Thoroughly and Establish a Mulch Barrier
Water immediately after planting to settle the soil and eliminate air gaps. Give the plant 1-2 gallons of water (depending on container size) and continue watering daily for the first 2 weeks until new growth appears. You'll know it's taking root when the leaves perk up and show no signs of wilting.
Spread 2-3 inches of organic mulch around the base, keeping it 4 inches away from the stem to prevent rot. I use shredded bark because it breaks down slowly while suppressing weeds. This mulch layer also helps regulate soil temperature, protecting roots during both heatwaves and cold snaps.
✂️ Step 4: Prune Strategically for Bushier Growth and Season-Long Blooms
Prune butterfly bush twice annually: first in early spring to shape the plant, and again in late summer to encourage new growth. In spring, cut back the previous year's growth by one-third to promote dense foliage. Remove any dead, diseased, or crossing branches first—these compete for nutrients and weaken the plant.
For summer blooms, cut back the current season's growth by half after the first flush of flowers fades. This rejuvenation pruning stimulates new shoots that produce the plant's signature late-season color. Always use clean, sharp pruners and make cuts at a 45-degree angle just above a leaf node to encourage proper healing.
🌿 Step 5: Maintain Through Seasons for Continuous Color
Fertilize butterfly bush in early spring with a balanced 10-10-10 formula applied at half strength. I prefer slow-release granules that feed the plant all season without risk of over-fertilization. Water thoroughly after applying to help distribute nutrients to the root zone.
Monitor for pests like spider mites or aphids—you'll spot them as tiny moving dots on new growth or as fine webbing between leaves. Treat infestations immediately with insecticidal soap or neem oil. Deadhead spent blooms regularly to encourage continuous flowering and prevent seed formation that diverts energy from new growth.
Tips & tricks for thriving butterfly bush plantings
These insider strategies will help you avoid common pitfalls and maximize your butterfly bush's vibrant growth potential.
Sunlight Strategy: While butterfly bush tolerates partial shade, the 6 hours of direct sunlight mentioned in Step 1 is non-negotiable for peak performance. I've seen plants in morning sun only produce sparse blooms—position your bush to capture those golden afternoon rays when the sun is strongest. For container growers, rotate pots every few weeks to ensure even sun exposure all around.
Soil Preparation Secret: The 2-3 inches of compost called for in Step 2 works wonders, but I take it further by adding a handful of perlite to the mix. This creates tiny air pockets that prevent compaction, which is especially important in heavy clay soils. For sandy soils, add a bit of peat moss instead to improve moisture retention. The goal is soil that drains like a well-worn hiking trail—not like a swamp or a sieve.
Watering Wisdom: Those first 2 weeks of daily watering are critical, but don't overdo it—your goal is moist (not soggy) soil. I test moisture by sticking my finger 2 inches down; if it's dry, water. For established plants, water deeply once a week rather than shallow daily waterings. Deep watering encourages roots to grow downward where they'll find stability and nutrients.
Pruning Precision: When you're cutting back by one-third in spring and half in summer, always make cuts just above a leaf node where new growth emerges. I mark these nodes with a pencil before pruning to ensure clean cuts. For stubborn branches, use a small saw—never prune with dull tools that tear rather than cut cleanly. This attention to detail prevents disease entry points and promotes faster healing.
Pro Tips for Root Butterfly Bush
- These insider strategies will help you avoid common pitfalls and maximize your butterfly bush's vibrant growth potent...
- Sunlight Strategy: While butterfly bush tolerates partial shade, the 6 hours of direct sunlight mentioned in Step 1 i...
- Soil Preparation Secret: The 2-3 inches of compost called for in Step 2 works wonders, but I take it further by addin...
Frequently asked questions
Got questions about growing and caring for your root butterfly bush? You’re not alone! Here are some of the most common queries—plus straightforward answers to keep your plant thriving.
How do I propagate root butterfly bush from cuttings?
Root butterfly bush (Buddleia davidii) spreads easily from softwood cuttings in late spring or early summer. Snip 4–6-inch stems just below a node, strip the lower leaves, and dip in rooting hormone. Plant in moist potting mix and cover with a plastic bag to retain humidity. Roots should form in 4–6 weeks!
When is the best time to prune butterfly bush?
Prune your butterfly bush late winter or early spring before new growth appears. Cut back one-third of the plant to encourage bushier growth and more flowers. Avoid heavy pruning in fall, as it can reduce winter hardiness in colder climates.
Is butterfly bush invasive? Should I remove it?
Yes, butterfly bush is highly invasive in many regions (e.g., the U.S. East Coast). If you’re in a warm climate, consider non-invasive alternatives like butterfly milkweed (Asclepias tuberosa) or purple coneflower (Echinacea). If you keep it, prune aggressively and monitor spread.
Why aren’t my butterfly bushes attracting pollinators?
Pollinators love butterfly bush, but poor attraction could stem from lack of flowers (over-fertilizing or poor pruning), pesticide use (even organic sprays can repel bees), or wrong timing. Ensure full sun, well-draining soil, and avoid chemicals. Deadhead spent blooms to encourage more flowers!
How cold-hardy is butterfly bush?
Most butterfly bush varieties tolerate USDA Zones 5–9. In colder zones, mulch heavily in fall and prune back before winter to protect tender growth. Young plants may need winter protection (burlap wraps or frost cloth) until established.
Pro Tip:
For year-round color, pair butterfly bush with evergreen shrubs like boxwood or holly. This creates a stunning backdrop while keeping your garden vibrant in all seasons!
Wrapping up and next steps
Transforming your garden into a vibrant haven with root butterfly bush is easier—and more rewarding—than you think! 🌸 With its low-maintenance care, stunning blooms, and pollinator-friendly appeal, this sun-loving perennial is a game-changer for year-round color.
Whether you’re a seasoned gardener or just starting out, now’s the perfect time to plant, nurture, and enjoy the beauty (and buzz!) it brings.
Ready to dive in? Start by selecting your spot—sunny, well-drained soil—and grab those roots! Your future butterfly buffet (and stunning garden centerpiece) awaits. 🌿