
Pests and Diseases
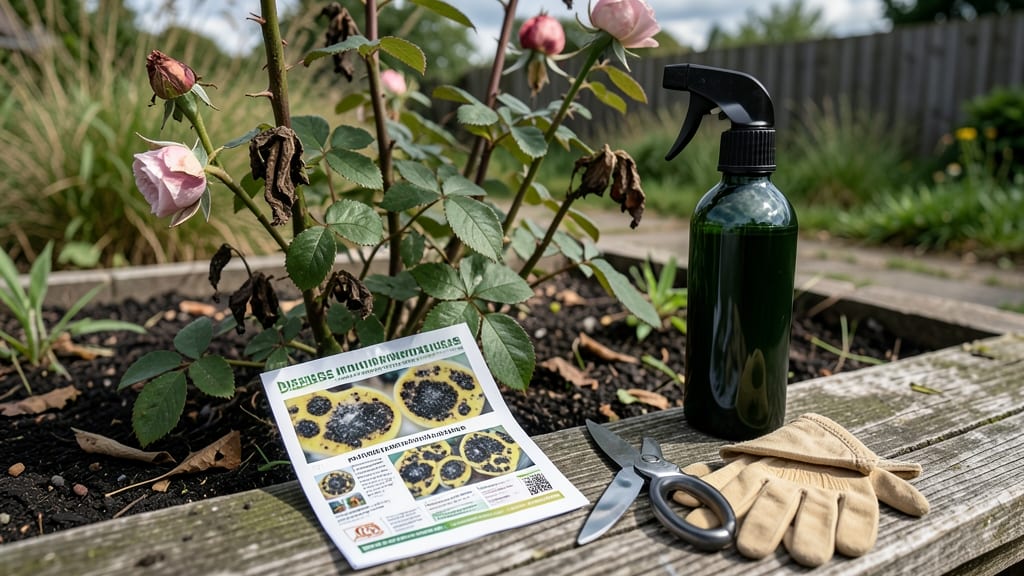
Your rose bush has black spots on leaves? That’s classic black spot disease—🌿 and it spreads faster than you’d think if you don’t act now. The spots start small, then grow with yellow halos, and before you know it, your roses look like they’ve been rained on with ink.
I’ve battled this enough times to know the exact organic fixes that work without harsh chemicals.
First, prune every infected leaf and stem down to healthy tissue—don’t leave even a tiny spot behind. Then, spray with a mix of 1 tablespoon baking soda, 1 quart water, and a drop of dish soap to stop the fungus in its tracks.
Repeat every 7–10 days until new growth appears without spots. The key? Water at the base (never overhead) and space plants for airflow—wet leaves are an open invitation to black spot.
📚 In This Guide
- What you need
- Instructions
- Tips and common mistakes
- Wrapping up and next steps
What you need
- ● Gloves (2 pairs): One pair of nitrile or rubber gloves for handling infected leaves, and another pair of gardening gloves for pruning.
- ● Pruning shears (1 pair): Sharp, sterilized shears (alcohol or bleach solution) to remove infected leaves and stems.
- ● Disposable plastic bags (5-10): For collecting and disposing of infected plant debris.
- ● Hose with nozzle (1): For rinsing leaves and applying water-based treatments.
- ○ Fungicide (organic or chemical): Neem oil (16 oz bottle) + horticultural oil (optional) for a natural spray.
- ○ Baking soda solution (1 tbsp baking soda + 1 gallon water + few drops of dish soap) (optional but effective).
- ● Copper fungicide (16 oz bottle) for severe cases (follow label instructions).
- ● Spray bottle (1-2): 8-16 oz for applying liquid treatments evenly.
- ○ Magnifying glass (optional but helpful): To inspect leaves closely for spores or pests.
- ● Compost bin or pile: For safely decomposing infected plant material (avoid adding to garden soil).
- ● Fungicide booster (e.g., potassium bicarbonate): Enhances organic treatments.
- ● Plant food (balanced fertilizer, 10-10-10): To strengthen the rose bush post-treatment.
- ● Weatherproof cover (e.g., shade cloth): To protect the bush from rain after treatment (if recommended).
How to diagnose and treat black spot on rose bushes
This is the simple, organic method I use to save my roses every season—no harsh chemicals needed.
🌿 Step 1: Confirm Black Spot and Assess Damage
Start by examining the affected leaves closely. Black spot appears as dark purple or black circular spots with yellow halos around them. These spots often have tiny black dots in the center—those are the fungal spores. Check both the top and undersides of leaves, as the fungus often starts there.
Gently shake the bush to see how much debris has fallen. Heavy infestations mean you'll see blackened leaves littering the ground beneath. If more than 25% of the foliage is affected, you'll need to act quickly. Don't panic—this is treatable, but early action prevents the fungus from spreading to new growth.
✂️ Step 2: Prune Infected Leaves and Improve Airflow
Use clean, sharp pruners (disinfect them with rubbing alcohol between cuts) to remove all leaves showing black spot. Cut back to healthy green tissue—you'll see a clear line where the disease stops. Bag up the infected leaves and throw them in the trash (don't compost them—they'll reinfect your garden).
Thin out crowded canes by 20-30% to improve airflow. Black spot thrives in shady, humid conditions, so prune to let sunlight reach the center of the bush. Aim for 6-12 inches of space between canes. This isn't just about looks—better airflow dries leaves faster and prevents future outbreaks.
💧 Step 3: Apply Organic Fungicide and Adjust Watering
Mix 1 tablespoon baking soda with 1 quart water and a few drops of liquid soap (this helps the solution stick). Spray the mixture evenly on both sides of all leaves until they glisten. Do this every 7-10 days until new growth appears without spots. I also add 1 tablespoon neem oil to the mix for extra protection—neem disrupts the fungus's life cycle.
Water only at the base of the bush in the morning. Wet leaves for long periods create the perfect environment for black spot. Use a soaker hose or drip irrigation to keep foliage dry. If you must water overhead, do it early in the day so leaves dry by afternoon. Mulch around the base with 2-3 inches of organic mulch to retain moisture in the soil but keep leaves dry.
☀️ Step 4: Strengthen the Rose Bush for Next Season
After treating the current outbreak, focus on preventing recurrence. Feed your roses with balanced organic fertilizer (like 10-10-10) in early spring to promote healthy, disease-resistant growth. I also apply 1 pound of compost around the base to boost root health—strong roots mean stronger leaves that fight off infections better.
In late fall, prune again to remove any remaining weak or diseased wood. Cut back to outward-facing buds to encourage an open, airy shape. This isn't just cleanup—it's setting your roses up to grow stronger next year. Keep an eye out for aphids or mites, too, as they weaken plants and make them more susceptible to black spot.
🌱 Step 5: Monitor and Maintain Season-Long Protection
Check your roses weekly during growing season for new spots. Early detection means smaller, easier-to-treat outbreaks. If you see new growth without spots after 4-6 weeks, you're on the right track. Keep spraying the baking soda-neem mix preventatively every 2-3 weeks during rainy seasons or high humidity.
Here's the thing—black spot always returns if you don't stay proactive. I treat my roses twice a year: once in early summer after the first flush of growth, and again in late summer before fall rains. This keeps the fungus from getting a foothold. With consistent care, your roses will bounce back stronger each season.
Tips & tricks for fungal spot treatment on roses
Here's what nobody tells you about keeping your roses healthy after the initial treatment—these details make all the difference.
Timing is Everything: In Step 3, when you're spraying the baking soda-neem mix every 7-10 days, aim for late morning when leaves are dry but still cool. This timing prevents the solution from evaporating too quickly while avoiding the midday sun that can burn treated foliage. I've found that applying it right after a light rain actually helps the mixture adhere better to the leaves.
Equipment Upgrade: Invest in a pair of sterilized pruning shears with a sharp blade—dull tools crush stems and create entry points for infection. After each cut in Step 2, wipe the blades with rubbing alcohol to prevent cross-contamination between healthy and infected parts. I keep a small bottle of 70% isopropyl alcohol in my gardening toolkit specifically for this purpose.
Preventative Pruning: During your late fall pruning in Step 4, look for canes that have multiple buds clustered together—these create dense growth that traps moisture. Cut these back to single buds spaced 6 inches apart to encourage an open structure. This isn't just about black spot prevention; it also improves airflow and sunlight penetration for healthier blooms next season.
Seasonal Adjustments: In Step 5, when you're monitoring weekly, adjust your spraying schedule during extreme weather. If you're experiencing unusually high humidity (like during summer heatwaves), increase to every 2 weeks instead of the standard 3-week interval. The baking soda-neem solution works best when applied consistently, so don't skip treatments just because you're not seeing immediate results.
Pro Tips for Rose Bush Has Black Spots On Leaves
- Here's what nobody tells you about keeping your roses healthy after the initial treatment—these details make all the difference.
- Timing is Everything: In Step 3, when you're spraying the baking soda-neem mix every 7-10 days, aim for late morning when leaves are dry but still cool.
- Equipment Upgrade: Invest in a pair of sterilized pruning shears with a sharp blade—dull tools crush stems and create entry points for infection.
Frequently asked questions
Got questions about black spots on your rose bush leaves? You’re not alone!
Here are the most common concerns—and quick, actionable answers to get your roses thriving again.
What causes black spots on rose leaves?
Black spots on rose leaves are usually caused by Diplocarpon rosae, a fungal disease called black spot. Overhead watering, poor air circulation, and high humidity create the perfect conditions for this pesky pathogen. Wet foliage for prolonged periods (like after rain or sprinklers) speeds up its spread.
Are black spots harmful to my rose bush?
Yes! While black spot won’t kill your rose immediately, it weakens the plant by blocking sunlight (via leaf defoliation) and reducing its ability to photosynthesize. Severe infections can stunt growth, leave your bush vulnerable to pests, and even kill it over time if left untreated. Act fast!
How long does it take to fix black spots on roses?
With consistent care, you’ll see improvement in 2–4 weeks. Prune infected leaves immediately, apply fungicide (organic or chemical), and adjust watering habits. For stubborn cases, repeat treatments every 7–10 days until new growth appears spot-free. Patience is key—fungi love to linger!
Can I save my rose bush if it’s already heavily infected?
Even heavily infected roses can recover with aggressive pruning and proper treatment. Start by removing all spotted leaves (don’t compost them—bag and toss!). Prune back branches to improve airflow, then apply a copper fungicide or neem oil spray. Water at the base (not overhead) and fertilize lightly to boost recovery.
What’s the best organic treatment for black spot?
Skip harsh chemicals and try these organic fixes:
- Neem oil spray: Mix 1 tbsp neem oil + 1 tsp mild soap in 1 quart water. Spray leaves (top and bottom) every 7–10 days.
- Baking soda solution: 1 tbsp baking soda + 1 tsp oil + 1 gallon water. Spray on dry leaves—safe and effective!
- Copper fungicide: Use copper soap or copper hydroxide (follow label rates).
- Companion planting: Add garlic, chives, or thyme nearby—they repel fungi naturally.
For extra defense, mulch with compost or straw to improve soil health and reduce splashing water.
Will black spots come back next year?
Yes, but you can break the cycle! Fungal spores overwinter in fallen leaves and soil. To prevent recurrence:
- Clean up all debris in fall (rake leaves, prune dead wood).
- Space roses for good airflow (3–4 feet apart).
- Water early in the day so leaves dry quickly.
- Apply a preventative fungicide (like neem oil) every 4–6 weeks during growing season.
With these steps, your roses can stay spot-free year after year!
Wrapping up and next steps
Don’t let those black spots dim your rose bush’s beauty! 🌿 With the right diagnosis and organic care, your roses can bounce back stronger than ever. Start by identifying the culprit (like black spot or powdery mildew) and acting fast—prune, treat, and prevent to keep your garden thriving.
Ready to revive your roses? Grab your tools, roll up your sleeves, and give your plants the TLC they deserve. Your green thumb is closer than you think! 🌸