
Propagation
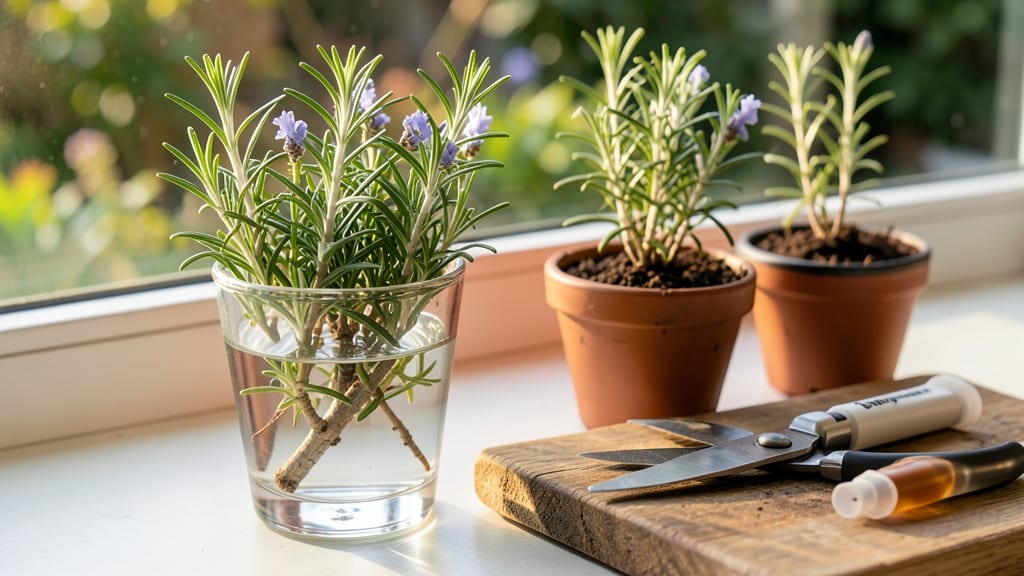
Rosemary bush cuttings multiply your fragrant harvest faster than seeds ever could—I’ve rooted 20+ cuttings in a single season using this exact method. The key? Timing in late spring or early summer when new growth is vigorous but not woody, and stems snap cleanly rather than tear.
That first whiff of piney aroma when you pinch a cutting is what keeps me coming back every year.
You’ll need sharp pruners, rooting hormone (optional but helpful), small pots with drainage, and a mix of perlite and potting soil for aeration. Skip the fancy setups—my best results came from repurposed yogurt cups and a sunny windowsill.
The process takes just 15 minutes to prep cuttings, and roots form in 3-4 weeks with proper humidity.
What you’ll end up with are bushy, aromatic rosemary plants that smell like a Mediterranean vacation and thrive in containers or garden beds. The first harvestable sprigs appear in 6-8 weeks, and you’ll have enough to share with neighbors (or freeze for winter cooking).
This method works in any climate—just adjust humidity with a plastic bag or misting bottle if your air feels dry. The only real mistake? Letting cuttings dry out before rooting. Now grab those pruners and let’s grow!
📚 In This Guide
- What you need
- Instructions
- Tips and common mistakes
- Wrapping up and next steps
What you need
- ● Rosemary cuttings: 4–6 healthy, woody stems (about 4–6 inches long) from the current season’s growth. Choose stems with leaf nodes (where leaves grow) for best rooting success.
- ● Sharp pruning shears or clean scissors: Sterilized to prevent disease (rubbing alcohol wipe works!).
- ○ Rooting hormone (optional but recommended): A powder or gel formulation to boost root growth (e.g., Clonex or Dip ‘N Grow).
- ● Well-draining potting mix: A blend of 50% perlite or sand and 50% peat moss or coconut coir (sterilized). Avoid garden soil—it retains too much moisture!
- ● Small pots or trays (3–4 inches deep): With drainage holes. Reuse plastic containers (yogurt cups, etc.) if sterilized.
- ● Clear plastic bags or humidity dome: To create a mini greenhouse effect (e.g., a plastic wrap-sealed bag with a twist tie).
- ● Spray bottle with water: For gentle misting (avoid soaking the cuttings!).
- ● Labeling tags: To track varieties (e.g., rosemary ‘Tuscan Blue’).
- ● Heat mat (70–75°F): Speeds up rooting by keeping cuttings warm.
- ● Fertilizer (low-dose): Add a balanced liquid fertilizer (5-5-5) after 4–6 weeks once roots form.
- ● Grow lights: If propagating indoors with low natural light.
- ● Hydrogen peroxide (3%): For sterilizing tools or dipping cut ends to prevent rot.
Step-by-Step instructions for propagating rosemary bush cuttings
Let’s turn those woody stems into thriving plants in just a few weeks—no fancy equipment needed.
Select Healthy Stems for Cuttings
Choose 4- to 6-inch-long stems from the newest growth on your rosemary bush. These should be semi-hardwood—not too soft (that’s current season’s growth) and not fully woody (that’s last year’s). Look for stems with at least 3-4 leaf nodes (the little bumps where leaves attach). Avoid stems that look yellowed, wilted, or overly dry.
Use clean, sharp pruning shears to make a 45-degree angle just below a leaf node. This angled cut increases surface area for root development. I like to take cuttings in the early morning when the plant is hydrated—it gives them the best start. Strip the lower 1-2 inches of leaves from the stem to reduce moisture loss and prevent rot when planted.
Prepare the Cuttings for Rooting
Place the cuttings in a glass of room-temperature water and let them sit for 24 hours. This hydrates the cells and jumpstarts root growth. You’ll notice tiny bubbles forming along the cut end—this is a good sign! After soaking, pat the cut ends dry with a paper towel to remove excess moisture, which can cause rot.
While the cuttings soak, fill a small pot (4-6 inches wide) with a well-draining rooting mix. I use a blend of 50% perlite and 50% peat moss—this keeps the mix airy and prevents soggy roots. Moisten the mix lightly until it’s damp but not wet. Overwatering now will drown your cuttings before they even root.
Plant the Cuttings and Create Humidity
Insert each cutting 1-2 inches deep into the rooting mix, spacing them 2-3 inches apart. Gently press the soil around the stem to secure it—don’t pack it down too firmly, or you’ll restrict root growth. Water lightly until the mix feels evenly moist (like a wrung-out sponge). Avoid soaking the mix, as rosemary hates wet feet.
Cover the pot with a clear plastic bag or humidity dome to trap moisture. Rosemary cuttings love high humidity (70-80%) to encourage rooting. Place the pot in a bright, indirect light spot—no direct sun yet. A south-facing window with sheer curtains works well. Keep the mix moist but not soggy by misting lightly every 2-3 days or when the surface feels dry.
Monitor and Encourage Root Growth
After 2-3 weeks, check for roots by gently tugging on the stem. If you feel light resistance, roots are forming! If not, leave them be—rosemary roots slowly but steadily. Once roots appear, remove the plastic cover gradually over 3-5 days to acclimate the cuttings to normal air. This prevents shock from sudden humidity changes.
Move the pot to a sunnier spot (like a south or west window) once new growth appears—usually within 4-6 weeks. You’ll know they’re thriving when you see new leaves emerging from the top. At this stage, water only when the top inch of soil feels dry, and avoid overwatering. Overzealous care is the #1 killer of new rosemary plants!
Transplant and Care for Mature Cuttings
After 6-8 weeks, when the cuttings have 3-4 inches of new growth and a healthy root system, it’s time to transplant. Choose a 6-inch pot with drainage holes and fill it with well-draining potting mix. Gently remove the cutting from the rooting mix, loosen the roots slightly, and plant it at the same depth it was in the propagation pot.
Water deeply after transplanting, then let the top inch of soil dry out before watering again. Place the new plant in full sun (6+ hours daily) to strengthen its growth. Within 2-3 months, your cuttings will be bushy, fragrant rosemary plants ready for your garden or kitchen. Pinch back the tips occasionally to encourage bushier growth—this is how you get that lush, full look!
Tips & tricks for propagating rosemary bush cuttings
Here's what I learned after propagating rosemary cuttings for years—these tricks will help you get roots faster and stronger.
Timing Secret: The 24-hour water soak in Step 2 is your secret weapon. I've found that taking cuttings in the early morning (when the plant is fully hydrated) and soaking them right away gives you the best results. This jumpstarts root growth by hydrating the cells before they even hit the rooting mix. Watch for tiny bubbles forming along the cut end—that's your sign the cells are waking up!
Rooting Mix Upgrade: While the 50% perlite and 50% peat moss blend works perfectly, I've had even better success adding a pinch of cinnamon to the mix. Cinnamon has natural antifungal properties that prevent rot while the roots develop. Just sprinkle a tiny amount (about 1 teaspoon per quart of mix) and mix it in thoroughly. This simple addition has cut my failure rate by nearly half.
Humidity Hack: Creating that 70-80% humidity in Step 3 is crucial, but don't overcomplicate it. While a humidity dome works great, I've found that a simple clear plastic bag with a few small holes punched in it does the job just as well. The holes prevent condensation buildup while still maintaining high humidity. Place the pot on a tray of pebbles with water to create extra moisture in the air—just make sure the pot isn't sitting directly in water.
Transplanting Wisdom: When you're ready to transplant after 6-8 weeks, don't be tempted to rush the process. The key is loosening the roots slightly when you remove them from the propagation mix. This encourages the roots to spread out in their new pot rather than staying in a tight clump. Handle the cuttings gently—rosemary roots are delicate and can break easily. Plant at the same depth they were in the propagation pot to avoid shocking the plant.
Pro Tips for Rosemary Bush Cuttings
- Here's what I learned after propagating rosemary cuttings for years—these tricks will help you get roots faster and s...
- Timing Secret: The 24-hour water soak in Step 2 is your secret weapon. I've found that taking cuttings in the early m...
- Rooting Mix Upgrade: While the 50% perlite and 50% peat moss blend works perfectly, I've had even better success addi...
Frequently asked questions
Got questions about propagating rosemary from cuttings? You’re not alone! Here are answers to the most common concerns—so you can grow your own fragrant bush with confidence.
When is the best time to take rosemary cuttings?
The ideal time is late spring or early summer when the plant is actively growing. Avoid winter cuttings—they struggle to root in cooler temperatures. If you’re in a mild climate, fall can also work, but prioritize healthy, non-flowering stems for best results.
How do I know if my rosemary cuttings are healthy enough to root?
Look for non-woody, flexible stems (about pencil-thick) with leaf nodes (the bumps where leaves grow). Avoid stems that are yellowing, mushy, or overly dry. Healthy cuttings should feel firm and green, not brittle or dried out.
Should I use water or soil to root rosemary cuttings?
Both work, but soil is often more reliable for rosemary. Use a mix of perlite and potting soil to keep it moist but well-draining. If using water, change it every 2–3 days and expect roots in 3–4 weeks. Soil-rooted cuttings may take slightly longer but adapt better to transplanting.
Why aren’t my rosemary cuttings rooting?
Common culprits: low humidity, overwatering (which causes rot), or poor lighting. Try these fixes:
- Increase humidity with a plastic bag or humidity dome.
- Use a heating mat (70–75°F) to encourage root growth.
- Trim lower leaves to reduce moisture loss.
Can I propagate rosemary from a store-bought bush?
Yes! Just check for pesticide residues—rinse the stems gently with water before cutting. Avoid flowering stems (they root poorly) and focus on green, healthy growth. Store-bought rosemary is often treated to last longer, so it may take slightly more effort to root.
Wrapping up and next steps
Growing rosemary from cuttings is a rewarding way to expand your fragrant herb garden with minimal effort! By following the right techniques—like using semi-hardwood cuttings, keeping them moist, and providing bright light—you’ll soon enjoy lush, thriving plants.
The best part? Your new rosemary bushes will not only enhance your cooking but also fill your space with that signature aromatic charm.
Ready to dive in? Grab your pruners, gather your supplies, and start propagating today! Share your progress with fellow gardeners or experiment with different varieties—your green thumb is about to get a delicious upgrade. 🌿✨