
Shrubs
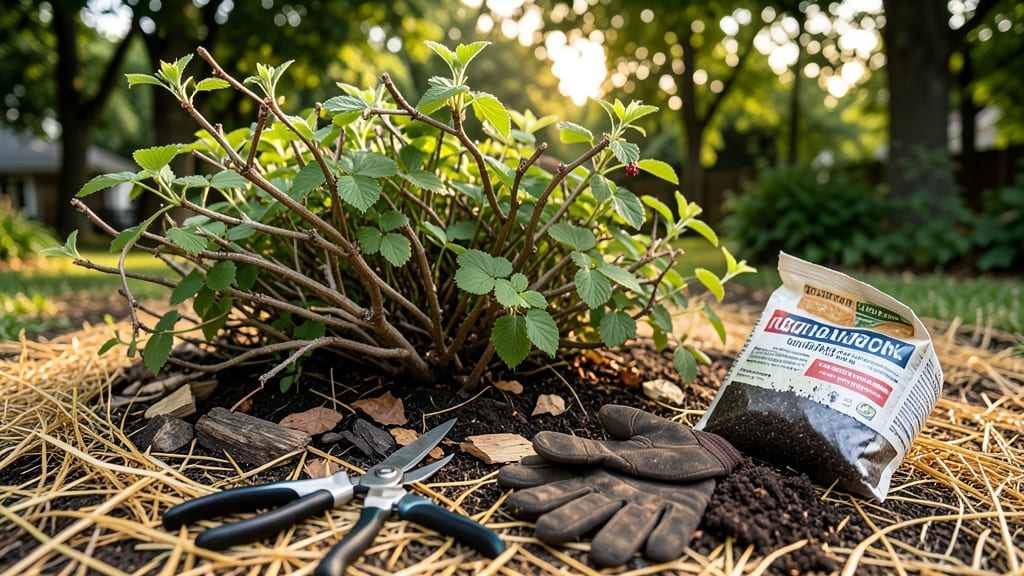
Fall is when raspberry bushes need your attention most—prune now, and you’ll double next year’s harvest. 🌿 The key is cutting back the old canes that fruited this season while protecting the new ones for spring growth.
I’ve learned the hard way that skipping this step means weaker plants and fewer berries in June.
Start by harvesting any remaining ripe berries—those last few clusters are sweeter than you’d expect. Then, cut the thin, brown canes (the ones that produced fruit this year) down to the ground, leaving the thicker, green canes untouched.
These are next year’s fruit producers. A sharp pair of pruners makes this job clean and fast.
After pruning, spread 3-4 inches of mulch around the base to insulate roots from winter’s freeze-thaw cycles. Straw or shredded leaves work best—they’ll break down slowly, feeding the soil while keeping moisture in. By spring, your bushes will burst with fresh growth, ready for another bountiful season.
Timing matters: finish pruning before hard frosts hit your zone, usually by late October or November. In colder climates, add extra mulch; in milder areas, a light frost is fine. The goal is to give your raspberries a strong start before winter sets in.
📚 In This Guide
- What you need
- Instructions
- Tips and common mistakes
- Wrapping up and next steps
What you need
- ● Pruning shears or loppers – Sharp, bypass-style shears (avoid anvil shears—they crush stems). Choose 4- to 6-inch blades for precision.
- ● Gloves – Heavy-duty, thorn-resistant (raspberry canes are seriously spiky!). Look for gardening or leather work gloves with reinforced palms.
- ● Rake – A sturdy garden rake (8-12 inches wide) for clearing debris and mulch.
- ○ Pruning saw – For thick, woody canes (optional but handy if your bushes are mature). A curved blade works best.
- ● Garden hose or watering can – To sterilize tools between cuts (70% isopropyl alcohol works too!).
- ● Mulch – 3-4 inches of organic mulch like straw, shredded leaves, or wood chips. Avoid fresh grass clippings (they can mat down).
- ● Compost or fertilizer – Balanced, slow-release fertilizer (10-10-10 or similar) or well-aged compost to enrich the soil.
- ● Disinfectant spray – 70% isopropyl alcohol or a bleach solution (1 part bleach to 9 parts water) to prevent disease spread.
- ● Stakes or trellis supplies – If your bushes need support, grab bamboo stakes or wire trellis (2-3 feet tall).
- ● Container or bucket – For collecting pruned canes (or composting them on-site).
- ● Knee pads – Because fall prep is no joke—your knees will thank you!
Step-by-Step fall care for raspberry bushes
Here’s how I prepare my raspberry bushes each fall—pruning and mulching that sets up a stronger, more productive harvest next year.
✂️ Step 1: Prune After Harvest
Use clean, sharp pruners to remove all canes that bore fruit this season—these are called primocanes, and they’ll die back naturally after fruiting. Cut them down to the ground immediately after harvest. I always prune on a dry day to avoid spreading disease through wet canes.
Next, focus on the remaining floricane canes (the ones that produced fruit last year). Remove any that are dead, diseased, or less than ½ inch thick. Thin the stand to 10-15 canes per plant—this ensures better airflow and larger berries. Watch for new shoots growing from the base; these are future fruiting canes, so leave them unless they’re weak.
💧 Step 2: Water Deeply Before Mulching
Water the bushes thoroughly 2-3 days before mulching. This gives the roots time to absorb moisture and prepares the soil for winter. You’ll know the soil is ready when the top 6 inches feel damp but not soggy. Overwatering now can lead to root rot before the ground freezes.
I like to water in the late afternoon so the foliage has time to dry overnight. This reduces the risk of fungal diseases like botrytis, which thrives in damp conditions. If your soil drains poorly, consider adding a 2-inch layer of coarse sand around the base before mulching.
🌿 Step 3: Apply Mulch for Winter Protection
Spread a 3-4 inch layer of organic mulch (like straw or shredded leaves) around the base of the bushes, keeping it 6 inches away from the stems. This insulates the roots from freezing temperatures while allowing moisture to penetrate. I avoid thick mulch piles directly against the canes—too much moisture there can cause rot.
For extra protection in cold climates, top the mulch with a 4-inch layer of evergreen boughs or pine straw. This adds another insulating layer and deters rodents that might dig around the roots. Check the mulch in early spring—if it’s compacted or washed away, fluff it up to maintain airflow.
☀️ Step 4: Fertilize Lightly for Spring Growth
In late fall, apply a low-nitrogen fertilizer (like 5-10-10) around the drip line of the bushes. Use about ½ pound per 100 square feet—raspberries don’t need heavy feeding in winter, but a light dose encourages root development. Work the fertilizer into the top 2 inches of soil to avoid burning the roots.
Skip high-nitrogen fertilizers now; they promote tender new growth that won’t survive winter. Instead, focus on phosphorus and potassium to strengthen root systems. If your soil is sandy, mix in a 1-inch layer of compost to improve moisture retention before the ground freezes.
⏰ Step 5: Plan for Spring Cleanup
Mark the location of your raspberry bushes with stakes or flags so you don’t accidentally prune them in early spring. In late winter, remove any mulch that’s compacted or moldy—fresh air helps prevent disease buildup. I also check for overwintering pests like raspberry cane borers and remove any damaged canes immediately.
Wait until after the last frost to prune any remaining weak canes or suckers. Early pruning can expose the plant to cold damage. By spring, your bushes will be ready to send out strong new growth—just give them a little time to wake up naturally.
Tips & tricks for fall raspberry bush care
These simple strategies will help you avoid common mistakes and get the most out of your raspberry bushes this season.
Pruning Precision: When thinning to 10-15 canes per plant in Step 1, focus on keeping the strongest, most upright canes. Look for canes with smooth bark and no signs of disease—these will produce the best fruit next year. I always make my cuts at a 45-degree angle just above a bud to encourage healthy regrowth. This might seem like overthinking, but it makes all the difference in spring.
Timing is Everything: The 2-3 days of watering before mulching in Step 2 is non-negotiable. I've learned this the hard way—skipping this step can leave your roots vulnerable to winter stress. Test your soil moisture by squeezing a handful—it should hold together but not be dripping wet. In dry climates, you might need to water twice, 2-3 days apart, to reach that perfect damp-but-not-soggy state.
Mulch Placement Matters: Keeping that 3-4 inch layer of mulch 6 inches away from stems in Step 3 prevents rot while still insulating roots. I've seen gardeners make the mistake of piling mulch right against the canes, which traps too much moisture and can actually harm the plant. Think of it like a cozy blanket—nice and snug around the roots, but not suffocating the stems. For extra insulation in cold zones, I add pine needles on top of the mulch—they're like nature's winter coat.
Fertilizer Strategy: That ½ pound of low-nitrogen fertilizer per 100 square feet in Step 4 might seem like a small amount, but it's perfect for winter. I've found that raspberries actually appreciate this light feeding more than heavy doses. If your soil is particularly poor, you can add a little extra compost (up to 1 inch) around the drip line—just mix it in gently so you don't disturb the roots. The key is to give them just enough to wake up strong in spring without encouraging tender new growth that could freeze.
Pro Tips for What To Do With Raspberry Bushes In The Fall
- These simple strategies will help you avoid common mistakes and get the most out of your raspberry bushes this season.
- Pruning Precision: When thinning to 10-15 canes per plant in Step 1, focus on keeping the strongest, most upright canes.
- Timing is Everything: The 2-3 days of watering before mulching in Step 2 is non-negotiable.
Frequently asked questions
Got questions about fall prep for your raspberry bushes? Here are some of the most common ones—and their answers—to help you keep your plants thriving year after year.
When is the best time to prune raspberry bushes in the fall?
For summer-bearing varieties, prune right after harvest (late summer to early fall) to remove fruited canes. For fall-bearing types, wait until spring—pruning in fall can reduce next year’s crop. Always remove dead, diseased, or weak canes first!
Should I cut back raspberry canes all the way to the ground?
No! Only prune fruited canes (for summer-bearing) or thin out old canes (for fall-bearing). Leave 1-2 inches of stubble—this helps prevent disease and protects the crown. Never cut healthy, young canes; they’ll fruit next season.
Can I mulch raspberry bushes in the fall, and what’s the best material?
Yes! Mulch after pruning to insulate roots and retain moisture. Use 3-4 inches of organic mulch like shredded leaves, straw, or wood chips. Avoid fresh sawdust or thick layers, which can suffocate roots or attract pests.
How do I protect raspberry bushes from pests or disease over winter?
Start by removing all fallen leaves and debris (a hotspot for pests!). Prune for airflow, and apply copper fungicide if you’ve had issues with cane blight. For rodents, wrap young canes in hardware cloth—they love gnawing on tender new growth!
What if my raspberry canes are still green in late fall—should I prune them?
Hold off! If canes are still green or producing new growth in late fall, they’re likely fall-bearing varieties. Prune them in early spring instead. Green canes in summer-bearing types? Prune them now—but leave the ones that turned brown first.
Can I replant raspberries in the fall, or should I wait until spring?
Fall is a great time to plant raspberries in most climates (Zone 5-9). The cool weather helps roots establish before winter. Just water deeply after planting and mulch well. Avoid fall planting in Zone 10+—opt for spring instead.
Wrapping up and next steps
Fall is the perfect time to set your raspberry bushes up for a bountiful harvest next year—whether you're pruning, mulching, or even harvesting the last berries! 🍓 With the right care, you’ll reward yourself with healthier plants and sweeter fruit in the seasons ahead. Start small, stay consistent, and enjoy the process!
Ready to take action? Grab your pruners, gather supplies, and roll up your sleeves—your future raspberry patch is waiting! Check out our guide on seasonal raspberry care for even more tips to keep your bushes thriving.