
Pests and Diseases
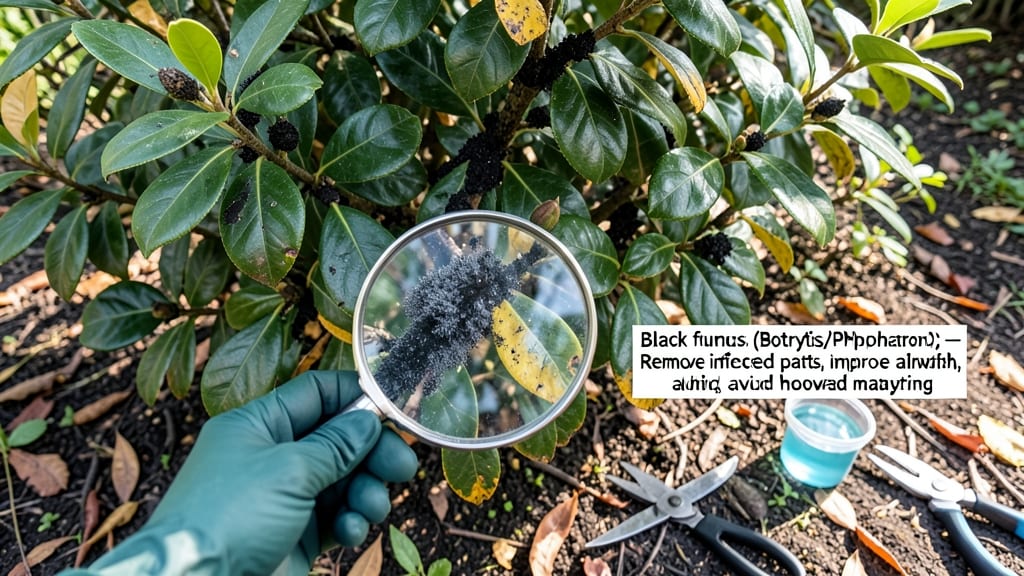
Black fungus creeping across your bushes isn’t just unsightly—it’s a silent thief of blooms and leaves. 🌿 I’ve seen it turn vibrant hydrangeas into skeletal shadows, and the good news is you can stop it before it spreads.
This isn’t about expensive sprays or drastic measures; it’s about spotting the signs early and acting with simple, effective solutions.
The black rot you’re seeing thrives in damp, shady conditions, often starting as tiny black specks that multiply into fuzzy patches. Roses, lilacs, and even ornamental shrubs are common targets, but the damage isn’t inevitable.
The key is understanding what fuels this fungus—too much moisture, poor airflow, or stressed plants—and how to break that cycle without harming your bushes.
With the right approach, you’ll see those bushes bounce back in weeks. Prune out infected stems, adjust watering habits, and apply targeted treatments (organic or chemical, depending on your preference). The goal isn’t just to clean up the mess but to create an environment where your plants stay healthy year-round.
We’ll cover everything from quick fixes to long-term prevention, so you can enjoy lush, fungus-free bushes without the guesswork. Let’s get those plants thriving again—starting today.
Root Causes Behind Dark Fungal Growth
Black fungus on bushes isn’t just an eyesore—it’s often a symptom of deeper issues lurking in your garden’s ecosystem. Understanding the why behind this problem is the first step to stopping it before it spreads.
Below, we break down the most common triggers, backed by science and actionable insights to help you diagnose the issue accurately.
Fungi thrive in wet conditions, and black fungal growth is no exception. When bushes sit in soggy soil—whether from overwatering, heavy rainfall, or compacted, poorly draining soil—they create the perfect breeding ground for pathogens like Botrytis cinerea (gray mold) or Alternaria species.
- Why it happens: Fungal spores germinate when moisture lingers on leaves, stems, or soil for prolonged periods. Poor airflow exacerbates the problem by trapping humidity against plant surfaces.
- Actionable fix:
- Test your soil’s drainage by digging a hole, filling it with water, and timing how long it takes to drain. Ideal drainage should take no more than 2 hours.
- Amend heavy clay soil with organic matter (compost, perlite, or sand) to improve aeration.
- Avoid overhead watering; use drip irrigation or soaker hoses to deliver water at the base.
Stressed bushes—whether from nutrient deficiencies, physical damage, or environmental shocks—are far more susceptible to fungal infections. Think of it like a human catching a cold after a rough week: the plant’s defenses are down, and opportunistic fungi move in.
- Why it happens:
- Nutrient deficiencies (especially phosphorus or potassium) weaken cell walls, making them easier targets.
- Physical trauma (pruning cuts, hail damage, or pest bites) creates entry points for spores.
- Extreme temperatures (sudden heatwaves or late frosts) shock plants, compromising their ability to resist pathogens.
- Actionable fix:
- Fertilize with a balanced, slow-release fertilizer (e.g., 10-10-10) in early spring to bolster plant health.
- Prune bushes in dry, mild weather and sterilize tools with rubbing alcohol to prevent spreading spores.
- Mulch around the base with 2–4 inches of organic mulch (wood chips, straw) to regulate soil temperature and retain moisture without suffocating roots.
Bushes packed too closely together create a fungal highway—limited airflow and shaded foliage trap moisture, while dense canopies block sunlight, slowing evaporation. This is a recipe for black rot, powdery mildew, and other fungal diseases.
- Why it happens: Fungal spores spread via wind, water, or touching leaves. In tight spaces, spores have more opportunities to jump from plant to plant.
- Actionable fix:
- Thin out overcrowded bushes by removing 10–20% of the smallest or weakest plants to improve airflow.
- Space new plantings according to their mature size (check plant tags for guidance).
- Prune branches to open up the center of the bush, allowing sunlight and air to circulate.
Insects like aphids, mites, and caterpillars don’t just damage leaves—they chew or pierce plant tissues, leaving behind wounds that fungal spores exploit. Some pests, like Japanese beetles, also defecate on leaves, spreading fungal spores as they feed.
- Why it happens: Open wounds disrupt the plant’s protective cuticle layer, and sticky honeydew (a byproduct of sap-sucking pests) provides a nutrient-rich film for fungi to grow on.
- Actionable fix:
- Monitor bushes for pests and treat infestations early with:
- Neem oil (natural fungicide + insecticide)
- Insecticidal soap (for soft-bodied pests)
- Beneficial predators (ladybugs, lacewings)
- Clean up fallen leaves and debris where pests and spores hide.
- Monitor bushes for pests and treat infestations early with:
Fungi love humidity, but bushes need balanced moisture and airflow to stay healthy. Greenhouses, shaded areas, or humid climates can turn a lush garden into a fungal paradise if conditions aren’t managed.
- Why it happens: Humidity levels above 70% (common in mornings or after rain) slow water evaporation, keeping leaves damp for hours—ideal for spore germination.
- Actionable fix:
- Use a hydrometer to monitor humidity and aim for 40–60% around bushes.
- Install fan ventilation in greenhouses or use oscillating fans outdoors to improve airflow.
- Choose fungus-resistant bush varieties (e.g., Hydrangea paniculata over H. macrophylla for black leaf spot resistance).
💡 Pro Tip: If black fungus keeps reappearing, test your soil’s pH. Many fungi prefer slightly acidic to neutral soil (pH 6.0–7.0). Adjust with lime (to raise pH) or sulfur (to lower pH) if needed.
Quick Fixes for Black Fungus Woes
Black fungus creeping onto your bushes isn’t just unsightly—it can weaken or even kill your plants if left unchecked. But don’t worry! With the right approach, you can reverse the damage and prevent future outbreaks.
Below, we’ve mapped out practical solutions tailored to the most common causes of black fungus, from overwatering to poor airflow. Each fix is designed to be easy, effective, and budget-friendly—so grab your gloves and let’s get to work!
If your bushes are sitting in soggy soil, fungal spores thrive like all-you-can-eat buffets. Here’s how to dry things out:
💦 Step 1: Adjust Your Watering Habits
- Water deeply but less often—aim for 1–1.5 inches per week (including rain).
- Water in the morning so foliage dries by evening (fungus loves damp leaves).
- Avoid overhead sprinklers—use drip irrigation or a soaker hose to keep leaves dry.
🏗️ Step 2: Improve Soil Drainage
- Amend heavy clay soil with compost, perlite, or coarse sand to loosen it up.
- Raise garden beds slightly if drainage is chronically poor.
- Check for buried roots or compacted soil—loosen it with a fork if needed.
🌡️ Pro Tip:
If your soil stays waterlogged for days, consider planting fungus-resistant varieties (like certain roses or hydrangeas) in problem areas.
Once black fungus takes hold, act fast with these DIY fungicides that won’t harm your plants (or the planet).
🧪 Option 1: Baking Soda Spray (Best for Early Stages)
What you’ll need:
- 1 tbsp baking soda
- 1 quart water
- 1 tsp dish soap (as a surfactant)
- 1 tsp horticultural oil (optional, for extra protection)
How to apply:
- Mix ingredients in a spray bottle.
- Spray thoroughly on both sides of leaves and stems.
- Reapply every 7–10 days until the fungus clears.
🍋 Option 2: Neem Oil Solution (Kills Spores & Prevents Regrowth)
What you’ll need:
- 1 tbsp neem oil
- 1 tsp dish soap
- 1 quart water
How to apply:
- Mix and shake well (neem oil separates).
- Spray at dusk (avoids burning leaves in sunlight).
- Repeat every 2 weeks for prevention.
⚠️ Warning:
- Test sprays on a small leaf first—some plants (like citrus) are sensitive.
- Avoid copper-based fungicides if you have pets or kids—they can be toxic.
Fungus spreads like wildfire through infected debris. Here’s how to cut it off at the source:
✂️ Step 1: Prune Infected Areas
- Remove and destroy (don’t compost!) blackened leaves, stems, and branches.
- Sterilize pruners with rubbing alcohol between cuts to avoid spreading spores.
- Thin out dense foliage to improve airflow (fungus hates circulation!).
🧹 Step 2: Deep-Clean Your Garden
- Rake up fallen leaves and mulch from around infected bushes.
- Disinfect tools and pots with a 10% bleach solution (1 part bleach to 9 parts water).
- Replace old mulch with cedar chips or pine straw (naturally antifungal).
💡 Pro Tip:
If the fungus keeps returning, rotate your plants—don’t replant the same species in the same spot for at least 2–3 years.
An ounce of prevention is worth a pound of cure! Break the fungus cycle with these long-term strategies:
| Problem | Solution | When to Do It |
|---|---|---|
| High humidity | Space plants 3–6 feet apart for airflow. | When planting or pruning. |
| Shady, damp spots | Plant sun-loving bushes in full sun areas. | Spring or early fall. |
| Weakened plants | Fertilize with compost (not synthetic nitrogen-heavy feeds). | Early spring and mid-summer. |
| Contaminated soil | Solarize soil (cover with clear plastic for 4–6 weeks in summer). | Late spring/early summer. |
✨ Bonus Prevention Hack:
- Interplant with fungicide-free companions like garlic, chives, or marigolds—they naturally repel fungal spores!
- Mild cases: Improvement in 7–14 days with consistent treatment.
- Severe infections: May take 3–4 weeks—keep pruning and spraying!
- Prevention mode: Once fungus is gone, reapply neem oil or baking soda spray every 2 weeks for a month, then monthly in humid seasons.
Remember: Patience and persistence are key! If your bushes are struggling but not dead, they can often bounce back with the right care. And if all else fails? Replace the bush—sometimes, a fresh start is the easiest fix.
Now go forth and save your greenery—one fungus-free leaf at a time! 🌿✨
Frequently asked questions
What’s the difference between black fungus and sooty mold?
Black fungus on bushes often refers to diseases like anthracnose or black spot, which create dark, velvety patches on leaves and stems. Sooty mold, however, is a surface fungus that grows on honeydew (sap-sucking insect waste) and appears as a black, powdery coating—not a disease itself but a symptom of pest problems.
Will rain make black fungus worse?
Yes, prolonged rain or high humidity (70%+) creates the perfect conditions for fungal spores to spread. Water droplets can splash spores onto healthy leaves, accelerating the infection. The key is to water bushes early in the morning so foliage dries by evening, and avoid overhead sprinklers.
Can I use household vinegar to treat black fungus?
White vinegar (1 part vinegar to 3 parts water) can help as a natural fungicide, but it’s not as effective as neem oil or baking soda sprays. Always test on a small leaf first—vinegar’s acidity can burn sensitive plants. For best results, spray in early morning and reapply every 5–7 days.
How do I know if my bush is beyond saving?
If more than 50% of the foliage is blackened, the bush is severely stunted, or the fungus has spread to the main stems/trunk, it may be too far gone. However, if the roots are still healthy (check by gently pulling back mulch), prune back infected growth, treat with fungicide, and give it time—many bushes recover with proper care.
Are chemical fungicides safe for pets and kids?
Most copper-based fungicides and synthetic chemicals (like chlorothalonil) can be toxic if ingested or inhaled. Opt for organic alternatives like neem oil, baking soda, or horticultural oil, which are pet- and child-safe when used as directed. Always apply sprays when kids/pets aren’t nearby and rinse produce before eating.