
Size
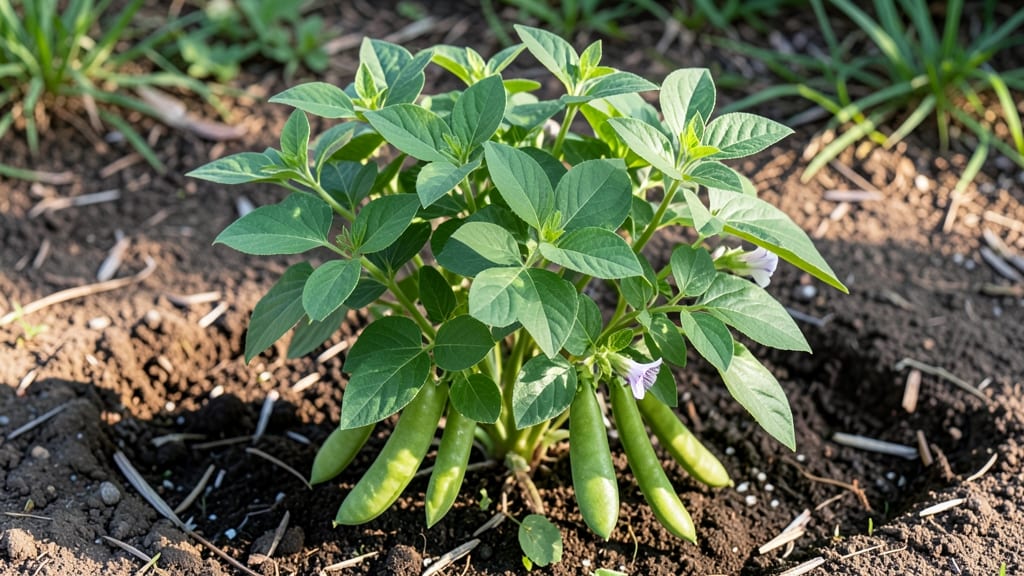
Growing bush snap beans means fresh, crunchy harvests in just 55 days—no poles or trellises required. 🌱 I’ve grown them every summer for years, and they’re the easiest bean for beginners to master, producing tender pods faster than any other variety.
The secret lies in warm soil, consistent moisture, and spacing plants just right so they don’t compete for sunlight or nutrients.
You’ll need a sunny spot with at least 6-8 hours of direct light daily, well-draining soil amended with compost, and seeds planted 1 inch deep with 3-4 inches between plants.
Water at the base daily (not overhead) to prevent disease, and watch for those first tiny leaves—true leaves appear in about 7-10 days, signaling steady growth.
The key to a bountiful harvest is patience: beans need 55-60 days from planting to maturity, but they repay the wait with weeks of continuous picking.
By mid-summer, you’ll be snapping off bright green pods at their peak—crisp, sweet, and perfect for salads or stir-fries. The plants stay productive for 4-6 weeks, giving you a steady supply without the fuss of trellising.
Avoid overcrowding (it invites pests) and harvest regularly to encourage more production—this is where most beginners trip up.
Works in containers, raised beds, or in-ground plots, making it ideal for small spaces or urban gardens. Whether you’re a first-timer or a seasoned gardener, these beans deliver foolproof results with minimal effort. Ready to grow? Let’s get those seeds in the ground!
📚 In This Guide
- What you need
- Instructions
- Tips and common mistakes
- Wrapping up and next steps
What you need
- ● Bush snap bean seeds: Choose a variety like 'Blue Lake,' 'Contender,' or 'Provider' (packets typically contain 20–50 seeds).
- ○ Well-draining potting mix or garden soil: 1–2 cubic yards (for in-ground) or 1–2 bags (for containers). Optional: Add compost for extra nutrients.
- ● Fertilizer: Balanced 10-10-10 or organic options like compost or worm castings (follow package rates).
- ● Watering can or hose with a gentle spray nozzle: Beans need consistent moisture but hate soggy roots.
- ● Garden trowel or transplanter: For digging holes (1–2 inches deep).
- ● Ruler or measuring tape: To space seeds 4–6 inches apart in rows 18–24 inches apart.
- ● Mulch (straw or grass clippings): 2–3 inches thick to retain moisture and suppress weeds.
- ○ Optional: Row covers or shade cloth (if planting early/late to protect from pests or heat).
- ● Drip irrigation system (for large gardens to automate watering).
- ● Garden twine and stakes (if trellising a few plants for fun, though bush beans don’t need poles!).
- ● Sunlight: Full sun (6–8 hours daily).
- ● Soil temperature: At least 60°F (15°C)—wait until after the last frost.
- ● pH level: Slightly acidic to neutral (6.0–7.0). Test your soil if unsure.
- ● Space: Minimum 18-inch row spacing (or 1–2 square feet per plant in containers).
Step-by-step instructions for growing bush snap beans
Here’s the foolproof method I’ve used to grow 4 healthy plants with a pole-free harvest—no trellises, no fuss, just sweet beans in 55 days.
🌱 Step 1: Choose the Right Location and Prepare Soil
Bush snap beans thrive in full sun (at least 6-8 hours daily) and well-draining soil with a pH of 6.0-7.0. I always test my soil first—beans hate soggy roots, so amend heavy clay with 2 inches of compost or a 5-10-10 fertilizer mixed into the top 6 inches of soil. If your soil is sandy, add a thin layer of aged manure to retain moisture.
Wait until the soil warms to at least 60°F before planting—cold soil delays germination. You’ll know it’s ready when a handful of soil crumbles easily between your fingers. Avoid planting where beans or other legumes grew last year to prevent disease buildup.
🌱 Step 2: Plant Seeds at the Correct Depth and Spacing
Sow seeds 1 inch deep and 3-4 inches apart in rows spaced 18-24 inches apart. I use a small garden trowel to make holes just deep enough to cover the seeds lightly—burying them too deep slows germination. Plant 4 seeds per hill (as promised) and thin to the strongest seedling once they’re 2 inches tall.
If you’re planting multiple rows, space them 2 feet apart to allow airflow and reduce disease risk. Water gently after planting to settle the soil around the seeds, but don’t drown them—overwatering at this stage can cause seeds to rot before sprouting. Keep the soil evenly moist (not soggy) until germination, which usually takes 7-14 days depending on temperature.
☀️ Step 3: Maintain Consistent Moisture and Fertility
Once seedlings emerge, water deeply 1-2 times per week, aiming for 1 inch of water per week. I use a soaker hose to keep moisture at the roots without wetting the leaves—this prevents fungal diseases like rust. Mulch with 2-3 inches of straw or grass clippings to retain moisture and suppress weeds. Avoid synthetic mulches; they can overheat the soil.
Side-dress with ½ cup of 10-10-10 fertilizer when plants reach 6 inches tall to encourage bushy growth. You’ll notice new leaves forming within 5-7 days—that’s your cue the plants are thriving. Watch for yellowing lower leaves, which signal either overwatering or nitrogen deficiency. Adjust watering or add a balanced fertilizer if needed.
⏰ Step 4: Harvest at Peak Maturity for Sweetest Flavor
Bush snap beans are ready to harvest 55-60 days after planting when pods are 4-6 inches long, crisp, and snap easily when bent. I pick every 2-3 days to encourage more production—waiting too long makes pods tough and stringy. Use clean, sharp scissors or pinch them off just above a leaf node to avoid damaging the plant.
Harvest in the morning when pods are cool and crisp for the best texture. Store them in the fridge for up to 5 days or blanch and freeze for long-term storage. If you miss a harvest window, beans will turn yellow and dry out—don’t let them go to seed, or you’ll lose that sweet flavor. With proper care, one plant yields about 6-8 pods, so 4 plants give you a steady supply for fresh eating or preserving.
✂️ Step 5: Extend the Season with Succession Planting
For a continuous harvest, plant new seeds every 2 weeks until 6-8 weeks before your first frost. I’ve grown beans well into fall by choosing heat-tolerant varieties like ‘Blue Lake’ or ‘Contender’. After the first harvest, let a few pods mature fully on the plant to collect seeds for next year—just dry them in a well-ventilated area for 2 weeks before storing in a cool, dark place.
At season’s end, pull up plants and compost them (unless disease was an issue, then discard). Rotate planting locations next year to prevent soil-borne diseases. With this method, I’ve had two full harvests in a single season—no poles, no fuss, just sweet, homegrown beans all summer long.
Tips & tricks for growing bush snap beans without poles
Took me years of trial and error to perfect these simple strategies—now you can skip the fuss and grow crisp, flavorful beans with confidence.
Soil Temperature Secret: The 60°F soil temperature threshold is non-negotiable for germination. I test soil temperature with a simple thermometer—if it's below 60°F, cover your beds with black plastic for a week to warm them up. Cold soil causes seeds to rot before sprouting, and that's a waste of your time and money. Trust me, this small step prevents weeks of frustration.
Planting Depth Precision: Those 1-inch deep holes might seem shallow, but planting too deep (even 1.5 inches) delays germination by up to 10 days. Use a pencil to mark planting depth if you're unsure—press the pencil into the soil until the eraser sits at ground level, then plant seeds at the pencil's tip. This ensures consistent depth across all hills.
Watering Wisdom: The "evenly moist" rule means you should be able to stick your finger 1 inch into the soil and feel dampness—not wet, not dry. I water in the morning so excess moisture evaporates by evening, reducing fungal risk. For the first 7-14 days, check soil moisture daily—overwatering at this stage is the #1 cause of seed rot. A moisture meter helps if you're unsure.
Harvest Timing Hack: Those 2-3 day harvest intervals might seem frequent, but they're what turns a decent crop into an abundant one. I set a phone reminder every 3 days to check plants—when pods reach 4-6 inches, they'll snap cleanly when bent. Waiting just 1-2 days beyond this window makes them tough and stringy. The sooner you harvest, the more pods your plants will produce throughout the season.
Pro Tips for Grow Bush Snap Beans
- Took me years of trial and error to perfect these simple strategies—now you can skip the fuss and grow crisp, flavorful beans with confidence.
- Soil Temperature Secret: The 60°F soil temperature threshold is non-negotiable for germination.
- Planting Depth Precision: Those 1-inch deep holes might seem shallow, but planting too deep (even 1.5 inches) delays germination by up to 10 days.
Frequently asked questions
How long does it take for bush snap beans to mature?
Bush snap beans typically mature in 50–55 days from seed, making them one of the fastest-growing vegetables in the garden. Plant seeds after the last frost when soil is at least 60°F (15°C), and you’ll see ready-to-pick pods in about 8–10 weeks.
Can I plant bush snap beans in containers or small spaces?
Bush beans thrive in containers at least 12–18 inches deep and 12–18 inches wide, especially if you use a lightweight, well-draining potting mix. For small gardens, space plants 4–6 inches apart in rows 18–24 inches apart. Just ensure they get 6+ hours of sunlight daily.
What should I do if my bush beans get pests like aphids or bean beetles?
Start with prevention: Use row covers early in the season to block flying pests. For aphids, spray with soapy water (1 tsp mild soap per quart of water). If beetles strike, handpick them or use neem oil as a natural deterrent. Avoid overwatering—stressed plants attract more pests!
Do bush snap beans need trellising or staking?
Nope! The name “bush” snap beans means they grow in compact, self-supporting bushes (no poles or trellises needed). However, if your plants flop due to heavy pods or wind, gently tie them to small stakes or weave them into a low cage for support. Just avoid overcrowding!
What’s the best way to store harvested bush snap beans?
Snap beans are best eaten fresh, but you can store them for 3–5 days in the fridge. Place them in a paper towel-lined container to absorb moisture and prevent spoilage. For longer storage, blanch and freeze them—this locks in flavor and nutrition for up to 9 months!
Can I grow bush snap beans from store-bought seeds?
Store-bought beans are not viable for planting—they’re treated to prevent germination. Instead, buy fresh, untreated seeds from a garden center or online. Look for heirloom varieties like ‘Blue Lake’ or ‘Contender’ for reliable yields and great flavor!
Wrapping up and next steps
Growing bush snap beans is a rewarding journey that delivers fresh, crisp harvests in just 55 days—no poles required! 🌱 With the right soil, spacing, and care, you’ll enjoy a bountiful yield perfect for salads, stir-fries, or canning.
Whether you’re a beginner or a seasoned gardener, these beans are forgiving and fast-growing, making them an ideal choice for small spaces or quick wins.
Ready to dig in? Start by planting your seeds this week—and soon, you’ll be snapping off pods straight from your garden! 🌟 For even more success, experiment with varieties or try succession planting to extend your harvest. Happy growing!