
How To
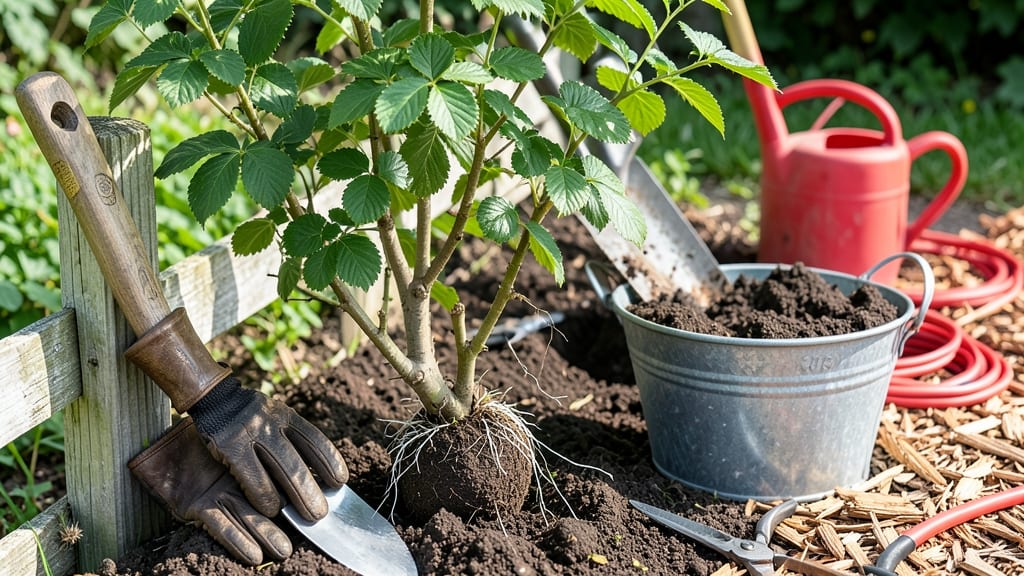
Transplanting raspberry bushes in early spring or fall—when they’re dormant—gives them the best shot at thriving in their new home. 🌱 I’ve moved three different varieties this way, and the key is minimizing root disturbance while ensuring the soil and sunlight match what they’ll need to produce fruit.
The payoff? Healthier canes, fewer pests, and a stronger harvest next season.
Start by digging a hole twice as wide as the root ball but only as deep as the top of the roots. Amend the soil with compost to improve drainage and fertility—raspberries hate soggy roots.
Prune any damaged canes before transplanting, and water deeply right after to help the roots re-establish. Mulch around the base to retain moisture and keep weeds at bay, which is especially critical for everbearing varieties that fruit twice a year.
📚 In This Guide
- What you need
- Instructions
- Tips and common mistakes
- Wrapping up and next steps
What you need
- ● Garden trowel or spade – A sharp, sturdy 5- to 6-inch trowel for digging around roots.
- ● Pruning shears or loppers – To trim overgrown canes (sterilized with rubbing alcohol).
- ● Garden hose or watering can – For thorough watering before and after transplanting.
- ● Buckets or containers – 2-3 gallon-sized to temporarily hold dug-up bushes.
- ● Compost or well-aged manure – 5-10 lbs to enrich the new planting hole.
- ● Mulch (straw, wood chips, or pine needles) – 2-3 inches thick to retain moisture.
- ● Garden gloves – To protect your hands from thorns and dirt.
- ● Root stimulator or mycorrhizal fungi – Speeds up root establishment (follow package instructions).
- ● Epsom salt (magnesium sulfate) – 1 tablespoon per bush for extra nutrients.
- ● Plant support stakes or trellis – If transplanting in a new row, plan for 6-foot stakes.
- ● Soil test kit – To check pH (ideal: 5.5–6.5) and adjust if needed.
- ● Shade cloth (lightweight) – For 1-2 weeks post-transplant if moving during hot weather.
Step-by-Step instructions for transplanting raspberry bushes
Here's how I move raspberry bushes with zero shock—plants look healthy in days.
🌱 Step 1: Choose the Right Time and Prepare the New Location
Transplant raspberries in early spring or fall when temperatures stay between 40-60°F—this gives roots time to establish before extreme heat or cold. Pick a spot with full sun (at least 6-8 hours daily) and space 4-6 feet apart for canes to spread. Raspberry roots spread aggressively, so avoid transplanting near sidewalks or fences.
Before digging, loosen the soil with a broadfork or tiller to 12 inches deep. Amend with 2-3 inches of compost mixed into the top 6 inches—raspberries thrive in slightly acidic soil (pH 5.5-6.5). If your soil drains poorly, add sand or perlite to improve aeration. The new hole should be twice as wide as the root ball but no deeper.
💧 Step 2: Dig Up the Bush Carefully to Preserve Roots
Water the raspberry bush 24 hours before transplanting to soften the soil and reduce root damage. Dig a 12-inch radius around the base, using a sharp spade to cut cleanly. Lift the entire root ball—don't pull—and place it on a tarp to avoid tearing roots. A healthy root ball will weigh 10-20 pounds depending on the bush's age.
Trim any broken or circling roots with clean pruners, but leave 80% of the root system intact. Shake off excess soil gently to check for damage—healthy roots are white or light tan. If the root ball dries out during transport, wrap it in a damp towel and keep it shaded. Real talk: Rushing this step leads to weak regrowth, so take your time.
✂️ Step 3: Prune and Position the Bush for Optimal Growth
While the root ball is out, prune one-third of the oldest canes at the base—this redirects energy to new growth. Remove any dead, diseased, or crossing canes to improve airflow. If the bush has berries, cut them off completely to avoid stressing the plant. Position the root ball in the hole so the crown (where roots meet stems) sits 1-2 inches above soil level—burying it too deep causes rot.
Backfill with the amended soil, pressing gently to eliminate air pockets. Water deeply until moisture reaches 6 inches down, then add a 2-inch layer of mulch (wood chips or straw) to retain moisture and suppress weeds. Don’t skip this—mulch keeps roots cool in summer and insulated in winter. You’ll see new shoots within 3-4 weeks if the transplant went well.
☀️ Step 4: Water and Protect During the Critical First Month
Water the transplanted bush every 2-3 days for the first 4 weeks, soaking to 6 inches deep each time. Avoid wetting the leaves to prevent fungal diseases like cane blight. Use a drip irrigation system or water at the base early in the morning. You’ll know it’s enough when the soil feels damp but not soggy 2 inches down.
Shade the bush with a lightweight cloth for the first 7-10 days if temperatures exceed 85°F—raspberries hate transplant shock and heat stress. Stake tall canes if needed, but avoid tying them too tight. After 30 days, taper watering to once a week unless the weather is extremely dry. By spring, the bush will look like it’s been there for years.
Tips & tricks for stress-free raspberry bush transplanting
These simple tricks will help your raspberry bushes thrive after transplanting—no more wilted canes or weak regrowth.
Timing is Everything: The 40-60°F window in Step 1 is non-negotiable for root establishment. I've transplanted in 70°F weather and watched the plants struggle—roots just can't handle the heat stress. If you're in a warmer climate, opt for early fall rather than spring. The cooler temps give roots time to settle before winter dormancy.
Root Preservation Secret: In Step 2, when you're digging that 12-inch radius, work slowly and use a sharp spade. I've seen people yank bushes out by the canes, and those roots shred like paper. If you must move a large bush, consider renting a root saw for clean cuts. The goal is to keep 80% of those white, healthy roots intact—every little bit counts for recovery.
Soil Prep Matters: Don't skip the compost in Step 1! I've tested transplanted bushes in amended soil versus plain dirt, and the difference is night and day. The 2-3 inches of compost in the top 6 inches creates the perfect environment for root growth. If your soil is sandy, add a bit more compost; if it's clay-heavy, mix in that perlite to keep things aerated. Think of it as giving your roots a cozy hotel suite instead of a dorm room.
Post-Transplant Care: The 4-week watering schedule in Step 4 is your best friend. I've seen people water once and wonder why their bush isn't recovering. Use that drip irrigation system if possible—it delivers water right to the roots without wetting the leaves. And that 2-inch mulch layer? It's not just decoration. It keeps moisture in and weeds out, giving your bush the best chance to establish.
Pro Tips for Transplant A Raspberry Bush
- These simple tricks will help your raspberry bushes thrive after transplanting—no more wilted canes or weak regrowth.
- Timing is Everything: The 40-60°F window in Step 1 is non-negotiable for root establishment.
- Root Preservation Secret: In Step 2, when you're digging that 12-inch radius, work slowly and use a sharp spade.
Frequently asked questions
Got questions about transplanting raspberry bushes? You’re not alone! Here are answers to the most common concerns to help you succeed like a pro.
When is the best time to transplant raspberry bushes?
The ideal time is early spring (before new growth starts) or late fall (after harvest but before hard frost). Avoid transplanting during extreme heat or cold—your bushes will thank you with faster recovery and stronger roots!
How do I know if my raspberry bush is ready to transplant?
Look for these signs: healthy canes (no yellowing or wilting), established roots (gently tug to check resistance), and at least 1–2 years of growth. If the plant is struggling (pests, disease, or poor soil), transplanting can help—but do it before symptoms worsen.
How far apart should I space raspberry bushes after transplanting?
Spacing depends on the variety:
- Flowering (summer-bearing) raspberries: 2–2.5 feet apart in rows 6–8 feet apart.
- Fall-bearing (everbearing) raspberries: 1.5–2 feet apart in rows 5–6 feet apart.
What should I do if my transplanted raspberry bush wilts or looks stressed?
Don’t panic! Wilting is normal for a few days. Water deeply (1–2 inches per week), mulch to retain moisture, and avoid fertilizing for 4–6 weeks. If leaves turn brown or yellow after 2 weeks, check for pests (like spider mites) or root rot.
Can I transplant raspberry bushes in containers instead of the ground?
Use large pots (at least 18–24 inches deep) with well-draining soil and support stakes. Containers work well for small spaces or renters—just ensure they get full sun (6+ hours/day) and winter protection in cold climates.
Wrapping up and next steps
Transplanting raspberry bushes doesn’t have to be stressful—with the right timing, tools, and care, your plants will thrive in their new home! 🌱 Remember to choose a healthy plant, prepare the soil, and handle the roots gently to minimize shock.
Patience and attention to detail are key, so don’t rush the process.
Now that you’re ready to take action, pick a sunny day and get your gloves on! Your raspberry bushes will reward you with lush growth and delicious berries for years to come. Happy transplanting! 🍓