
Planting
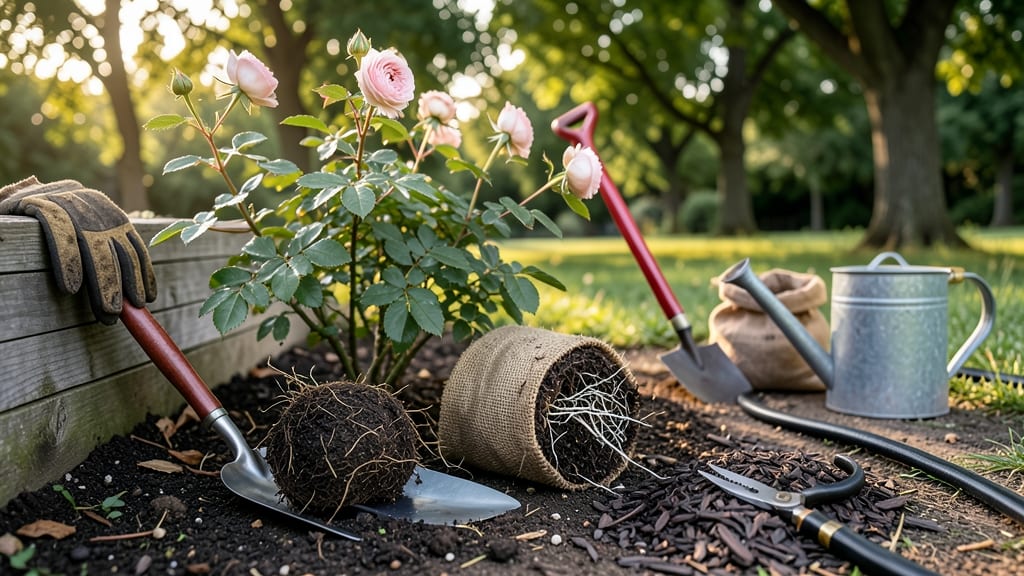
Handling that rose bush root ball wrong can mean weeks of struggling before your plant recovers—but I’ve transplanted dozens without a single case of root shock. The secret lies in protecting those delicate roots from drying out and giving them the perfect spot to settle in right away.
Start by inspecting the root ball: if it’s dry or cracked, soak it for 20-30 minutes before planting. Dig a hole twice as wide as the root ball but only as deep as it’s currently planted—roses hate being buried too deep.
Loosen the soil around the edges to encourage roots to spread outward, and mix in compost for that extra boost.
📚 In This Guide
- What you need
- Instructions
- Tips and common mistakes
- Wrapping up and next steps
What you need
- ● Rose bush with root ball: Choose a healthy, well-hydrated rose bush (bare-root or container-grown). For container-grown, ensure the root ball is intact and moist.
- ● Shovel or spade: A sturdy digging shovel (16–20 inches wide) for excavating the planting hole.
- ● Garden fork or trowel: For loosening compacted soil around the root ball and gently teasing roots if needed.
- ● Measuring tape or ruler: To ensure the planting hole matches the root ball’s dimensions (typically 2–3 times wider and equally deep as the root ball).
- ● Native soil or amended planting mix: A blend of topsoil, compost (20–30%), and perlite/sand (10%) for drainage. Avoid heavy clay or pure peat.
- ● Organic mulch: 2–3 inches of wood chips, straw, or shredded bark to retain moisture and suppress weeds.
- ● Slow-release fertilizer: A balanced rose fertilizer (10-10-10 or 5-10-5) with micronutrients, applied after transplanting.
- ● Watering can or hose with a gentle nozzle: For deep watering (1–2 gallons per plant) post-transplant.
- ● Root stimulator: A liquid or powder (e.g., Mycorrhizal fungi) to encourage root growth and reduce shock.
- ● Plant support: A stake or cage (4–6 feet tall) if your rose variety is tall or prone to flopping.
- ● Pruning shears: For trimming 1/3 of the plant’s height post-transplant to redirect energy to root establishment.
- ● Soil test kit: To check pH (ideal: 6.0–6.5) and amend soil if needed.
- ● Knee pads or gloves: For comfort while digging and handling roots.
Step-by-step instructions for transplanting a rose bush root ball
Here’s how to move your rose bush with confidence—keeping roots intact and shock to a minimum.
Prepare the New Planting Site
Choose a location with at least 6 hours of direct sun daily and space for the rose to mature—most varieties need 3-4 feet of clearance all around. Dig a hole twice as wide as the root ball but only as deep as the ball itself. This prevents burying the graft union (the swollen area near the base) too deeply, which can cause rot.
Loosen the soil at the bottom of the hole with a garden fork, breaking up any compacted layers. Mix in 2-3 inches of compost or aged manure to improve drainage and fertility. Avoid adding fresh manure, which can burn roots. Tap the fork gently against the sides of the hole to settle the soil before planting—this prevents the rose from sinking too low once watered.
Remove the Rose from Its Container
Water the rose thoroughly the day before transplanting so the root ball stays moist and holds together. Gently squeeze the sides of the container to loosen it, then tip the plant out while supporting the root ball with one hand. If roots are circling tightly inside, use a knife to score the root ball vertically every 2-3 inches—this encourages outward growth once planted.
Inspect the roots for signs of rot (mushy, dark areas) or dryness (brittle, crumbly ends). Trim any damaged roots with clean, sharp pruners, but avoid cutting healthy roots unless absolutely necessary. The goal is to disturb the root ball as little as possible while ensuring what you do plant is vigorous and healthy.
Plant the Root Ball at the Right Depth
Place the rose in the hole so the top of the root ball sits 1-2 inches above ground level. This ensures the graft union remains visible and protected from soil-borne diseases. Fill the hole with native soil, tamping down gently in layers to eliminate air pockets. Avoid packing the soil too firmly—roots need room to expand.
Create a watering basin by mounding soil slightly higher around the edges of the hole. This directs water straight to the roots when you water, reducing runoff. Once planted, water deeply until the soil is evenly moist to 12 inches down. You’ll know it’s soaked enough when water pools briefly in the basin before draining away.
Mulch and Protect the Newly Planted Rose
Spread 2-3 inches of mulch (like shredded bark or straw) over the soil surface, keeping it 6 inches away from the stem to prevent rot. Mulch conserves moisture, regulates soil temperature, and suppresses weeds—critical for a rose’s first year. Water lightly after mulching to settle everything in place.
For the first 2-3 weeks, monitor the rose closely for wilting or yellowing leaves, signs of transplant shock. If the leaves droop in the afternoon but perk up after watering, the roots are adjusting. If they stay wilted, water more frequently or provide afternoon shade with a temporary shade cloth until the plant recovers.
Support and Maintain Through the First Season
Stake the rose immediately if it’s tall or top-heavy, using a 4-5 foot stake tied loosely with soft fabric strips. Avoid wire or tight ties, which can girdle the stem as it grows. Prune any broken or damaged stems with clean pruners, cutting just above a healthy bud or outward-facing leaf.
Fertilize lightly 6-8 weeks after transplanting with a balanced rose fertilizer (10-10-10 ratio). Over-fertilizing now stresses the plant. Water deeply once a week unless rainfall provides 1 inch of moisture**, adjusting for heat or drought. By next spring, your rose will be established and ready for full care.
Tips & tricks for transplanting rose bush root balls
Here’s what nobody tells you about transplanting roses—these tricks keep your plant thriving after the move.
Timing is Everything: Transplant roses in early spring or fall when temperatures are mild. Avoid extreme heat or cold, which stress the plant. If you must transplant in summer, do it on a cloudy day or in the early morning to reduce water loss. The 6 hours of direct sun mentioned in Step 1 is crucial—choose a spot that gets consistent sunlight to prevent shock.
Root Ball Prep: If your rose has been in the same container for years, scoring the root ball every 2-3 inches isn’t just helpful—it’s essential. This encourages roots to grow outward instead of circling, which can strangle the plant over time. Use a sharp knife and make cuts about 1/4 inch deep, but don’t go too deep or you’ll damage the roots. This step is especially important for roses that have outgrown their pots.
Watering Wisdom: The deep watering in Step 3 is critical, but don’t stop there. After transplanting, water every 2-3 days for the first 2 weeks, even if it hasn’t rained. The goal is to keep the soil consistently moist to 12 inches down—this helps the roots establish without drying out. Use a moisture meter or your finger to check; if the top 2 inches of soil are dry, it’s time to water again.
Mulch Matters: That 2-3 inches of mulch isn’t just decoration—it’s a lifesaver. Mulch keeps soil temperatures stable, reduces water evaporation, and prevents weeds from competing with your rose for nutrients. Just remember to keep it 6 inches away from the stem to avoid rot. For extra protection in hot climates, consider adding a layer of mulch in late spring to help the plant through the summer months.
Pro Tips for Rose Bush Root Ball
- Here’s what nobody tells you about transplanting roses—these tricks keep your plant thriving after the move.
- Timing is Everything: Transplant roses in early spring or fall when temperatures are mild.
- Root Ball Prep: If your rose has been in the same container for years, scoring the root ball every 2-3 inches isn’t just helpful—it’s essential.
Frequently asked questions
Got questions about transplanting your rose bush root ball?
You’re not alone! Here are some of the most common concerns—and their straightforward solutions—to help you avoid stress and ensure a thriving rose bush.
What’s the best time of year to transplant a rose bush root ball?
Transplant your rose bush in early spring or early fall when temperatures are mild (50–70°F). Avoid extreme heat or cold, as roots struggle to establish in harsh conditions. Pro tip: If you must transplant in summer, do it on a cloudy day to reduce stress on the plant.
How do I prepare the root ball before transplanting?
Gently loosen the root ball’s outer edges with your hands or a knife to encourage root growth into the soil. If the roots are circling tightly, tease them apart—never force it. Water the root ball 24 hours before transplanting to keep roots hydrated and flexible during the move.
Should I prune my rose bush before or after transplanting?
Prune after transplanting—but only if the bush looks stressed or leggy. Trim back 1/3 of the plant’s height to reduce water loss and encourage new growth. Avoid heavy pruning before transplanting, as it adds unnecessary stress to the already vulnerable root system.
What if my rose bush shows signs of root shock after transplanting?
Root shock is normal! Watch for wilting, yellowing leaves, or stunted growth. To help recovery:
- Keep the soil consistently moist (not soggy).
- Avoid fertilizing for 4–6 weeks—let roots focus on establishing.
- Provide light shade for the first week or two.
Can I transplant a rose bush with a bare root instead of a root ball?
Yes! Bare-root roses are often easier to transplant because you can inspect and trim damaged roots before planting. Soak the roots in water for 1–2 hours before transplanting, and plant them 2 inches deeper than they were in their original pot. Just be sure to water thoroughly after planting.
Wrapping up and next steps
Transplanting your rose bush with care—especially protecting that all-important root ball—sets the stage for a thriving, beautiful garden. By following the right techniques, you’ll minimize stress on your plant and give it the best chance to flourish.
Now that you’re armed with the know-how, go ahead and dig in! 🌹
Ready to take the next step? Pick a perfect day (early morning or overcast), gather your tools, and start planting with confidence. Your roses will thank you with vibrant blooms all season long!