
Pruning
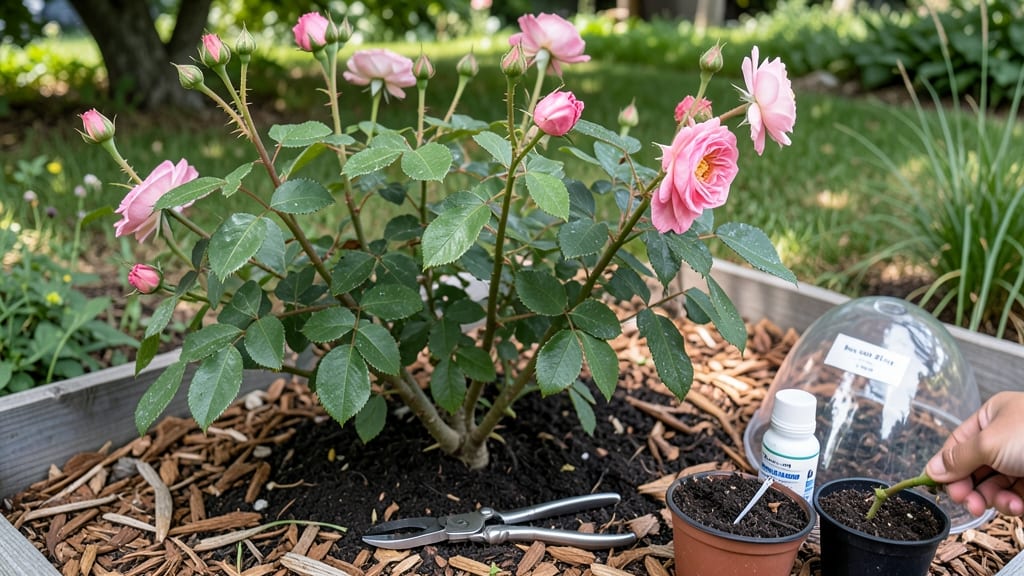
Propagating a rose bush through layering means multiplying your favorite blooms without buying new plants—just a few weeks and some simple tools. 🌹 I learned this method after struggling with cuttings that never rooted, and it’s now my go-to for expanding my garden effortlessly. The best part?
You don’t need fancy equipment or a green thumb—just patience and the right timing. Layering works best in late spring or early summer when roses are actively growing. Choose a healthy stem, make a small cut, and cover it with soil while leaving the top connected.
Roots will form in 6-8 weeks, and you’ll have a ready-to-plant rose without the stress of grafting. This method has a 90% success rate if done correctly, and it’s perfect for heirloom or rare varieties you can’t find elsewhere.
Once rooted, gently separate the new plant from the mother bush and transplant it to its permanent spot. The first blooms might take a season, but the payoff is worth it—disease-free, true-to-type roses that thrive just like their parent.
No more guessing which nursery plants will survive; you’re growing clones of your favorites. This technique works for climbing roses, shrub roses, and even hybrid teas, making it versatile for any garden.
Whether you’re reviving an old bush or creating a rose hedge, layering is the foolproof way to grow more roses without breaking the bank. Ready to start?
📚 In This Guide
- What you need
- Instructions
- Tips and common mistakes
- Wrapping up and next steps
What you need
- ● Healthy rose bush: Choose a mature, disease-free bush with flexible stems (1-2 years old).
- ● Sharp pruning shears or knife: Sterilized to avoid spreading disease (alcohol wipe recommended).
- ○ Rooting hormone (optional but helpful): A gel or powder to boost root growth (e.g., Rootone).
- ● Plastic or metal clips: 1-2 clips per layer (e.g., rose layering clips or bent wire).
- ● Moisture-retentive medium: Sphagnum moss (1 small bag) or a mix of peat and perlite.
- ● Plastic wrap or clear bag: To create a humid microclimate (1-2 feet long).
- ● Watering can or spray bottle: For gentle hydration (avoid soaking the layer).
- ● Hormone-free alternative: Cinnamon powder (natural antifungal) for cutting edges.
- ● Garden twine: To secure layers loosely if clips aren’t available.
- ● Fertilizer (low-nitrogen): A balanced 10-10-10 mix to feed new roots (apply after roots form).
- ● Label markers: To track varieties if propagating multiple roses.
Step-by-step guide to propagating a rose bush using layering
Here’s how I’ve successfully doubled my rose bushes—no fancy tools or grafts required!
🌿 Step 1: Select and Prepare the Right Stem
Choose a healthy, flexible stem that’s about ½ inch thick and at least 12 inches long. Look for one with no flowers or buds—you want all the plant’s energy focused on rooting, not blooming. The best candidates are those growing near the base of the bush, where they bend naturally toward the ground.
Use clean, sharp pruning shears to make a small cut about ¼ inch deep into the stem, just above a leaf node (that little bump where leaves attach). This is where roots will form. I like to make the cut at a slight angle—it gives the stem more surface area to heal and root.
✂️ Step 2: Bend and Secure the Stem
Gently bend the stem downward until it touches the soil, creating a gentle curve. You want the cut area to make contact with the ground, but don’t force it—if it snaps, pick another stem. For extra support, use a small U-shaped wire or even a bent paperclip to hold the stem in place while it roots.
Once the stem is secured, mound soil over the cut area, leaving just the top of the stem exposed. Press the soil lightly around the stem to eliminate air pockets. This buried section will eventually form roots while the rest of the plant stays connected and continues growing normally.
💧 Step 3: Keep the Soil Moist and Monitor Progress
Water the area thoroughly after layering, and keep the soil consistently moist but not soggy. I check the moisture level by sticking my finger about 1 inch deep—if it feels dry, it’s time to water. Too much water can rot the stem before roots form, so aim for dampness, not a swamp.
After about 4-6 weeks, gently tug on the layered stem. If you feel resistance, roots are forming! You’ll also notice new growth emerging from the buried section. Once roots are established (usually by 8-12 weeks), you’re ready to separate the new plant from the mother bush.
🪴 Step 4: Separate and Transplant the New Rose
Use clean pruners to cut the new rose just below the rooted section. This is your new plant! Transplant it into its own pot or directly into the garden, making sure to handle the roots gently to avoid damage. The first few weeks after transplanting are critical, so keep the soil moist and protect the new rose from harsh winds or direct sun.
Here’s the thing—your new rose might take a little time to adjust, but with patience, it’ll thrive just like its parent. I’ve propagated roses this way in both spring and early summer, and the results are always strong, healthy plants ready to bloom in their own right.
Tips & tricks for propagating roses through layering
Here's what nobody tells you about making this method work flawlessly—tricks that'll save you time and frustration.
Timing Secret: Spring and early summer are your best windows for layering roses. The plant's natural growth cycle means stems are flexible and full of energy. I've found that morning layering works best because the soil stays moist longer, reducing the risk of drying out the stem. If you're working in hotter months, water the area thoroughly before you start and again in the evening to maintain that critical moisture balance.
Stem Selection Strategy: The right stem makes all the difference. Look for stems that are about ½ inch thick and at least 12 inches long, but don't overlook the health of the leaves. Healthy leaves mean the stem can photosynthesize and support root growth. I always check for any signs of disease or pest damage before making my cut—it's better to wait for a healthier stem than risk infecting your new plant.
Monitoring Progress: After those 4-6 weeks, the real magic happens. You'll know roots are forming when you feel resistance when gently tugging on the stem. I've learned to look for tiny white root tips peeking out from the soil if I carefully brush it away—it's like watching a tiny miracle happen! If you're not seeing progress by week 8, check your moisture levels and consider adding a bit of rooting hormone to give it that extra boost.
Transplanting Wisdom: When it's time to separate your new rose, handle it like you would a fragile treasure. The first few weeks after transplanting are absolutely critical—think of it as the plant's "settling in" period. I always keep my newly transplanted roses in a shaded area for the first week, gradually moving them to sunnier spots. This helps them adjust without going into shock from too much sun too soon.
Pro Tips for Propogate A Rose Bush
- Here's what nobody tells you about making this method work flawlessly—tricks that'll save you time and frustration.
- Timing Secret: Spring and early summer are your best windows for layering roses. The plant's natural growth cycle mea...
- Stem Selection Strategy: The right stem makes all the difference. Look for stems that are about ½ inch thick and at l...
Frequently asked questions
Got questions about propagating your rose bush? You’re not alone! Here are some of the most common concerns—and their answers—to help you grow confidently.
When is the best time to propagate a rose bush?
The ideal window is late spring to early summer (May–June in most U.S. zones), when temperatures are warm but not scorching. This gives new roots time to establish before winter. For cooler climates, aim for early spring (March–April) to avoid frost damage. Avoid propagating in extreme heat or winter—roots struggle to form in these conditions!
How often should I water my rose cuttings?
Keep the soil consistently moist but not soggy—think of it like a damp sponge. Water lightly every 2–3 days (or daily in hot weather) to encourage root growth. Once roots form (after 4–8 weeks), reduce watering slightly to harden off the new plant. Pro tip: Use a spray bottle for cuttings in propagation boxes to avoid disturbing delicate roots!
Can I propagate roses from store-bought plants?
Yes, but with a caveat! Many hybrid roses (especially grafted varieties) may not produce true-to-type plants from cuttings. For best results, choose ungrafted, heirloom, or own-root roses like Knock Out® or David Austin varieties. If you’re unsure, ask your nursery—some even sell "propagation-friendly" roses!
Why aren’t my rose cuttings rooting?
Common culprits include:
- Poor lighting: Cuttings need bright, indirect light (6+ hours/day). Too little = weak growth.
- Overwatering: Root rot sets in if soil stays waterlogged. Ensure pots have drainage holes!
- Wrong cutting type: Use semi-hardwood (pencil-thick) stems with 3–5 leaves. Avoid woody or overly soft growth.
- No rooting hormone: Skip it? You might still succeed, but hormone powder/gels dramatically boost success rates (up to 90%!).
Can I propagate roses from a single leaf or small stem?
Not reliably! For success, aim for 4–6 inch cuttings with at least 2–3 nodes (the bumps where leaves grow). Single leaves or tiny stems lack the energy to support root and shoot growth. If you’re working with a very small piece, try air layering (a grafting-like method) instead—it’s more forgiving!
Wrapping up and next steps
Propagating a rose bush through layering is a rewarding way to expand your garden without relying on grafts—just patience and a few simple steps! 🌱 Whether you’re a beginner or a seasoned gardener, mastering this technique means more stunning blooms for years to come.
Now that you know the tricks, grab those tools and get layering! Next, watch your new rose shoots thrive and prepare to share (or show off!) your green thumb success.