
Pruning
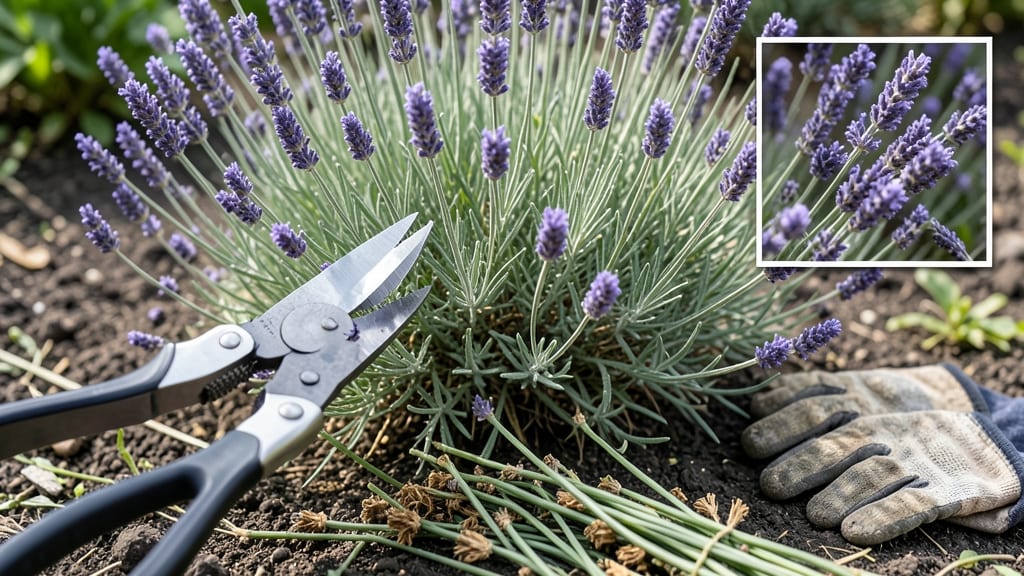
How to trim back a lavender bush right after last frost unlocks its best fragrance and growth for the season. ✨ I used to avoid pruning entirely until my bushes turned into woody sticks—no blooms, just sad stems. The key is timing: late winter or early spring, when new growth is about to burst. You’ll need sharp shears (dull blades tear stems) and a sunny day for visibility. Cut back one-third of last year’s growth—never more—to encourage fresh, fragrant stems. Avoid trimming in fall or winter, when lavender is dormant and vulnerable to rot. After pruning, you’ll see new green shoots within weeks, with blooms arriving by midsummer. The air around your bushes will smell like a Provençal summer, and the plant’s shape stays compact. Just skip the urge to shape it like a topiary—lavender thrives with a natural, airy form. For overgrown lavender, take it slow: trim back only the oldest wood first, then wait a year before full pruning. The secret? Less is more—lavender bounces back better when you give it time to recover between cuts.
📚 In This Guide
- What you need
- Instructions
- Tips and common mistakes
- Wrapping up and next steps
What you need
- ● Pruning shears or bypass pruners – Choose sharp, clean ones (5-7" blades) to avoid crushing stems.
- ● Gloves – Wear gardening gloves (cotton or leather) to protect against prickly stems.
- ● Disinfectant (rubbing alcohol or bleach solution) – Clean tools before and after trimming to prevent disease.
- ● Watering can or hose – Keep lavender hydrated before and after pruning (but avoid soggy soil!).
- ● Garden twine or rubber bands – Tie back new growth if needed for shaping.
- ● Hand pruners (smaller) – For tight spots where shears won’t reach.
- ● Pruning saw – Only if dealing with thick, woody stems (rare for most lavender).
- ● Lavender-specific fertilizer – Lightly feed after trimming for a post-cut boost.
- ● Mulch (gravel or pebbles) – Helps retain moisture and keeps roots cool.
Step-by-Step instructions for trimming back lavender bushes
Here's how I keep my lavender looking lush and fragrant year after year—no guesswork involved.
✂️ Step 1: Time Your Cuts for Healthy Growth
Lavender thrives when pruned in late winter or very early spring, just as new growth begins but before buds form. This gives the plant time to recover before summer heat arrives. I always check for new green shoots at the base—those signal it's time to prune. Avoid cutting back in fall or winter when the plant is dormant.
If your lavender grows in a warm climate, you can do a light trim in late summer to encourage fresh growth before winter. Just remove any dead or woody stems first. Never prune lavender after mid-July—this triggers new growth that won't harden off before frost, killing the plant.
✂️ Step 2: Use the Right Tools and Technique
Grab a pair of clean, sharp bypass pruners—dull blades crush stems and invite disease. I also keep a small hand saw handy for thicker stems over ½ inch in diameter. Sterilize your tools with rubbing alcohol before and after pruning to prevent spreading fungal spores.
Start by removing dead or damaged stems at the base. Then, cut back one-third of the oldest wood each year. Look for woody, brown stems—these are the first to go. Always cut just above a leaf node or bud to encourage new growth. Avoid "heading back" lavender like you would a hedge—it hates being sheared.
☀️ Step 3: Shape for Airflow and Sunlight
Lavender loves full sun, so aim to create an open, airy shape that lets light penetrate to the center. I step back and visualize the plant as a rounded dome—never let it grow too dense. Use your pruners to thin out crowded stems from the inside, cutting them back to the base if needed.
For mature bushes, focus on removing overly long stems that flop outward. Cut these back to a stronger branch lower on the plant. Never trim more than one-third of the plant in a single year—this stresses lavender and can kill it. If your bush looks leggy, it’s begging for a harder prune, but spread this over 2-3 years to avoid shock.
💧 Step 4: Post-Prune Care for Recovery
After trimming, water deeply to help the plant recover. Lavender is drought-tolerant, but fresh cuts need moisture to heal. I give mine ½ gallon of water per plant, focusing on the root zone—never water the foliage to prevent fungal issues. Avoid fertilizing right after pruning; lavender thrives in poor, well-draining soil and doesn’t need extra nutrients.
Watch for new green shoots emerging within 2-3 weeks—this is your sign the plant is recovering well. If you see yellowing leaves, it’s likely overwatering or poor drainage. Mulch lightly with ¼ inch of gravel around the base to keep roots cool and prevent rot. Avoid organic mulch—lavender roots need air and sun, not smothering.
⏰ Step 5: Maintain Year-Round with Light Trims
Between major prunes, do light maintenance trims in early summer to remove any spent flowers or slightly woody stems. This keeps the plant tidy and encourages more blooms. I pinch off a few flowers and rub them between my fingers to release their fragrance—it’s the best way to check if your lavender is healthy.
In fall, remove any dead or diseased stems immediately. Lavender rarely gets pests, but aphids or spider mites can appear if the plant is stressed. Spray with neem oil if needed, but usually, a strong blast of water does the trick. By winter, let the plant go dormant naturally—no pruning needed until spring.
Tips & tricks for perfect lavender trimming
These simple strategies will help you keep your lavender thriving and fragrant for years to come.
Timing is Everything: The late winter or early spring timing in Step 1 is crucial because it aligns with lavender's natural growth cycle. If you miss this window, you risk cutting back new buds that haven't formed yet. In warmer climates, that late summer trim is your second chance—just remember to never cut after mid-July, or you'll trigger tender new growth that won't survive winter. I've learned this the hard way after losing a prized lavender bush from a summer prune!
Tool Prep Matters: Step 2 emphasizes clean, sharp tools, but here's what nobody tells you—sterilizing your pruners with rubbing alcohol isn't just about disease prevention. It also removes any residual sap that could gum up your blades. For thicker stems over ½ inch, I've found that a small hand saw with fine teeth works better than pruners, giving you cleaner cuts that heal faster. Always clean your tools afterward too, or you'll be dealing with rusty pruners next season.
Shape with Purpose: When shaping in Step 3, think of lavender like a sculpture—you're not just cutting randomly, you're creating airflow channels. I step back frequently to visualize the plant as a rounded dome. For mature bushes, focus on removing those floppy stems that crowd the center. These are the ones that block sunlight and trap moisture, creating perfect conditions for fungal issues. Never cut more than one-third in a single year—that's lavender's stress limit.
Recovery Care Makes All the Difference: After pruning, the deep watering in Step 4 is just the beginning. I've noticed that lavender actually benefits from a second watering 3-4 days later, especially in hot climates. The key is watering at the root zone—never the foliage. And that gravel mulch? It's not just decorative. The ¼-inch layer helps regulate soil temperature and prevents that dreaded organic mulch from smothering the roots lavender craves to breathe.
Pro Tips for Trim Back Lavender Bush
- These simple strategies will help you keep your lavender thriving and fragrant for years to come.
- Timing is Everything: The late winter or early spring timing in Step 1 is crucial because it aligns with lavender's natural growth cycle.
- Tool Prep Matters: Step 2 emphasizes clean, sharp tools, but here's what nobody tells you—sterilizing your pruners with rubbing alcohol isn't just about disease prevention.
Frequently asked questions
Got questions about keeping your lavender bush lush and fragrant? Here are answers to the most common concerns—so you can trim with confidence!
When is the best time to trim lavender?
Trim lavender after it blooms in early summer (June–July) to encourage new growth. Avoid cutting back into old wood in fall/winter—this can kill the plant. For shaping, light trims in late spring (before flowering) work too, but never cut more than 1/3 of the bush at once.
How much should I cut off lavender?
Leave 3–4 inches of growth on stems after trimming. Over-pruning (cutting too close to the base) removes the plant’s energy reserves. For woody stems, trim just above a leaf node or bud. Pro tip: Use sharp shears to avoid crushing stems, which can invite disease.
What if my lavender turns brown after trimming?
Brown tips often mean over-trimming or stress. If it’s mild, trim back slightly more next time. For severe browning, check for root rot (soggy soil) or pests. Lavender hates wet feet—ensure well-draining soil and never trim in fall unless your climate is mild.
Can I trim lavender in winter?
Only in mild climates (Zones 8–10). In colder areas, wait until spring (after last frost) to avoid frost damage. If you must trim in winter, do so lightly to shape, but avoid heavy cuts. Pro tip: Mulch around the base to protect roots from freezing.
Will trimming lavender stop it from flowering?
No—proper trimming encourages more blooms! Cutting back after flowering (not before) signals the plant to produce new flowers next season. Warning: Never trim lavender during bloom—this removes next year’s buds. Save the shaping for post-bloom!
Wrapping up and next steps
Trimming your lavender bush doesn’t have to be intimidating—just follow the right timing, tools, and techniques, and you’ll reward yourself with lush, fragrant blooms year after year. Whether you’re pruning for shape, health, or harvest, remember: less is more—avoid over-trimming to keep your plant thriving.
Now that you’re armed with the know-how, grab those shears and get pruning! 🌿✂️
For even better results, keep an eye on your lavender’s growth and adjust your pruning schedule as needed. Happy gardening!