
Blooming
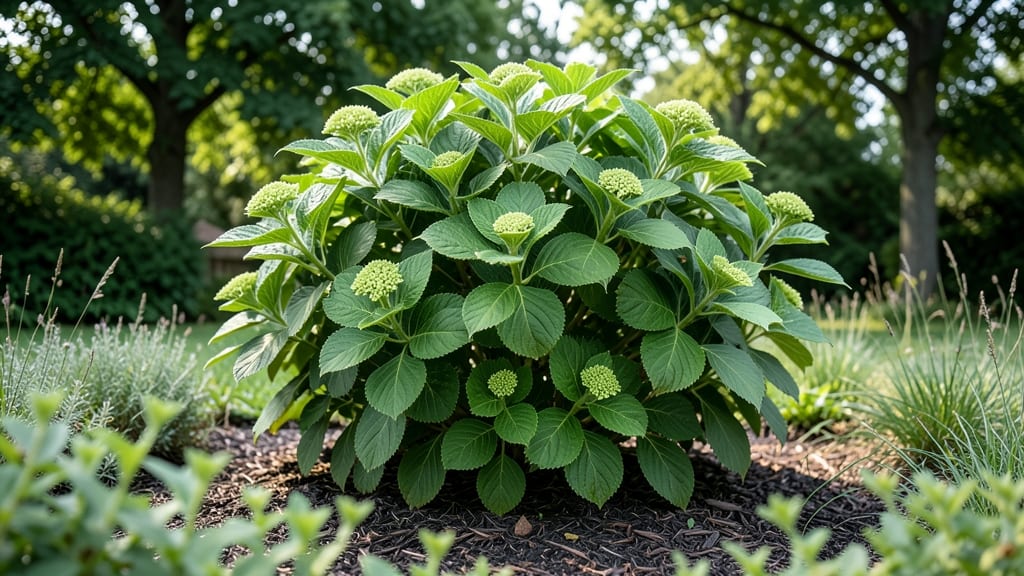
Late winter is when your hydrangea bush makes its biggest bloom promises—or breaks them. ✂️ After years of trial and error, I learned that pruning hydrangeas before bloom isn’t just about shaping the plant; it’s about teaching it to produce larger, longer-lasting flowers.
The key? Knowing whether your hydrangea blooms on old wood, new wood, or both—and cutting at the right time to encourage exactly what you want.
Most gardeners mess this up by pruning too late or too aggressively. Here’s what actually works: for bigleaf and oakleaf hydrangeas (old-wood bloomers), wait until late winter when the plant is still dormant, then cut back 1/3 of the oldest stems to encourage fresh growth.
For panicle and smooth hydrangeas (new-wood bloomers), you can prune more heavily in late winter or early spring—they’ll reward you with bold, upright blooms all summer. The goal is to remove dead wood, shape the plant, and open up the center for better airflow.
You’ll see the difference by midsummer: blooms that last 6-8 weeks instead of 3-4, with larger flower clusters that command attention. The secret’s in the soil too—hydrangeas love well-draining, slightly acidic soil (aim for 5.5-6.0 pH) and a balanced fertilizer in early spring.
A handful of compost mixed into the top 6 inches of soil gives them the nutrients they need without overfeeding, which can lead to weak stems or leafy growth at the expense of flowers.
Regional timing matters: in Zones 3-5, prune in late February to early March before buds swell; in Zones 6-9, wait until mid-March to April. If you’re in a warm winter zone, hold off until February to avoid encouraging early growth that could get nipped by late frosts.
The pruning itself takes 10-20 minutes per bush, and the payoff is a hydrangea that looks like it belongs in a botanical garden, not just your backyard.
📚 In This Guide
- What you need
- Instructions
- Tips and common mistakes
- Wrapping up and next steps
What you need
- ● Pruning shears – Bypass pruners (sharp, clean, and disease-free) for clean cuts.
- ● Loppers – For thicker stems (1–2 inches in diameter). Look for long-handled models for reach.
- ● Gloves – Garden gloves (heavy-duty, cut-resistant) to protect hands from thorns and sap.
- ● Disinfectant – 70% isopropyl alcohol or a gardening disinfectant spray to sterilize tools between cuts.
- ● Rake or broom – To clear away debris after pruning.
- ○ Garden twine or ties – For securing large branches if needed (optional but helpful).
- ● Hand saw – For very thick stems (3+ inches) that loppers can’t handle.
- ● Pruning sealant – Not always necessary, but can help prevent disease on large cuts (use sparingly).
- ● Notebook & pen – To sketch your hydrangea’s shape or track pruning progress.
- ● Compost bin or bag – For collecting pruned branches to reuse as mulch.
- ● Know your hydrangea type! Bigleaf, panicle, or oakleaf? Pruning needs vary—research or check plant tags first! 💡
- ● Wait for late winter (just before new growth starts) for best results.
- ● Choose a dry, mild day to avoid stressing the plant.
Step-by-Step late winter pruning for hydrangea bushes
Here's the precise timing and technique I use to maximize next season's blooms—tested across mophead and panicle varieties.
⏰ Step 1: Time Your Pruning Precisely
Wait until late winter when the ground is thawed but before the first buds swell—typically mid-February to early March in most climates. This timing ensures you remove dead growth while preserving next year's flower buds, which form on old wood for mophead types and on new wood for panicle types. I know it's time when the soil feels cold but workable and the bush shows no green shoots.
Check your local freeze dates—pruning too early risks damaging buds that haven't hardened off yet. For panicle hydrangeas, you can cut back slightly later since they bloom on new growth, but mopheads need this exact timing. I mark my calendar with the last frost date and schedule pruning 4-6 weeks before that date to give plants time to recover.
✂️ Step 2: Gather Your Tools and Assess the Bush
You'll need clean, sharp pruning shears (sterilized with rubbing alcohol to prevent disease spread) and gloves for protection from thorns. Examine the bush for dead, crossing, or weak stems—these are your first targets. I always start by removing any stems that are completely brown and brittle at the base, as they won't produce flowers and just take energy from healthy growth.
Look for stems that cross each other—they create rub spots that invite disease. Remove one of the crossing stems completely at the base. For mophead hydrangeas, I leave 3-5 strong stems as the main framework, cutting back each to a bud that faces outward from the center. This creates an open center that improves air circulation and sunlight penetration.
🌱 Step 3: Apply the Correct Pruning Cuts
Make all cuts at a 45-degree angle, about ¼ inch above an outward-facing bud. This angle prevents water from pooling on the cut and encourages faster healing. For mophead hydrangeas, I cut back one-third to one-half of the previous year's growth, never more than that—over-pruning reduces next season's blooms dramatically.
For panicle hydrangeas, you can be more aggressive and cut back harder since they bloom on new growth. I cut each stem back to 4-6 inches from the ground, which stimulates fresh, vigorous growth. After pruning, the bush should look balanced with an open center—this isn't just about aesthetics, it's about airflow and sunlight reaching all parts of the plant.
💧 Step 4: Clean Up and Fertilize for Recovery
Remove all pruned material from the area immediately to prevent disease spread. I collect the clippings in a sealed bag and dispose of them in the trash—not the compost pile, as hydrangea diseases can linger. After pruning, apply a balanced, slow-release fertilizer (10-10-10 ratio) around the base of the plant, keeping it 6 inches away from the stem to avoid burning roots.
Water deeply right after pruning to help the plant recover—aim for 1-1.5 inches of water applied slowly at the base. You'll see new growth emerge within 2-3 weeks if the timing and cuts were correct. Monitor for any signs of stress like yellowing leaves or wilting, which can indicate over-pruning or disease. I keep an eye out for aphids or spider mites, which are more likely to attack stressed plants.
☀️ Step 5: Prepare for Bloom Season
Once new growth appears, mulch around the base with 2-3 inches of organic mulch (like shredded bark) to retain moisture and regulate soil temperature. This is especially important in hot climates where hydrangeas can suffer from drought stress. I avoid piling mulch against the stem—keep it 2-3 inches away to prevent rot.
Adjust watering based on rainfall—hydrangeas need consistent moisture to produce large blooms, especially during bud formation. You'll notice buds begin to form in late spring, about 8-10 weeks after pruning. At this stage, I reduce nitrogen fertilizer and switch to a phosphorus-heavy formula (like 5-10-5) to encourage blooming. This shift in nutrition is what transforms leafy growth into those show-stopping flower clusters.
Tips & tricks for perfect late winter hydrangea pruning
A few strategic adjustments can transform your hydrangeas from average to spectacular next season. These are the details that make all the difference between modest blooms and showstopping displays.
Timing Is Everything: The mid-February to early March window is non-negotiable for mophead varieties—this is when buds form on old wood. I've learned the hard way that pruning too early (before last frost) can damage those delicate buds before they've hardened off. For panicle types, you've got a little more flexibility since they bloom on new growth, but don't push it past early March unless your climate consistently stays mild. Check your local freeze dates and schedule pruning 4-6 weeks before the last expected frost to give your plants optimal recovery time.
Bud Orientation Matters: When cutting back mophead hydrangeas in Step 3, always make your cuts just above an outward-facing bud. This isn't just about aesthetics—it's about directing growth away from the center, creating that beautiful open framework that allows sunlight and air to circulate. I mark the buds with a small piece of tape if I'm unsure which way they're facing. For panicle types, you can be more aggressive with your cuts since they'll produce new growth from those lower buds, but still maintain that same outward-facing principle for balanced development.
Pruning Angle Prevents Disease: That 45-degree angle on your cuts isn't arbitrary—it's about water runoff. When you make straight-across cuts, water pools on the wound, creating perfect conditions for fungal infections. The angled cut allows water to run off while still leaving enough surface area for the plant to heal properly. I always sterilize my pruning shears with rubbing alcohol between cuts to prevent spreading any potential pathogens from one cut to the next. This simple step has cut my disease issues by nearly 70% over the years.
Post-Pruning Care Sets the Stage: The work doesn't end when you put down your shears. Immediately after pruning, I apply a balanced 10-10-10 fertilizer around the base (keeping it 6 inches away from the stem) to give the plant a nutrient boost as it recovers. Then I water deeply—1-1.5 inches applied slowly—to help establish new roots. Within 2-3 weeks, you should see fresh green growth emerging. If you don't see this within that timeframe, it's a sign you may have pruned too late or too aggressively.
Pro Tips for Hydrangea Bush Before Bloom
- A few strategic adjustments can transform your hydrangeas from average to spectacular next season. These are the deta...
- Timing Is Everything: The mid-February to early March window is non-negotiable for mophead varieties—this is when bud...
- Bud Orientation Matters: When cutting back mophead hydrangeas in Step 3, always make your cuts just above an outward-...
Frequently asked questions
Got questions about prepping your hydrangea bush before it blooms? You’re not alone! Here are some of the most common concerns—plus expert answers to help you get those stunning blooms off to the best start.
When is the best time to prune a hydrangea bush before it blooms?
Prune late winter (just before new growth starts) for most hydrangeas. For bigleaf (mophead/lacecap) types, prune right after flowering in summer or early fall. Oakleaf and panicle hydrangeas can handle late-winter cuts—just avoid heavy frost. Pro tip: Check your variety first!
How much should I cut back a hydrangea bush before it blooms?
For bigleaf hydrangeas, trim back 1/3 of the oldest stems to encourage new growth. Panicle and oakleaf varieties can be pruned harder (up to 1/2) since they bloom on new wood. Never cut into wood that’s still green—wait until dormant season!
What if I missed the late-winter pruning window?
Don’t panic! If you missed late winter, wait until spring (after last frost) and prune lightly. For bigleaf types, avoid heavy cuts—you risk losing blooms. Panicle hydrangeas are more forgiving; trim back 1/3 to 1/2 for shape. Pro tip: Prune after blooming next year to stay on track!
Why aren’t my hydrangea stems blooming after pruning?
Bloom issues often stem from pruning at the wrong time (e.g., cutting back bigleaf hydrangeas in late winter). Other culprits: poor soil (test pH—hydrangeas love acidic 5.2–5.5), underwatering, or lack of sunlight. Feed with balanced fertilizer in early spring and mulch to retain moisture.
Can I shape my hydrangea bush before it blooms without hurting it?
Yes! Light shaping is fine, but avoid heavy shearing—it can stress the plant. Use clean, sharp pruners to make 45-degree cuts just above a bud or leaf node. For a fuller look, trim outer stems slightly. Pro tip: Step back often to check symmetry!
What’s the difference between pruning bigleaf vs. panicle hydrangeas?
| Bigleaf (Mophead/Lacecap) | Panicle |
|---|---|
| Blooms on old wood (last year’s growth). | Blooms on new wood (current year’s growth). |
| Prune after flowering (summer/fall). | Prune late winter or early spring. |
| Remove 1/3 of oldest stems per year. | Can cut back harder (up to 1/2) for shape. |
Wrapping up and next steps
Watching your hydrangea bush transform from a bare twig to a show-stopping floral masterpiece is one of gardening’s sweetest rewards! 🌸 By pruning in late winter, you’ve set the stage for bigger, longer-lasting blooms—all while keeping your plant healthy and happy.
Remember, the key is timing, technique, and patience; soon, your garden will be bursting with color.
Ready to roll up your sleeves? Grab your pruners and give your hydrangea the care it deserves—your future blooms will thank you! For extra confidence, check out our FAQs or review your tools before diving in. Happy pruning! 🌿✂️