
Shrubs
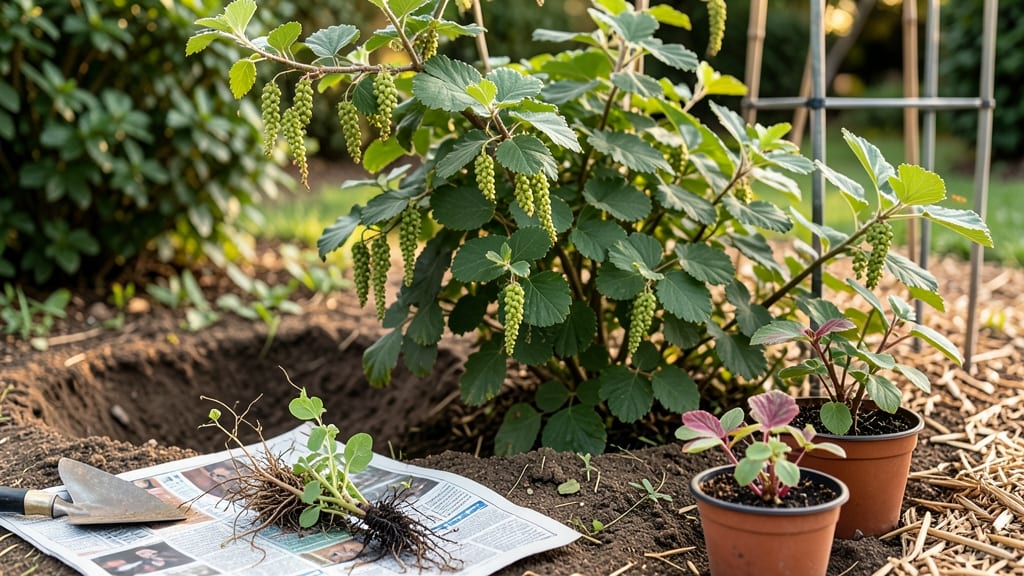
Planting currant bushes means foolproof harvests if you nail the spot and soil—my red currants now produce pounds of fruit every summer because I learned these simple steps the hard way. 🌱 The secret isn't fancy equipment; it's choosing the right sunlight, soil, and spacing from day one.
Most gardeners overlook how much these bushes hate soggy roots or crowded neighbors, and that's what kills yields before they even start.
You'll need a sunny patch with 6-8 hours of light, well-draining soil (currants hate wet feet), and space—5-6 feet apart for red and black varieties, 6-8 feet for white. My first mistake was planting too close to my fence; now the bushes get airflow and room to spread.
Amend heavy clay with compost, and if your soil tests acidic (pH below 5.5), add lime—currants prefer slightly acidic to neutral soil.
When planting, dig a hole twice as wide as the root ball but no deeper—buried roots rot. Loosen roots gently if pot-bound, then water deeply to settle the soil.
Mulch with 2-3 inches of wood chips to keep moisture consistent, and avoid pruning the first year unless you're removing dead wood. Within 2-3 years, you'll see those first heavy clusters of berries, and they'll keep producing for decades with proper care.
Climate matters: red and black currants thrive in zones 3-7, while white currants prefer zones 4-8. In hotter areas, provide afternoon shade to prevent sunburn. The key to long-term success? Watering deeply once a week (not daily) and pruning in late winter to open the center for airflow.
Now go plant—your future breakfast is waiting.
📚 In This Guide
- What you need
- Instructions
- Tips and common mistakes
- Wrapping up and next steps
What you need
- ● Currant bushes: 3–5 healthy, disease-resistant plants (red, black, or white varieties). Choose 1-year-old bare-root or container-grown plants for best results.
- ● Shovel or spade: A sturdy 18–24-inch digging tool for planting holes.
- ● Garden trowel: For delicate soil adjustments around roots.
- ● Compost or well-aged manure: 5–10 gallons to enrich planting soil.
- ● Mulch (straw, wood chips, or pine needles): 2–3 inches to retain moisture and suppress weeds.
- ● Pruning shears: Sharp, bypass-type shears (sterilized with rubbing alcohol) for trimming.
- ● Garden hose or watering can: For thorough watering post-planting.
- ○ Planting gloves: Optional but recommended for comfort.
- ● Soil test kit: To check pH (currants thrive in slightly acidic soil, 5.5–6.5).
- ● Fertilizer (balanced 10-10-10 or organic options like fish emulsion).
- ● Epsom salt: A handful mixed into soil for magnesium boost.
- ● Pest deterrents: Copper tape (for slugs) or diatomaceous earth (for insects).
- ● Stakes or trellis: If training vines (especially for red currants).
Step-by-Step instructions for planting currant bushes
Here's my foolproof method for establishing currant bushes that thrive and produce bountiful harvests year after year.
🪴 Step 1: Choose and Prepare the Planting Site
Currants flourish in full sun to partial shade, with at least 6 hours of direct sunlight daily. Select a location with well-draining soil and space 4-6 feet apart between bushes to allow proper airflow and future growth. I always test soil pH before planting—currants prefer 5.5-6.5, so amend with sulfur if your soil runs alkaline.
Clear the area of weeds and grass, then loosen the soil to a depth of 12-15 inches using a broadfork or tiller. This prevents soil compaction and encourages strong root development. Mix in 2-3 inches of compost to enrich the soil naturally. Avoid fresh manure, which can burn tender roots.
🌱 Step 2: Plant Bare-Root or Container-Grown Bushes
If planting bare-root bushes, soak the roots in lukewarm water for 1-2 hours before planting to rehydrate them. Dig a hole twice as wide as the root ball but only as deep as the container's base level. This ensures the bush sits at the correct depth—burying too deep suffocates the plant, while planting too shallow exposes roots to drying.
For container-grown bushes, gently remove the plant from its pot and loosen any circling roots with your fingers. Place the bush in the hole so the top of the root ball sits 1 inch above soil level. Backfill with native soil mixed with a handful of compost, tamping down lightly to eliminate air pockets. Water thoroughly to settle the soil around the roots.
💧 Step 3: Water and Mulch for Optimal Growth
After planting, water deeply to 12-15 inches deep—this encourages roots to grow downward for stability. You'll know you've watered enough when moisture reaches the bottom of the hole. Mulch the base of the bush with 2-3 inches of organic mulch (like wood chips or straw), keeping it 3 inches away from the stem to prevent rot.
Mulch retains moisture, regulates soil temperature, and suppresses weeds. Replenish mulch annually as it breaks down. Avoid synthetic mulches, which can smother roots and disrupt soil biology. Water newly planted bushes every 2-3 days until new growth appears, then taper to 1 inch of water weekly once established.
☀️ Step 4: Provide Support and Monitor for Pests
Currants benefit from light pruning in early spring to remove dead or crossing branches. I also install stakes or cages at planting to support the bush as it grows, especially in windy areas. Tie the main stems loosely to the support with soft plant ties to avoid girdling the stems.
Watch for signs of pests like aphids or spider mites, which thrive on currant foliage. I spray bushes with neem oil or insecticidal soap at the first sign of infestation. Regularly inspect leaves for holes, discoloration, or webbing—early intervention prevents outbreaks. Fertilize lightly in early spring with a balanced 10-10-10 fertilizer to promote vigorous growth.
Tips & tricks for planting currant bushes
Took me years to perfect these simple strategies—now your currant bushes will grow like they're in a professional orchard.
Soil Preparation Secret: Before planting, I always dig a test hole in your chosen spot and fill it with water. If it drains within an hour, your soil is well-draining. If not, mix in 2-3 inches of coarse sand along with the 2-3 inches of compost specified. This prevents root rot, which is the #1 killer of young currant bushes. The 12-15 inch deep loosening we do in Step 1 creates perfect root channels—think of it like building a highway system for your plant's roots.
Root Handling Technique: When loosening circling roots from container-grown bushes in Step 2, I use a technique called "root pruning"—snipping any roots that wrap around the root ball with clean shears. This encourages outward growth rather than circling, which can strangle the plant. For bare-root bushes, that 1-2 hour soak in lukewarm water is non-negotiable—it jumpstarts root regeneration. I even add a pinch of seaweed fertilizer to the water for extra nutrients.
Watering Wisdom: The 12-15 inch deep watering in Step 3 sounds dramatic, but it's essential. Use a long screwdriver to check moisture—if it comes out dry, water again. I've found that watering in the early morning prevents fungal issues from evening moisture. And here's a pro move: After the initial deep watering, let the top inch of soil dry between waterings to prevent waterlogging, especially in heavy clay soils.
Pest Prevention: I can't stress enough how important those early spring inspections are in Step 4. I keep a magnifying glass handy to check for tiny eggs on the undersides of leaves—aphids lay them there. For organic growers, I make my own neem oil spray by mixing 1 tablespoon neem oil with 1 teaspoon mild soap in a quart of water. Spray in the evening when bees aren't active, and repeat every 7-10 days until pests disappear.
Pro Tips for Planting Currant Bushes
- Took me years to perfect these simple strategies—now your currant bushes will grow like they're in a professional orc...
- Soil Preparation Secret: Before planting, I always dig a test hole in your chosen spot and fill it with water. If it ...
- Root Handling Technique: When loosening circling roots from container-grown bushes in Step 2, I use a technique calle...
Frequently asked questions
Got questions about planting currant bushes? You’re not alone! Here are answers to the most common queries to help you grow thriving currants with confidence.
When is the best time to plant currant bushes?
The ideal time to plant currant bushes is in early spring (after the last frost) or early fall (6-8 weeks before the first frost). This gives roots time to establish before extreme temperatures. Avoid planting in summer heat or winter frost—both can stress young plants.
How long does it take for currant bushes to bear fruit?
With proper care, currant bushes typically bear fruit within 2-3 years of planting. Some varieties may take slightly longer, but patience pays off! Ensure they get full sun (6+ hours/day) and well-draining soil to speed up fruiting.
What pests or diseases should I watch for when growing currants?
Common issues include aphids, whiteflies, and powdery mildew. To prevent pests, spray plants with neem oil or insecticidal soap. For mildew, improve airflow and avoid overhead watering. Prune regularly to keep bushes healthy and reduce disease risks.
Can I grow currant bushes in containers? What size pot do I need?
Yes! Currants thrive in containers if given enough space. Use a 5-gallon pot or larger (at least 18 inches deep) with drainage holes. Choose a dwarf variety like ‘Consort’ or ‘Red Lake’ for better success. Repot every 2-3 years to refresh soil nutrients.
Are currant bushes self-pollinating, or do I need more than one plant?
Most currant varieties are self-pollinating, meaning one bush can produce fruit. However, planting two or more bushes (even different varieties) can improve yield and fruit diversity. Cross-pollination also enhances flavor and size!
Wrapping up and next steps
Planting currant bushes is a rewarding journey that leads to delicious, homegrown berries with minimal effort!
By choosing the right location, preparing the soil, and following proper spacing and care techniques, you’ll set the stage for a bountiful harvest for years to come. 🌱 Whether you’re a beginner or a seasoned gardener, these simple steps will help you grow thriving currant bushes that bring joy—and tasty treats—to your table.
Now that you’re ready to plant, roll up your sleeves and get started! Grab your tools, pick a sunny spot, and watch your garden transform into a berry paradise. Happy planting! 🌟