
Pruning
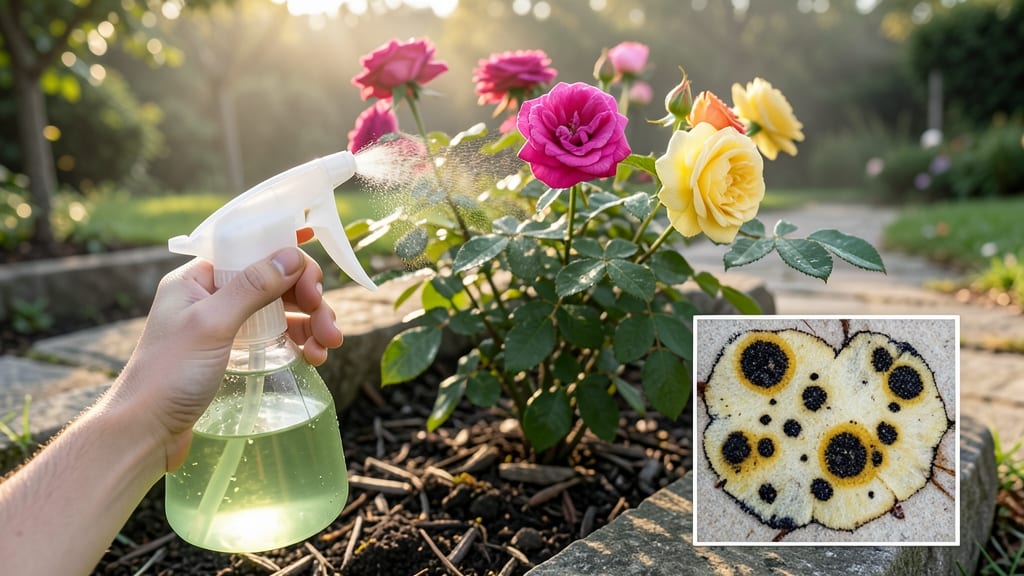
Fungal diseases like black spot and powdery mildew can turn your rose bushes into a sad, spotty mess—until you use the right organic fungicide. 🌿 I’ve battled these issues for years, and the key is acting fast with copper-based sprays or neem oil before the fungus spreads beyond control.
The right treatment doesn’t just stop the damage; it gives your roses a fighting chance to recover and bloom like they should.
Most gardeners reach for chemical fungicides, but organic options like copper fungicide or baking soda spray work just as well when applied correctly. The trick is consistency: spray every 7-10 days during wet seasons, and always hit the undersides of leaves where fungi love to hide.
I’ve seen roses go from wilting and covered in spots to thriving again in just a few weeks with this approach.
You’ll notice the difference within 2-3 applications—fewer black spots, no powdery white residue, and stems that stay strong. The best part? These organic solutions are safe for pollinators and won’t harm your soil like harsh chemicals can. Plus, they’re budget-friendly and easy to find at garden centers or online.
Whether you’re dealing with black spot, rust, or mildew, the same principles apply: prevent, treat early, and keep your roses healthy. No more sacrificing your bushes to fungus—just a few simple steps to keep them lush and disease-free all season.
Root Causes Of Fungal Spread
Fungal infections in rose bushes aren’t just random bad luck—they’re the result of specific conditions that create the perfect storm for pathogens to thrive. Understanding why these issues arise is the first step to stopping them before they take hold.
Here’s a breakdown of the key culprits behind fungal outbreaks in your roses.
Fungi love moisture, and nothing keeps them happier than excessive water sitting on leaves and stems. When you water from above—especially with a sprinkler—you’re essentially giving fungal spores a free ride onto your rose’s foliage. Once there, they germinate and spread rapidly in damp conditions.
Poor drainage compounds the problem. If your rose bed stays soggy after rain or watering, roots suffocate, and fungal spores like Botrytis (gray mold) or Phytophthora (root rot) get a foothold. Even well-draining soil can become a fungal hotspot if water pools around the base of the plant.
Why it matters: Fungi need at least 12 hours of leaf wetness to infect your roses. Overhead watering can easily double that time, turning your garden into a fungal breeding ground.
Roses with thick, bushy growth trap humidity and block airflow—two things fungi crave. When leaves rub against each other or debris (like fallen petals or mulch) piles up, spores hitch a ride and multiply in the sheltered, moist environment.
Common fungal troublemakers in this scenario include:
- Powdery mildew (Erysiphe spp.) – Thrives in shaded, humid spots where leaves can’t dry quickly.
- Black spot (Diplocarpon rosae) – Spreads via water splashes and thrives in crowded, low-light conditions.
- Rust (Phragmidium spp.) – Prefers dense foliage where spores can overwinter on fallen leaves.
Why it matters: Airflow is your rose’s natural fungicide—it dries surfaces faster and starves fungi of the moisture they need to grow. Without it, even resistant varieties can succumb.
Fungi are opportunists, and they strike hardest when conditions are just right. Most rose fungi prefer warm days (60–80°F) with cool, humid nights (60–70% humidity). This combo creates the ideal environment for spores to germinate and infect.
For example:
- Gray mold (Botrytis cinerea) – Loves temperatures between 50–77°F and high humidity.
- Downy mildew (Peronospora spp.) – Thrives in cool, wet conditions (50–75°F), often striking after sudden rain.
Why it matters: Microclimates in your garden (like shaded areas or mulched beds) can create these perfect conditions even if the rest of your yard is dry. Fungi don’t need much—just a little warmth and moisture to start their invasion.
Stressed roses are like open invitations to fungal invaders. When your roses are nutrient-deficient, overcrowded, or recovering from pruning, their natural defenses weaken. Fungi exploit this by:
- Attacking through wounds (like pruning cuts or insect bites).
- Overwhelming compromised tissue (e.g., roots damaged by poor soil or drought).
- Targeting new growth, which is softer and more vulnerable.
Common stressors that invite fungi:
| Stressor | Fungal Risk |
|---|---|
| Over-fertilizing with nitrogen | Soft, sappy growth attracts Botrytis and rust. |
| Underwatering or drought | Weakened roots invite Phytophthora (root rot). |
| Compacted or clay soil | Poor oxygen flow stresses roots, making them susceptible to Armillaria (shuttlecock root rot). |
Why it matters: A healthy rose can tolerate some fungal pressure, but stress turns it into a fungal buffet. Think of fungicides as a last line of defense—preventing stress is your first.
Fungal spores are everywhere—on old leaves, in mulch, and even on your pruners. If you’re not cleaning your tools between cuts or removing infected plant material, you’re basically spreading the problem.
Key sources of contamination:
- Fallen leaves and petals – Often harbor rust or black spot spores that survive winter.
- Infected mulch – Wood chips or straw from previously diseased plants can reintroduce fungi.
- Reused pruning tools – A single cut with a dirty blade can transfer spores to healthy stems.
Why it matters: Some spores can survive for years in soil or debris. If you don’t remove them, they’ll reinfect your roses season after season.
How to Treat Fungal Issues Naturally
Fungal infections like black spot, powdery mildew, or rust can turn your thriving rose bushes into a sad, spotted mess—but don’t panic! With the right approach, you can reverse the damage and protect your plants for years to come.
Below are practical, organic solutions tailored to common fungal causes, plus prevention tips to keep your roses healthy.
Cause: Diplocarpon rosae thrives in damp, shaded conditions, causing dark spots with yellow halos.
Fix It: 🔥 Remove Infected Leaves – Snip off heavily spotted leaves (wear gloves!) and compost them separately (not in your garden). This stops spores from spreading.
🍳 Apply Organic Fungicide Sprays – Mix 1 tablespoon baking soda + 1 quart water + a few drops of dish soap (as a surfactant). Spray under leaves every 7–10 days until new growth appears.
👨🍳 Boost Airflow & Sunlight – Prune branches to improve circulation. Morning sun + afternoon shade keeps humidity low—fungi hate dry conditions!
🥘 Strengthen the Plant – Feed roses with compost tea or fish emulsion to build natural resistance. Avoid overhead watering (water at the base instead).
⏰ Prevention Tip: 💡 Spray neem oil (1 tsp per gallon of water) every 2 weeks during growing season to prevent reinfection.
Cause: Erysiphe fungi love hot, humid days, coating leaves in a chalky white film.
Fix It: 🔥 Wipe Leaves with a Damp Cloth – Gently clean leaves with a mild soap solution (1 tsp castile soap per gallon of water) to remove spores.
🍳 Use Horticultural Oil or Sulfur – Spray refined horticultural oil (1%) or wettable sulfur (follow label rates) every 10 days until mildew disappears.
👨🍳 Prune for Better Airflow – Thin out crowded branches to let sunlight and air reach the center of the bush.
🥘 Encourage Beneficial Fungi – Apply Trichoderma harzianum (a natural soil fungus) to outcompete mildew spores.
⏰ Prevention Tip: 🌡️ Water early in the day so foliage dries quickly. Space roses 3–4 feet apart to reduce humidity buildup.
Cause: Phragmidium fungi create puffy orange spores on undersides of leaves, weakening the plant.
Fix It: 🔥 Rake & Remove Fallen Leaves – Rust spores overwinter in leaf litter. Collect and discard (don’t compost) all debris around roses.
🍳 Spray Copper Fungicide (Organic Option) – Use copper soap (1 tbsp per gallon) or copper fungicide (follow instructions) every 2 weeks until rust stops appearing.
👨🍳 Apply Compost & Mulch – A 2-inch layer of compost improves soil health, helping roses fight infections. Keep mulch 6 inches from the stem to prevent moisture buildup.
🥘 Rotate Plant Locations – If possible, move roses every few years to break the rust life cycle.
⏰ Prevention Tip: ✨ Plant resistant varieties like ‘Knock Out’ roses, which are less prone to rust.
No matter the issue, these proactive steps will keep your roses strong:
- 💡 Water at the base (never overhead) to keep leaves dry.
- 🌡️ Space plants properly (3–4 feet apart) for airflow.
- 🔪 Prune regularly to remove dead/diseased wood.
- 🎯 Use mulch (straw or wood chips) to regulate soil moisture.
- ✨ Test soil pH (roses prefer 6.0–6.5)—adjust with lime or sulfur if needed.
Final Thought: Fungal issues are manageable with consistent care and organic treatments. Start with removal + prevention, then reinforce with sprays and soil health. Your roses will bloom stronger than ever—without the chemical crutches! 🌹💪
Frequently asked questions
How often should I spray fungicide on my rose bushes?
For organic fungicides like copper soap or neem oil, apply every 7-14 days during active growth (spring to fall). Chemical fungicides may require 10-14 day intervals—always follow product instructions. The key is consistency, especially after rain or when you notice new fungal signs.
Can I mix homemade fungicides with store-bought ones?
Never mix homemade solutions (like baking soda spray) with chemical fungicides—it can create toxic reactions or reduce effectiveness. Stick to one type at a time. For severe infections, alternate between organic and chemical treatments with a 3-day gap between applications. Always test small areas first.
What’s the best time of day to apply fungicide?
Apply fungicide in the early morning when humidity is lowest. Avoid spraying when leaves are wet (like after rain) or in direct sunlight (can burn foliage). If you must spray later, choose late afternoon so the solution has time to dry before nighttime moisture sets in.
Will fungicide kill beneficial insects like ladybugs?
Most chemical fungicides are harmful to beneficial insects, but organic options like copper fungicide or neem oil are generally safer when used correctly. To protect pollinators, apply fungicides before dawn when bees are inactive, and avoid spraying flowers directly. Always choose OMRI-listed organic products.
How long until I see results after treating fungal issues?
You may notice improvement within 7-10 days of consistent treatment, but complete recovery can take 3-4 weeks for severe infections. New growth should appear spot-free within 2-3 applications. If no improvement occurs after 4 weeks, the fungus may be resistant—try a different active ingredient.